Welcome to Architect Designer Pro ! Make familiarity with block products:
Getting Started
Congratulations For purchasing our Architect Designer Pro WordPress Blocks theme ! This article walks you through numerous phases of the WordPress website configuration and administration process.
What is wordpress cms?
WordPress is an open source website construction tool that is built on PHP and MySQL. It is a powerful blogging platform as well as a completely free content management system (CMS). You may use this CMS to build dependable online apps and websites. It requires little technical knowledge or understanding to manage. WordPress has emerged as the most popular website development platform on the market due to several advantages, including ease of use and versatility.
A block theme is a WordPress theme with templates entirely composed of blocks so that in addition to the post content of the different post types (pages, posts, …), the block editor can also be used to edit all areas of the site: headers, footers, sidebars, etc.
Files structure
The template bundle you downloaded is organised into many folders. Let's look at the contents of each folder:
Screenshot: Screenshots of templates are included. Not for use in manufacturing.
Theme : the WordPress theme files.
Saas-block-pro.zip: This folder contains all of the theme's files.
license.txt : information about the licence.
readme.txt : include information about the theme's image paths and font use guidelines.
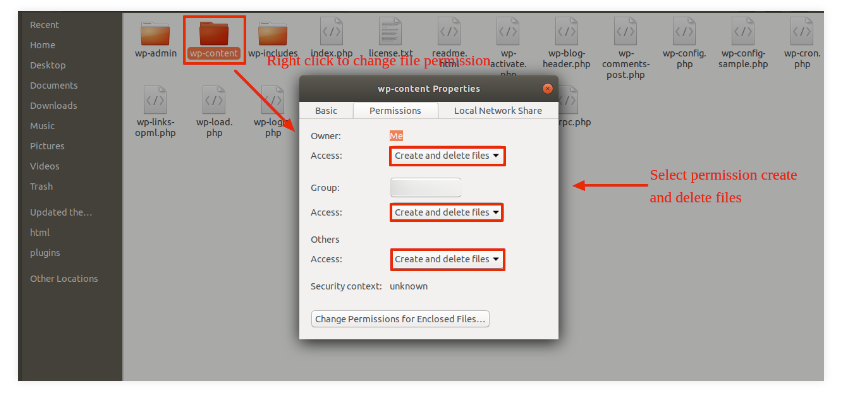
My website was previously operational? who changed the file's permissions?
If file permissions are wrongly specified, WordPress may be unable to create folders, upload photographs, or run some scripts.
WordPress requires rights to handle files and create folders on the server.
Then, when you right-click on all of the folders in the root directory, select "File Permissions" from the context menu.
wp-config
permissions dialog box
choose the checkbox read and write
To proceed, click the OK button.
Repeat the same with the wp-content folder.
Installation of Templates
Installing a template is a pretty simple and uncomplicated process.
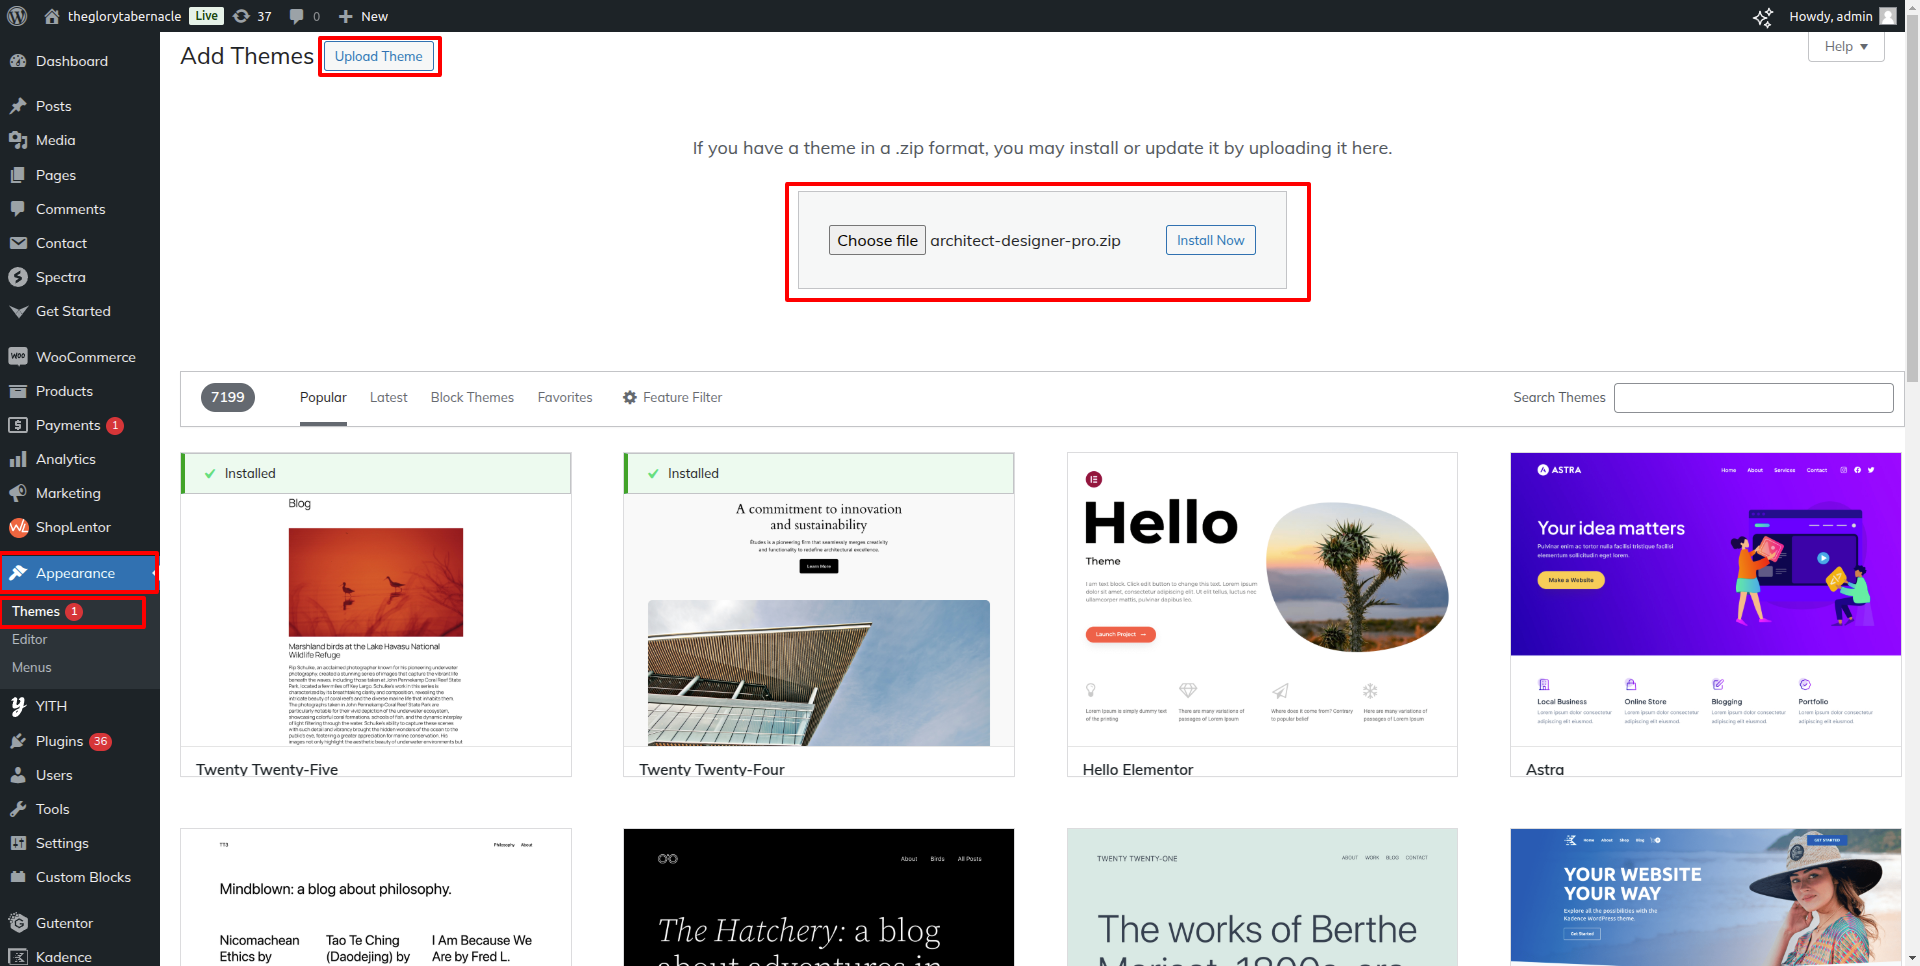
STEP 1. FOLLOW THESE PROCEDURES TO INSTALL A THEME USING WORDPRESS ADMIN.
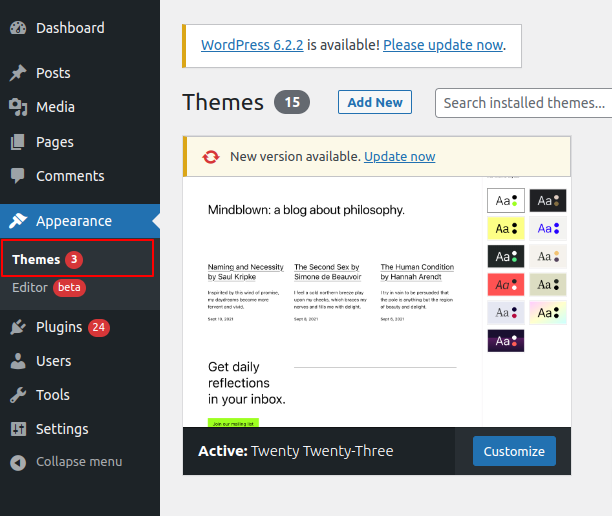
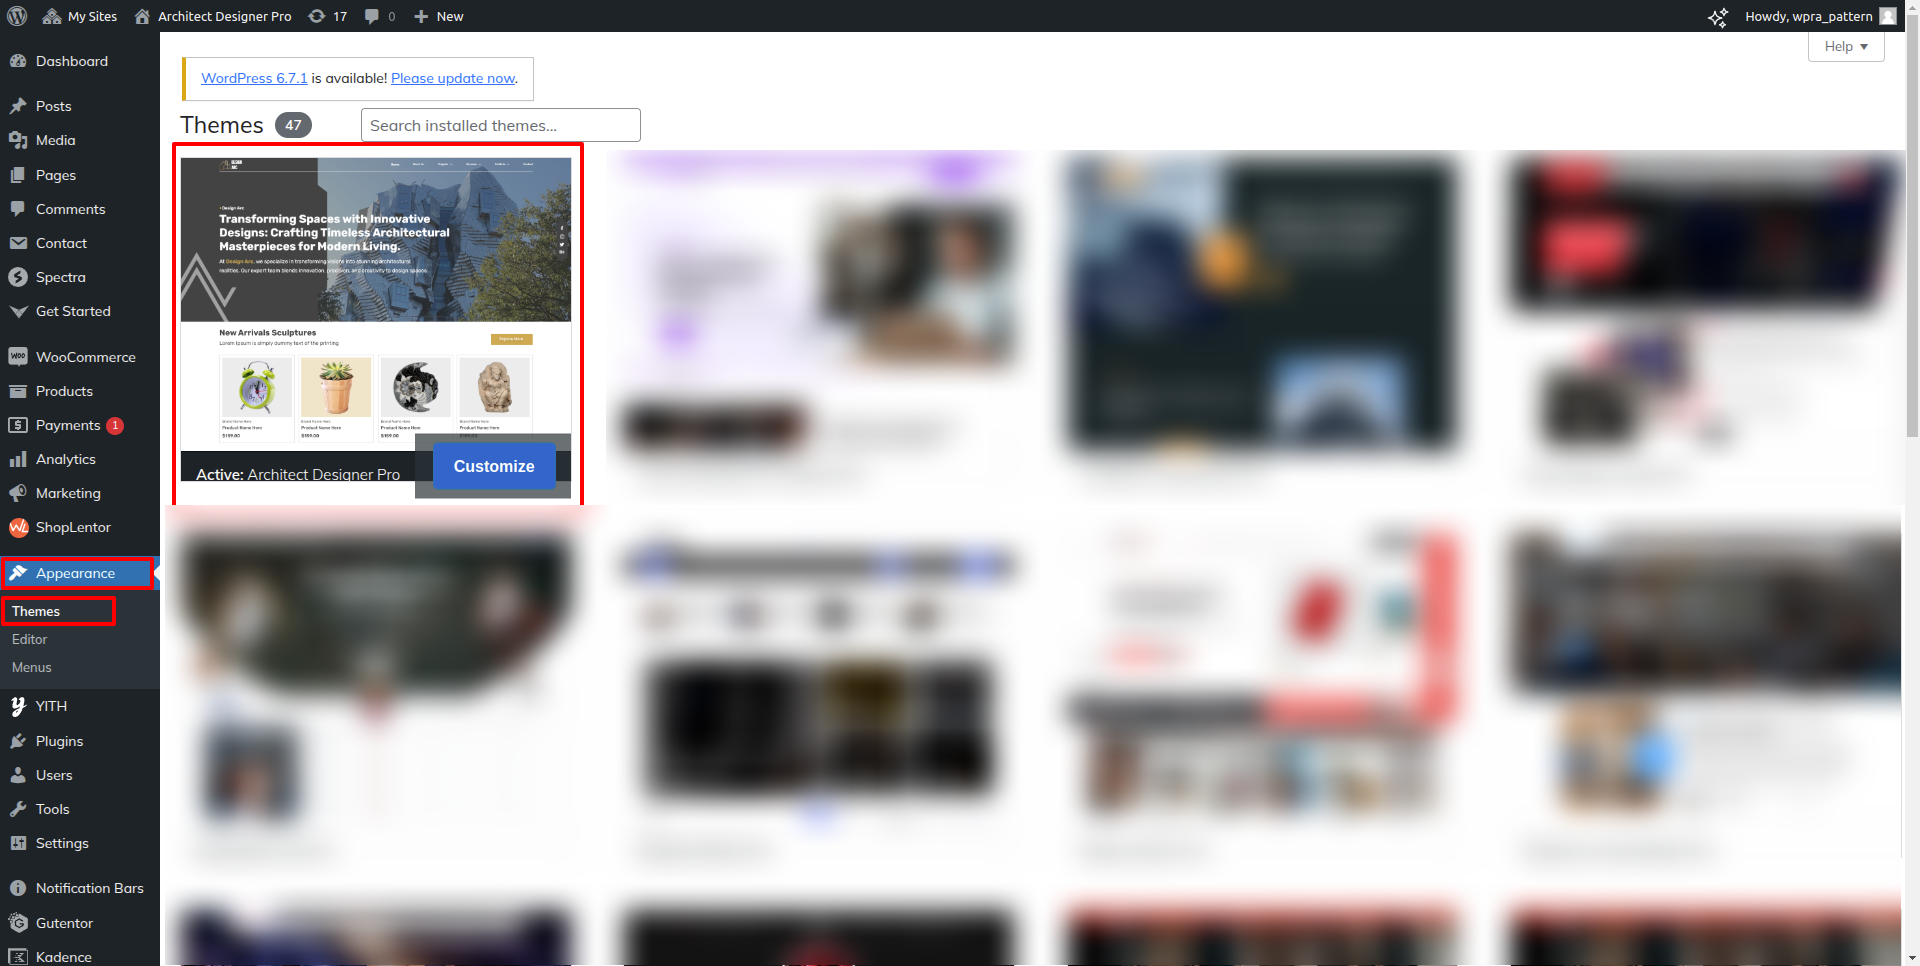
Go to your WordPress admin panel first.
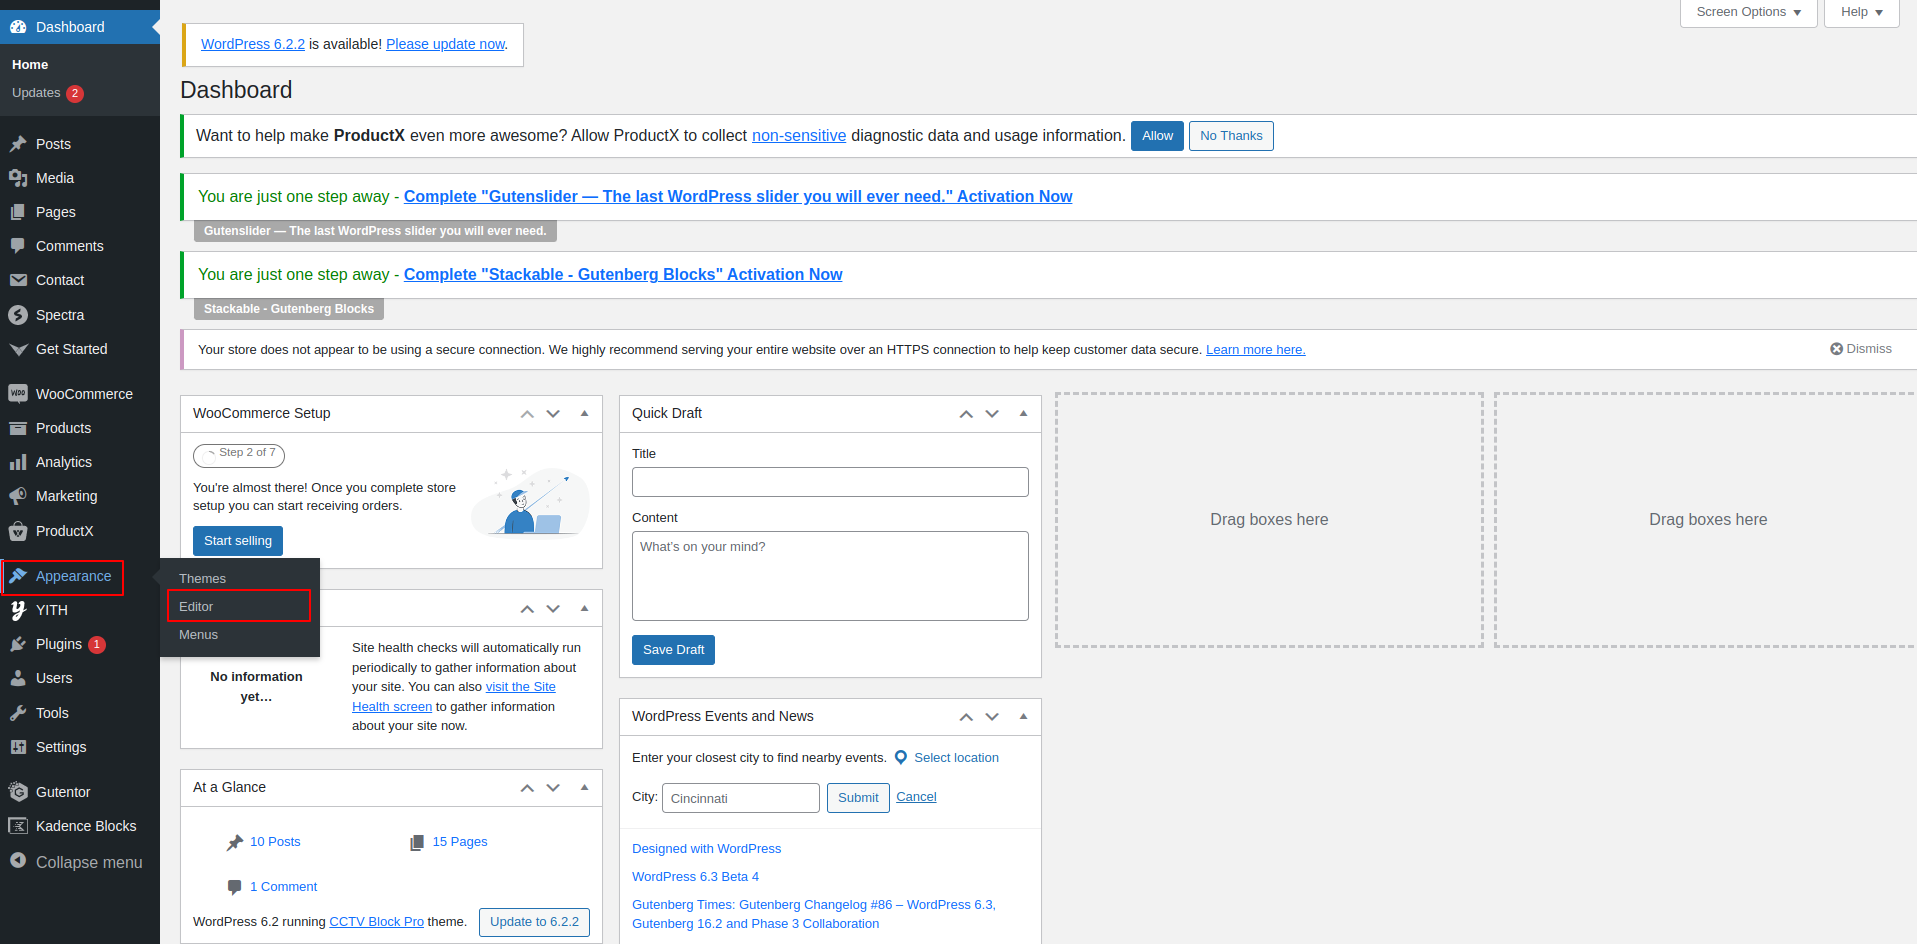
Then, go to the "Appearance" menu and pick "Themes."
Select "Add New" from the menu at the top of the themes page after you've arrived there.
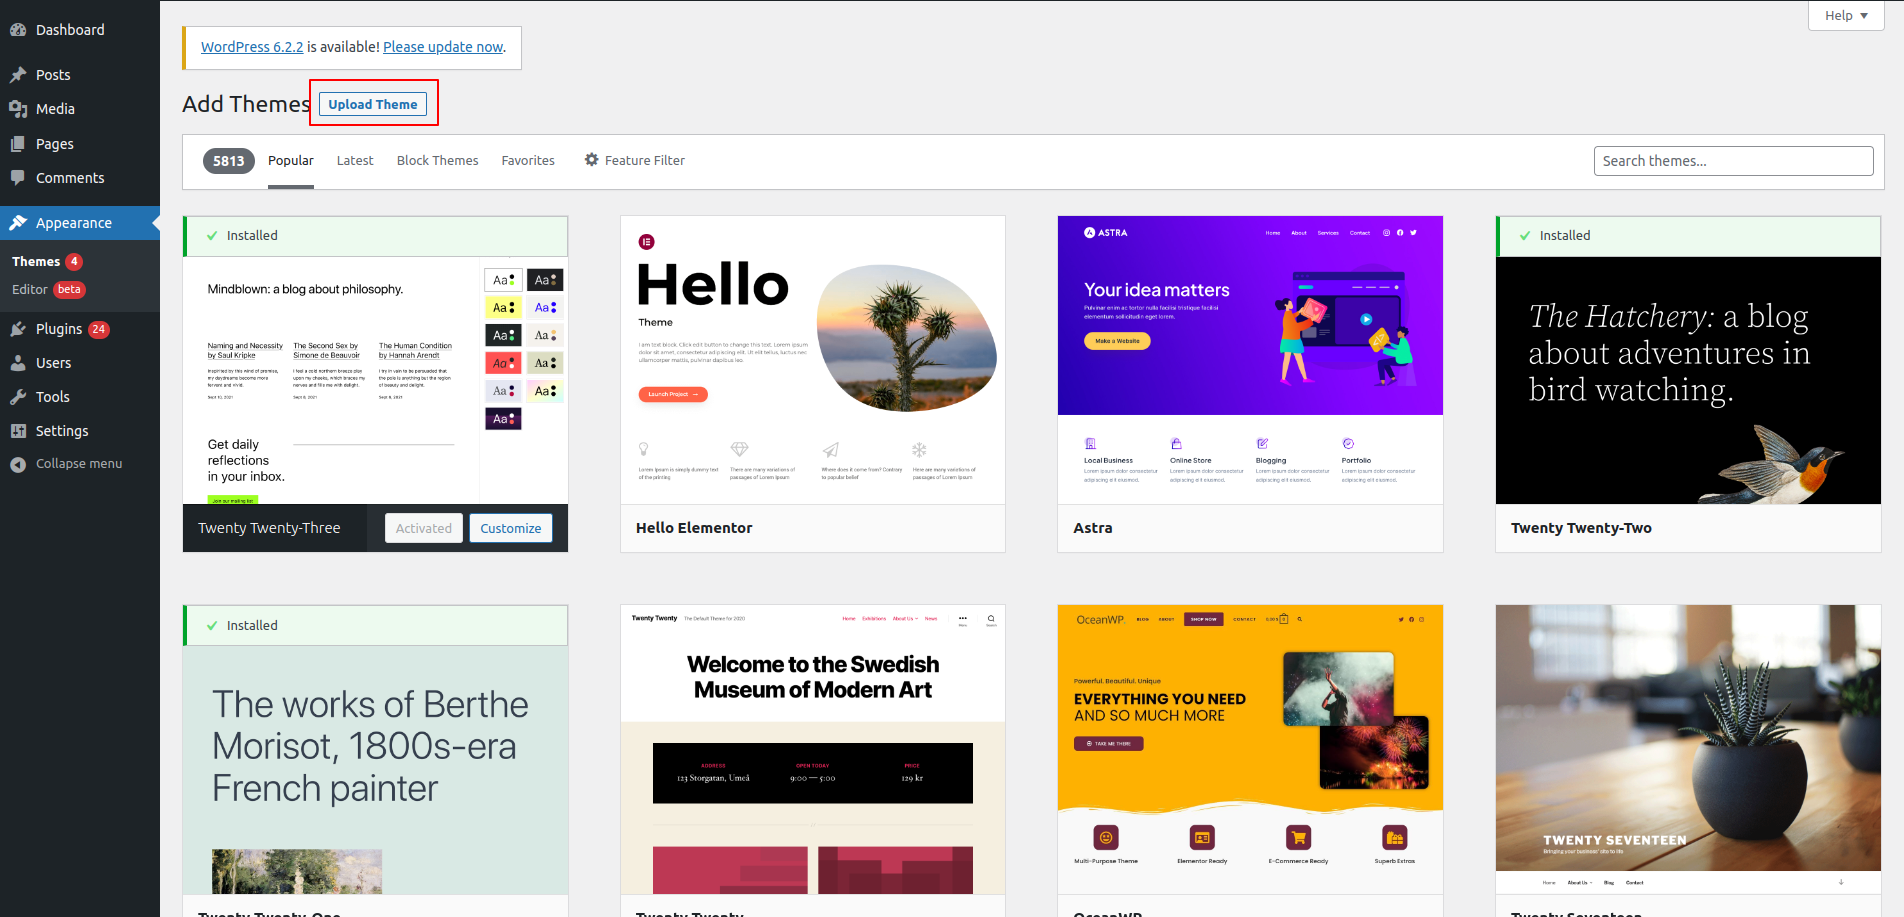
Choose the button for Upload Theme.
Click the Browse Button then select the block-education-pro.zip theme of your choice Now Installing button.
WordPress will now carry out the installation of your chosen theme and provide a success message along with choices to activate or live-preview the theme.
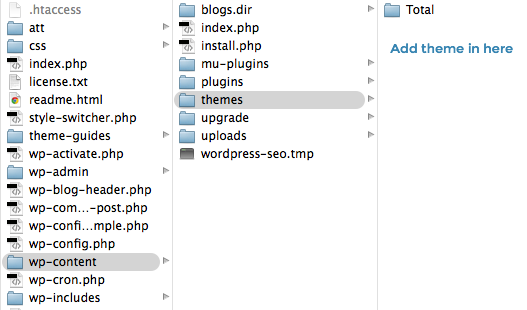
STEP 2. IMPLEMENT A THEME VIA FTP
As a second installation method, the theme may be uploaded through FTP. You must first log into your website using FTP and go to the wp-content/themes folder to apply this technique. All you have to do is download the theme file to your server and extract the Total folder from it.
Then, log in to your WordPress website and navigate to "Appearance" "Themes" to activate the whole folder.
INSTALL REQUIRED PLUGINS
Plugins allow you to extend and expand the functionality of WordPress.
How to Enable Plugins If you want these functionalities in your theme, you must activate the plugin. To enable the plugin in your theme, follow the steps outlined below.
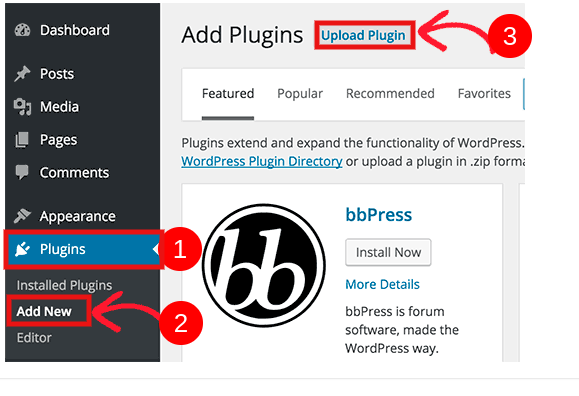
You may manually install a WordPress plugin from a.zip file using the techniques listed below.
1. Add Plugin : Go to Dashboard Plugin Add New Upload plugin.
Once you've clicked "install now," activate.
Installation of the Demo Importer Plugin.
THEME SETUP
Utilise these steps to establish the theme.
After installing the plugin, you must visit the Get Started.
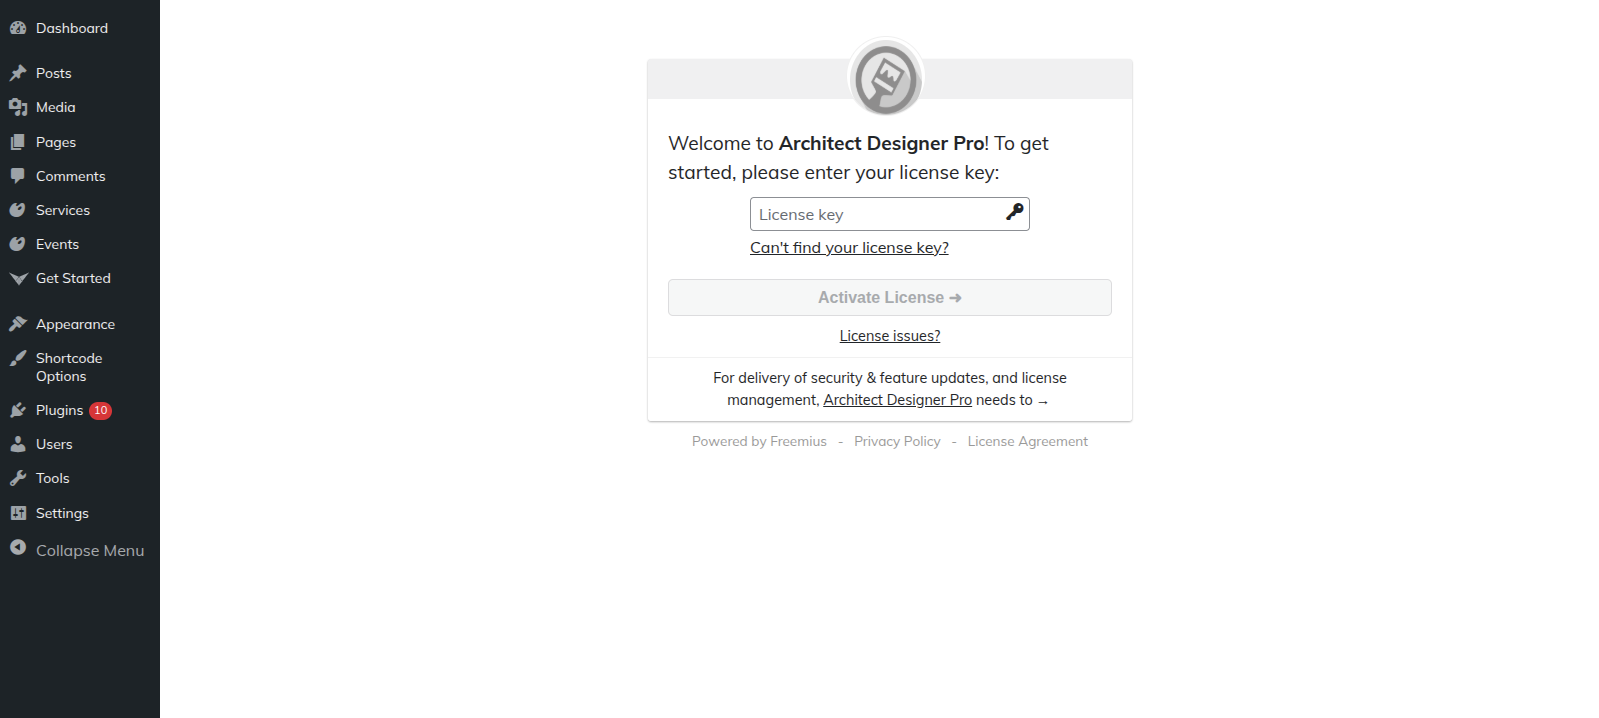
STEP 1: LICENSE ACTIVATION
The steps for activating a License are as follows.
Use the Licence Key you will receive through Email, to Activate Your Licence.
Click the Activate button following the entry of the licence key
Click the Next button once the licence has been activated.
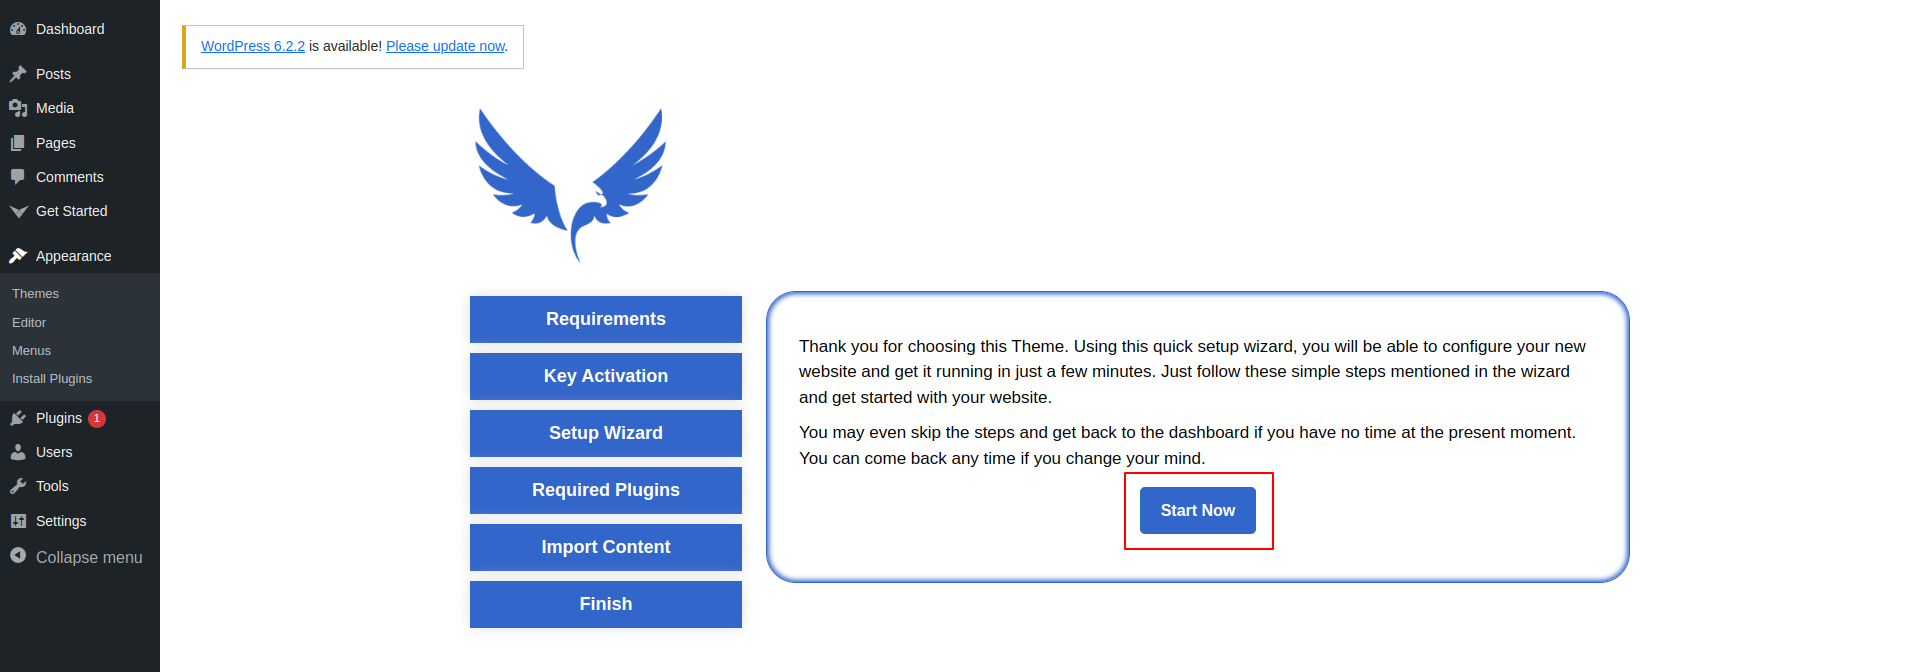
STEP 2: SETUP WIZARD
Select "Start Now" to begin the setup wizard.
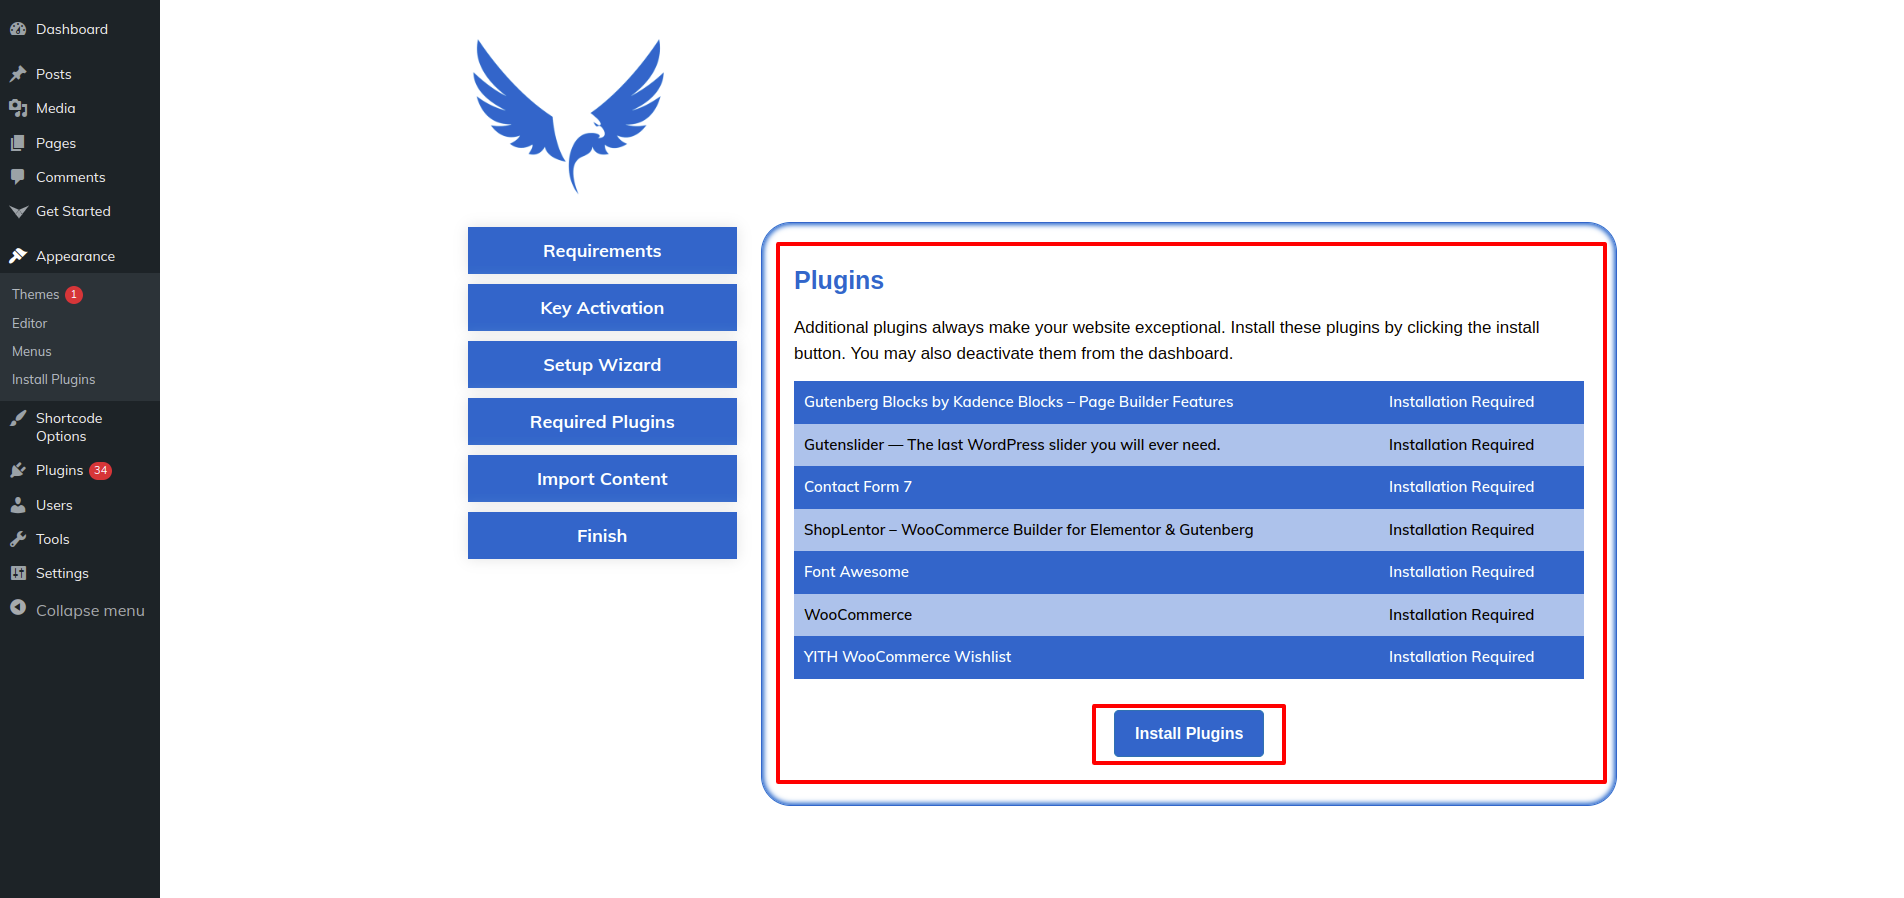
STEP 3: REQUIRED PLUGINS
To install the necessary plugins, click the "Install Plugin" option.
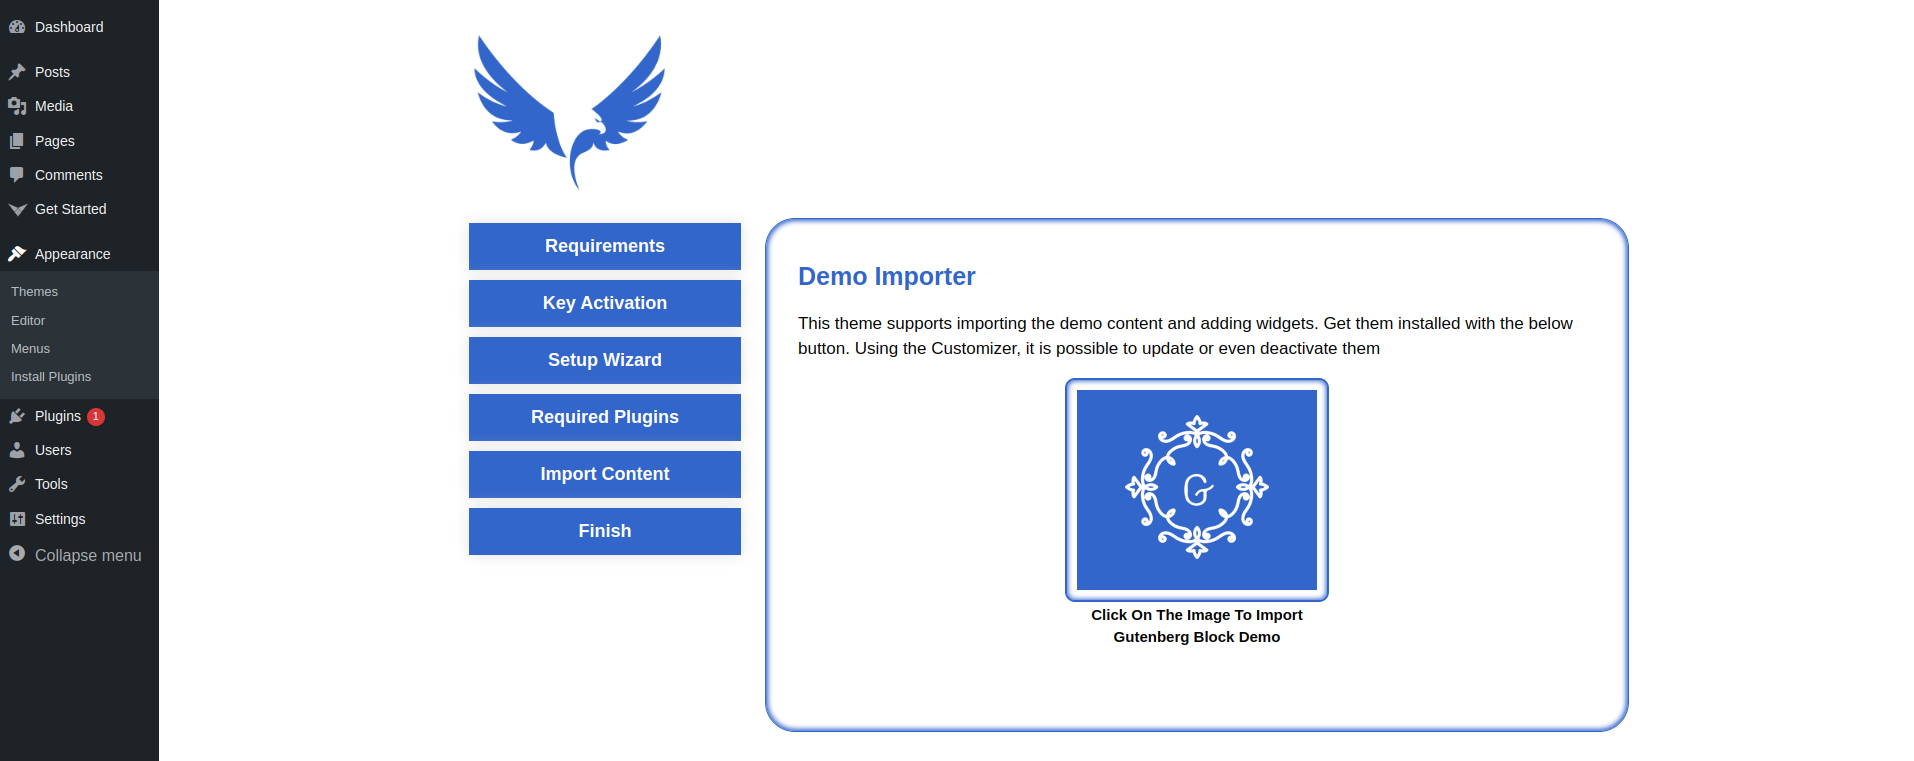
STEP 4: IMPORT CONTENT
Once the plugin has been installed, click the image to import content.
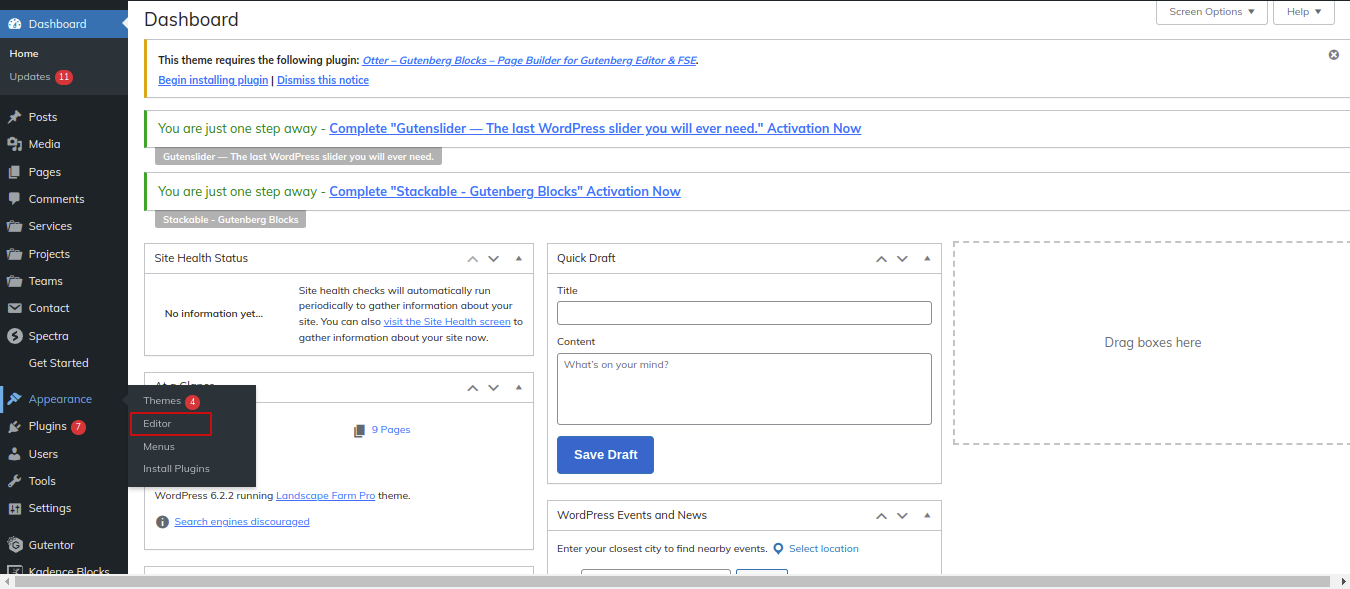
Once the demo has been imported, select Edit Themes from the menu and click "Save" to finish creating your theme.
Go to the Dashboard Appearance Editor.
THEME IMPLEMENTATION
HOW TO SET UP HOMEPAGE
Go to the Dashboard Appearance Editor.
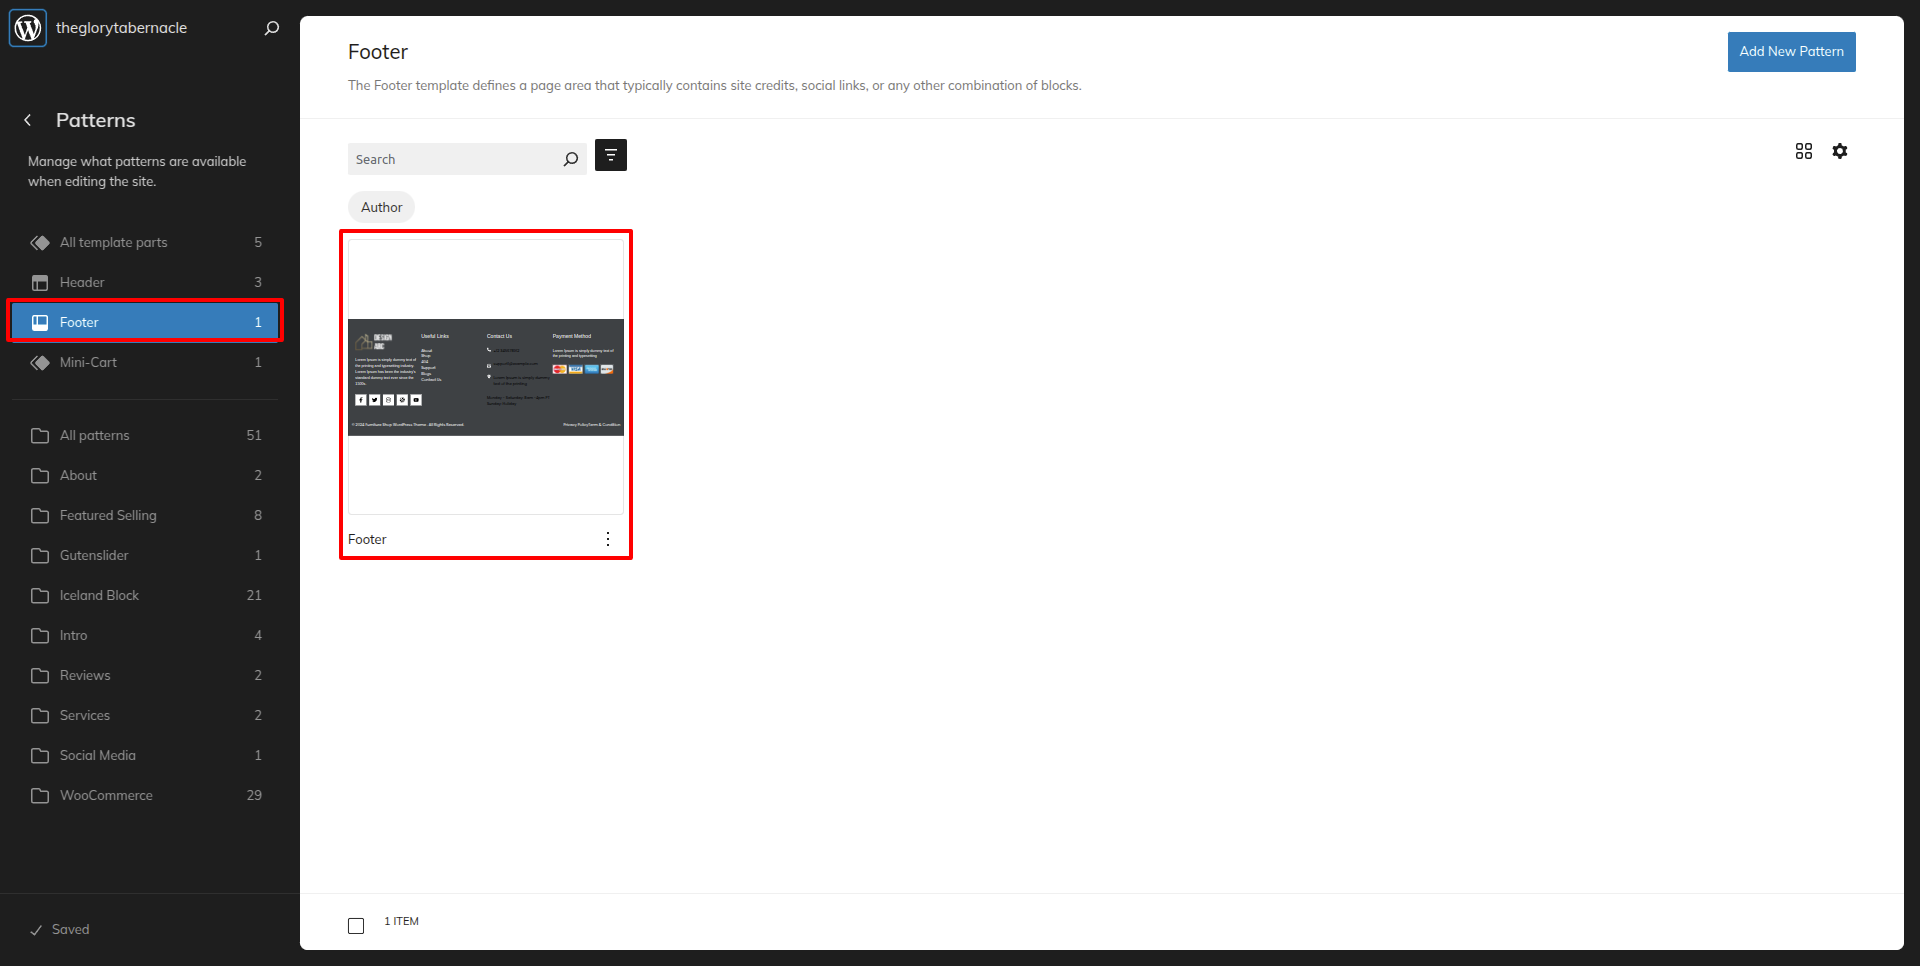
HOW TO INCLUDE PATTERNS AND BLOCKS IN A PAGE
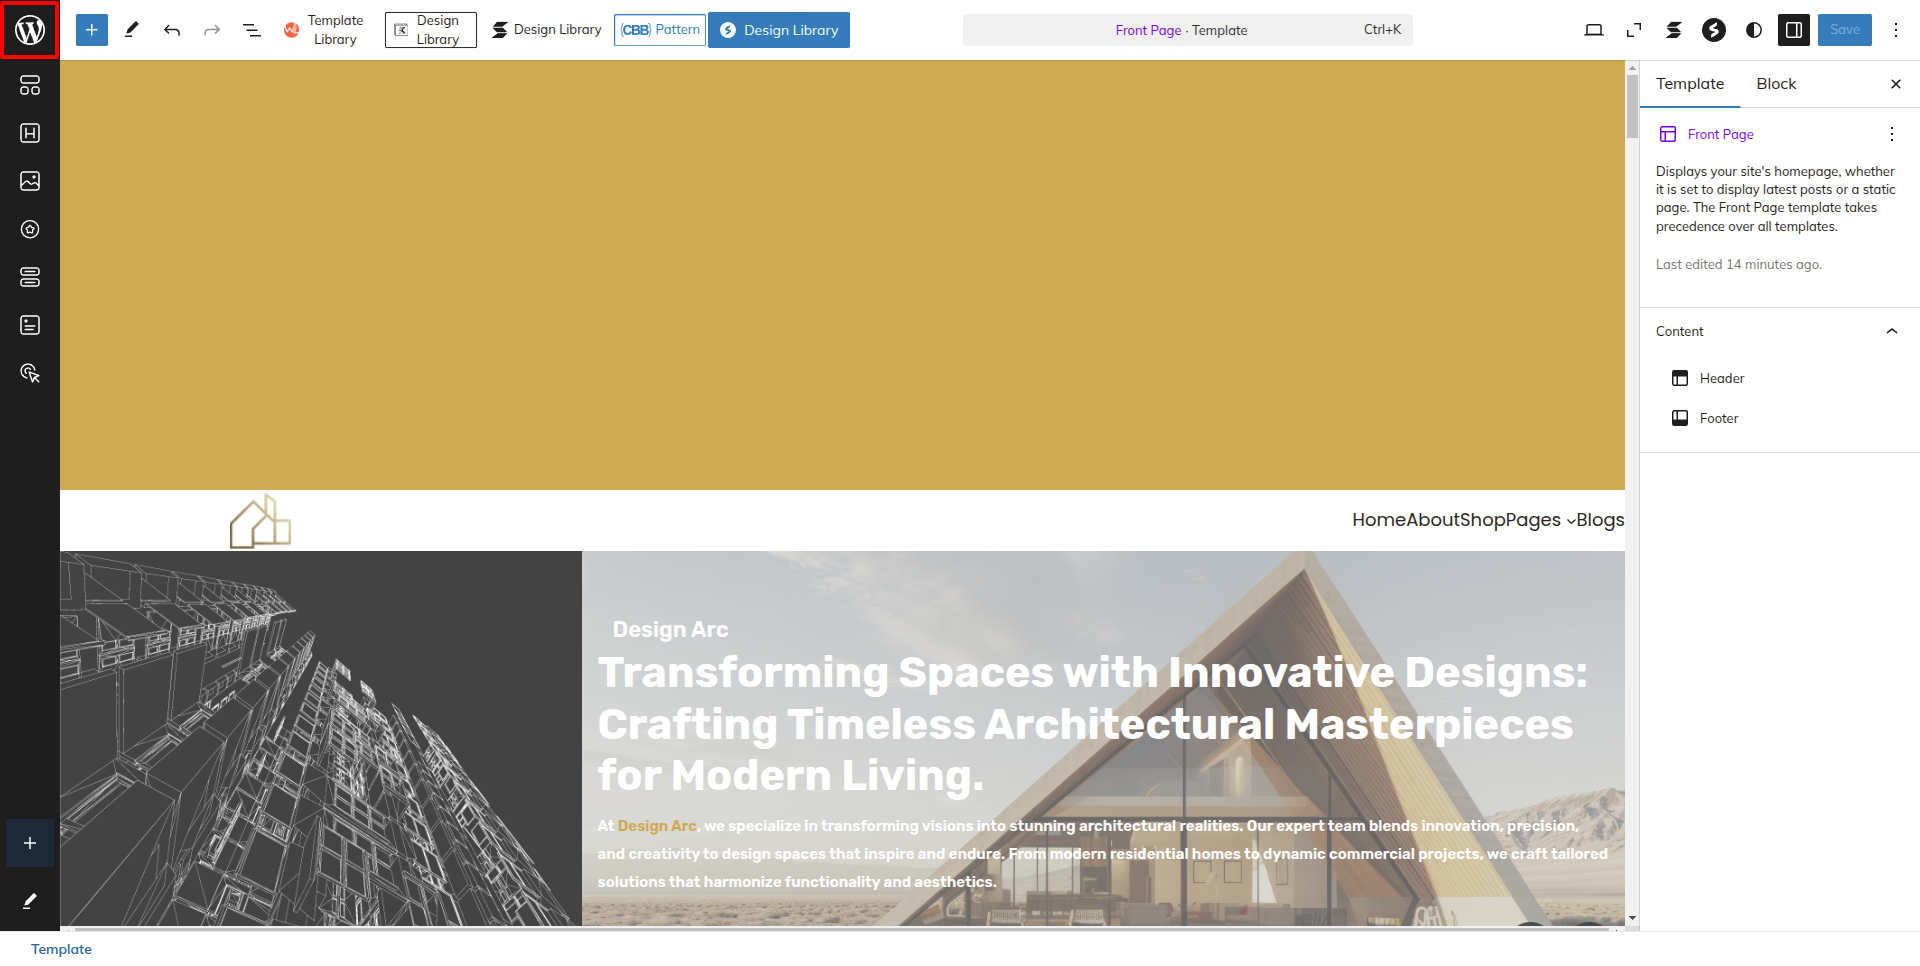
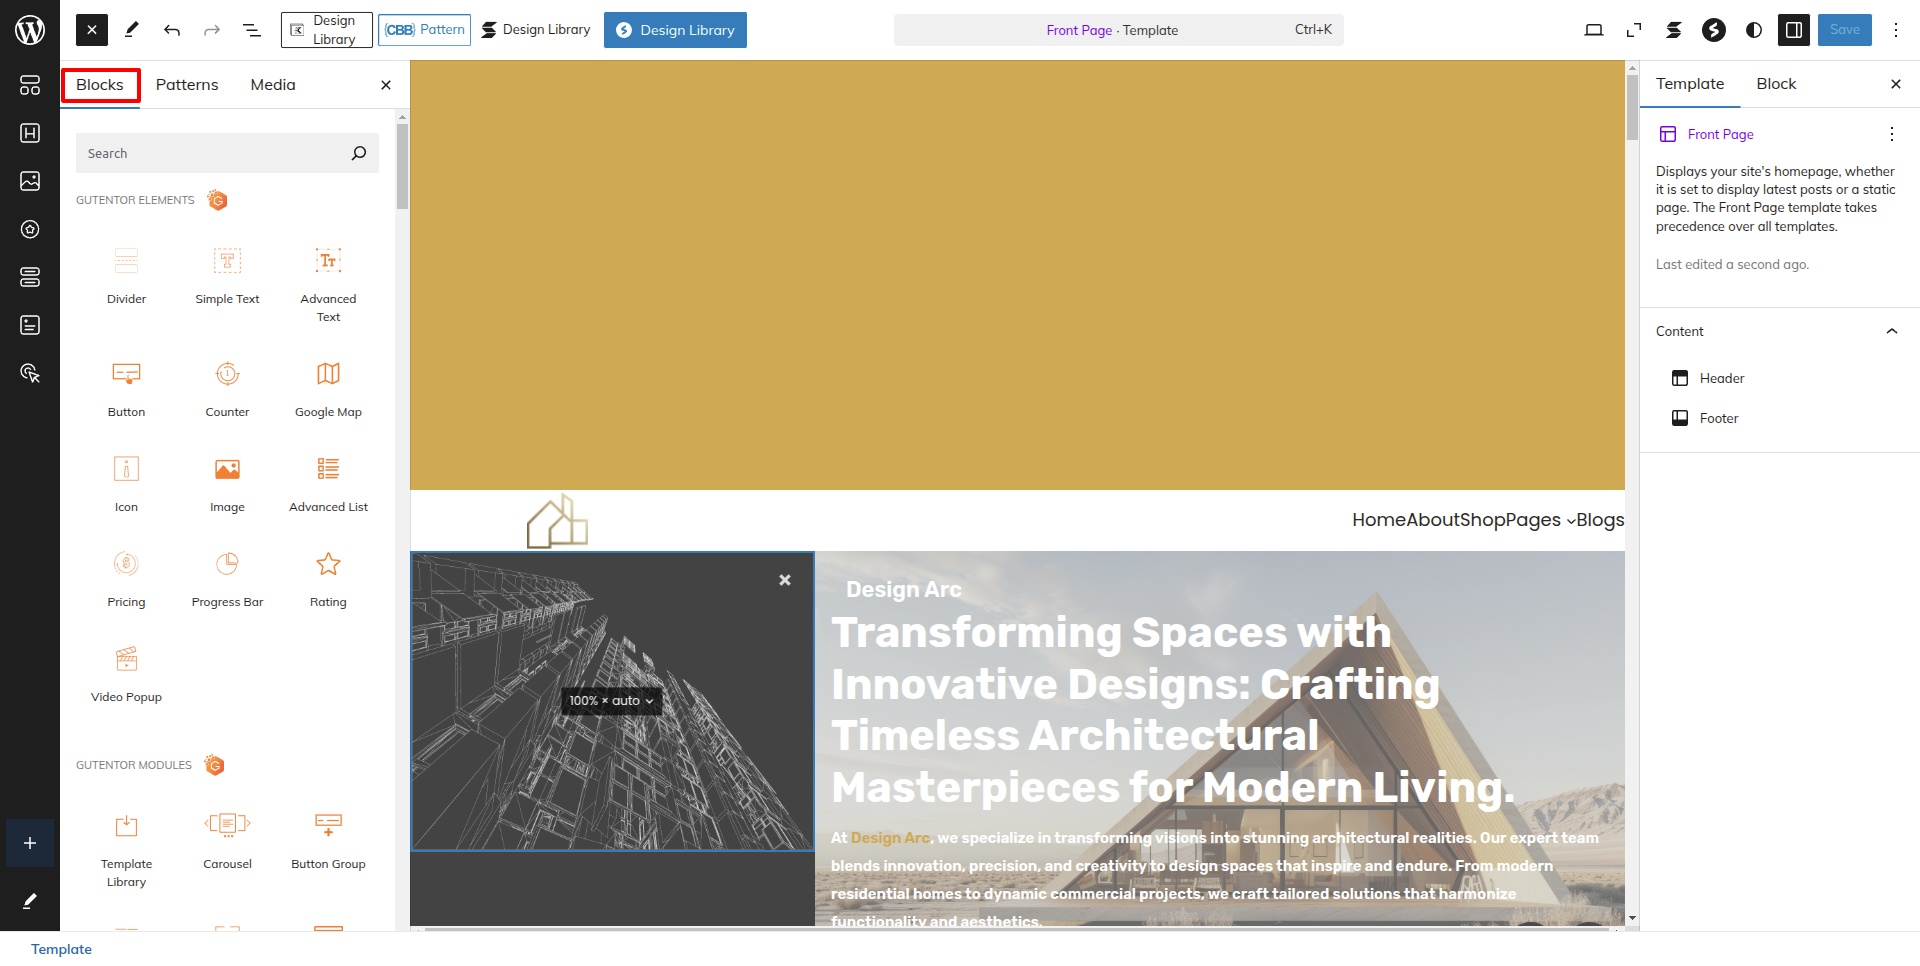
Please click the "Plus" icon as displayed in the screen below in order to add patterns and bocks.
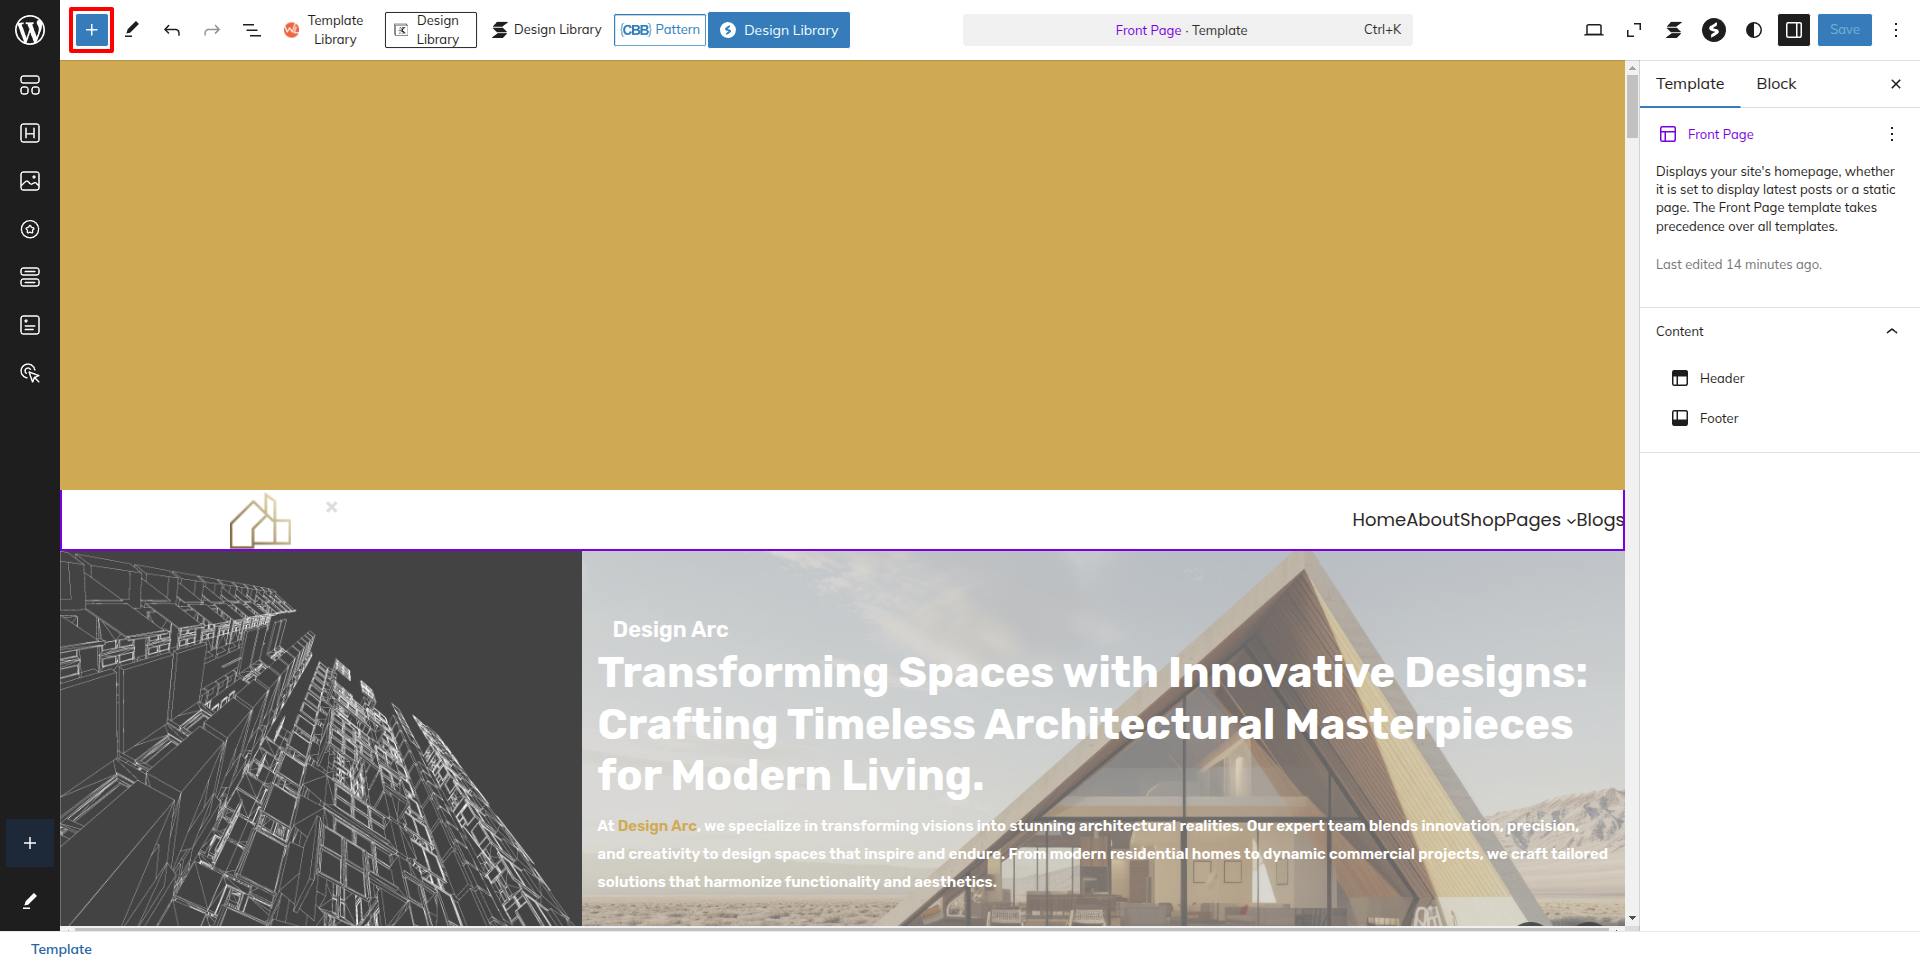
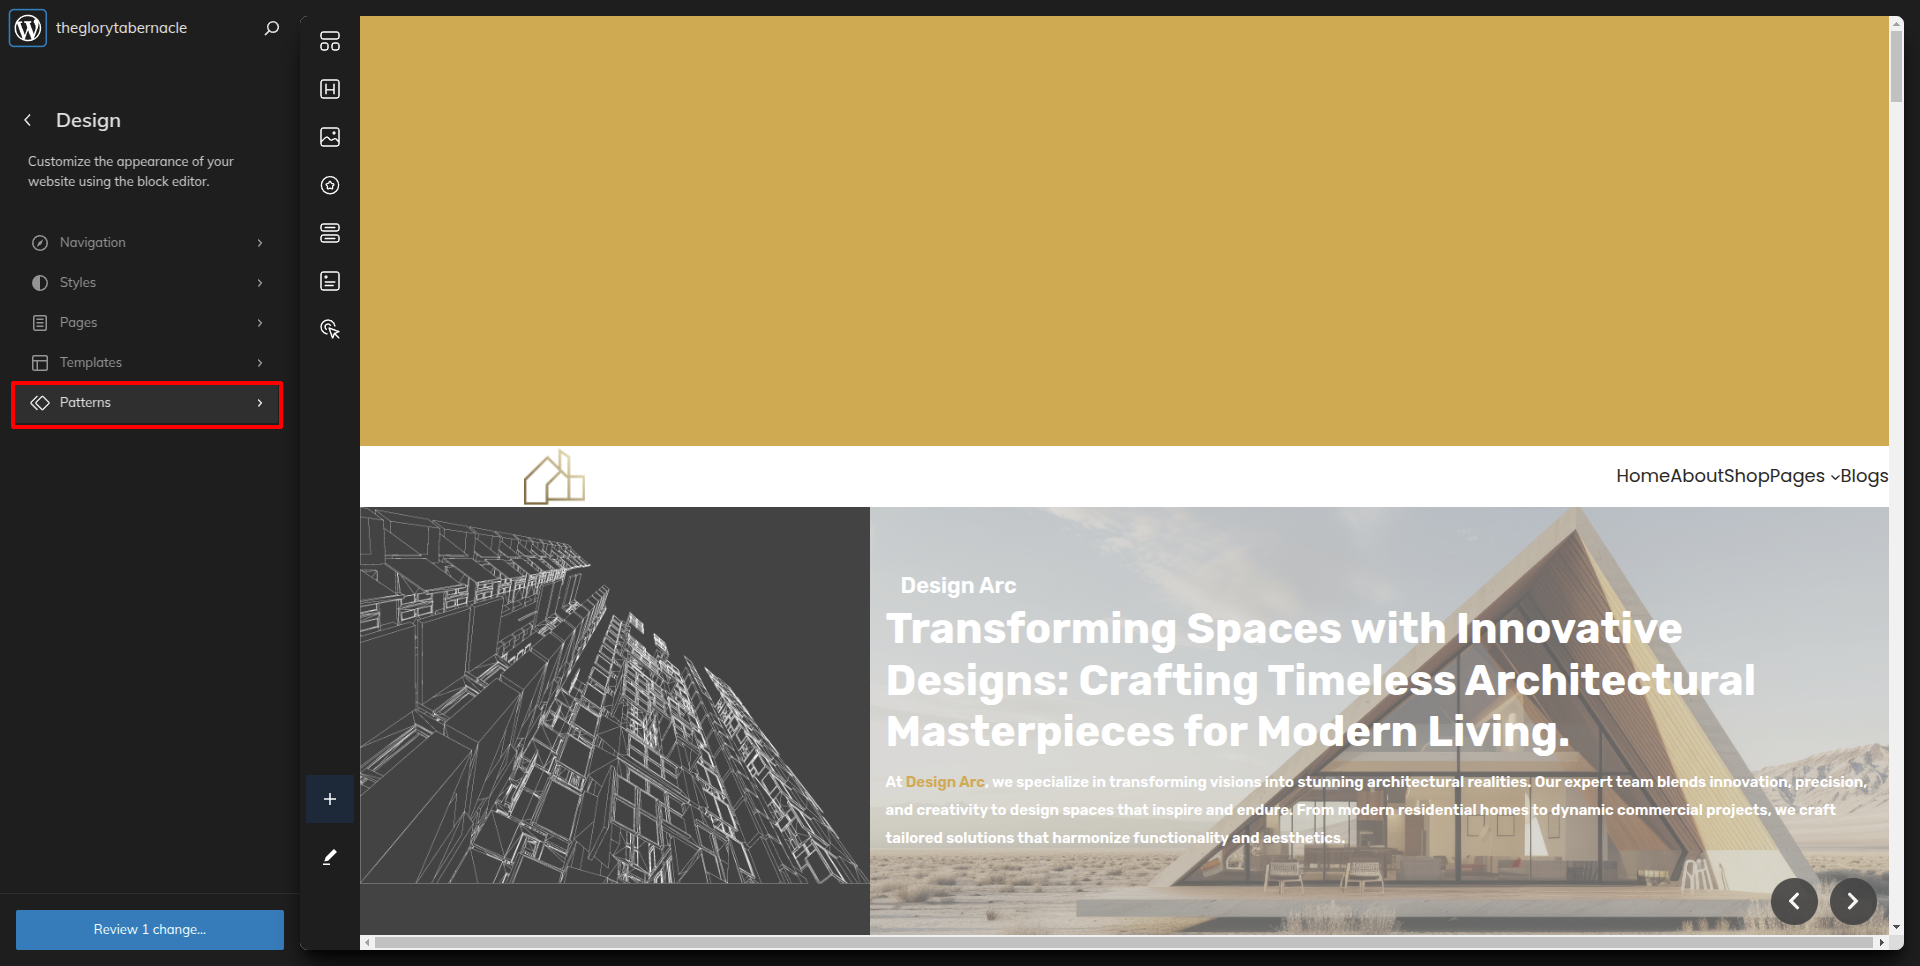
Select "Patterns" from the dropdown as displayed in the screen below once a sidebar has opened.
All of the theme patterns are now displayed here, and you may use them on any page.
All of the blocks are now displayed here, and you may use them on any page.
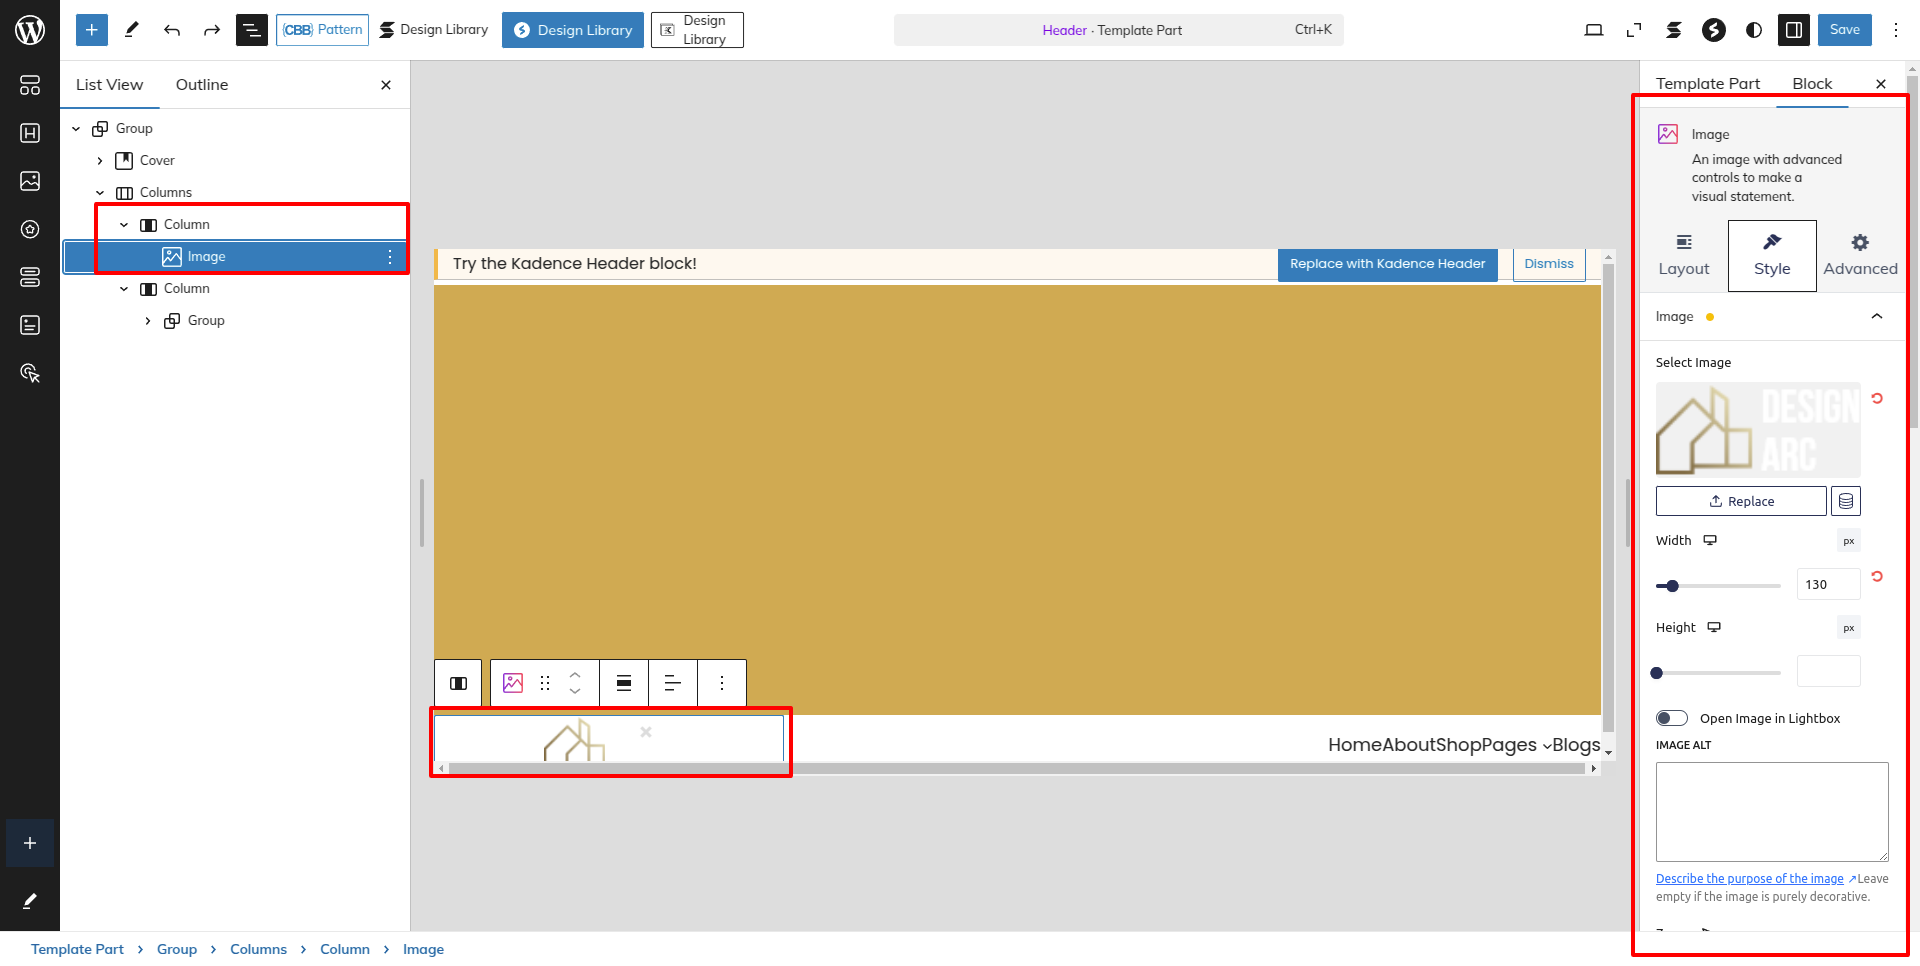
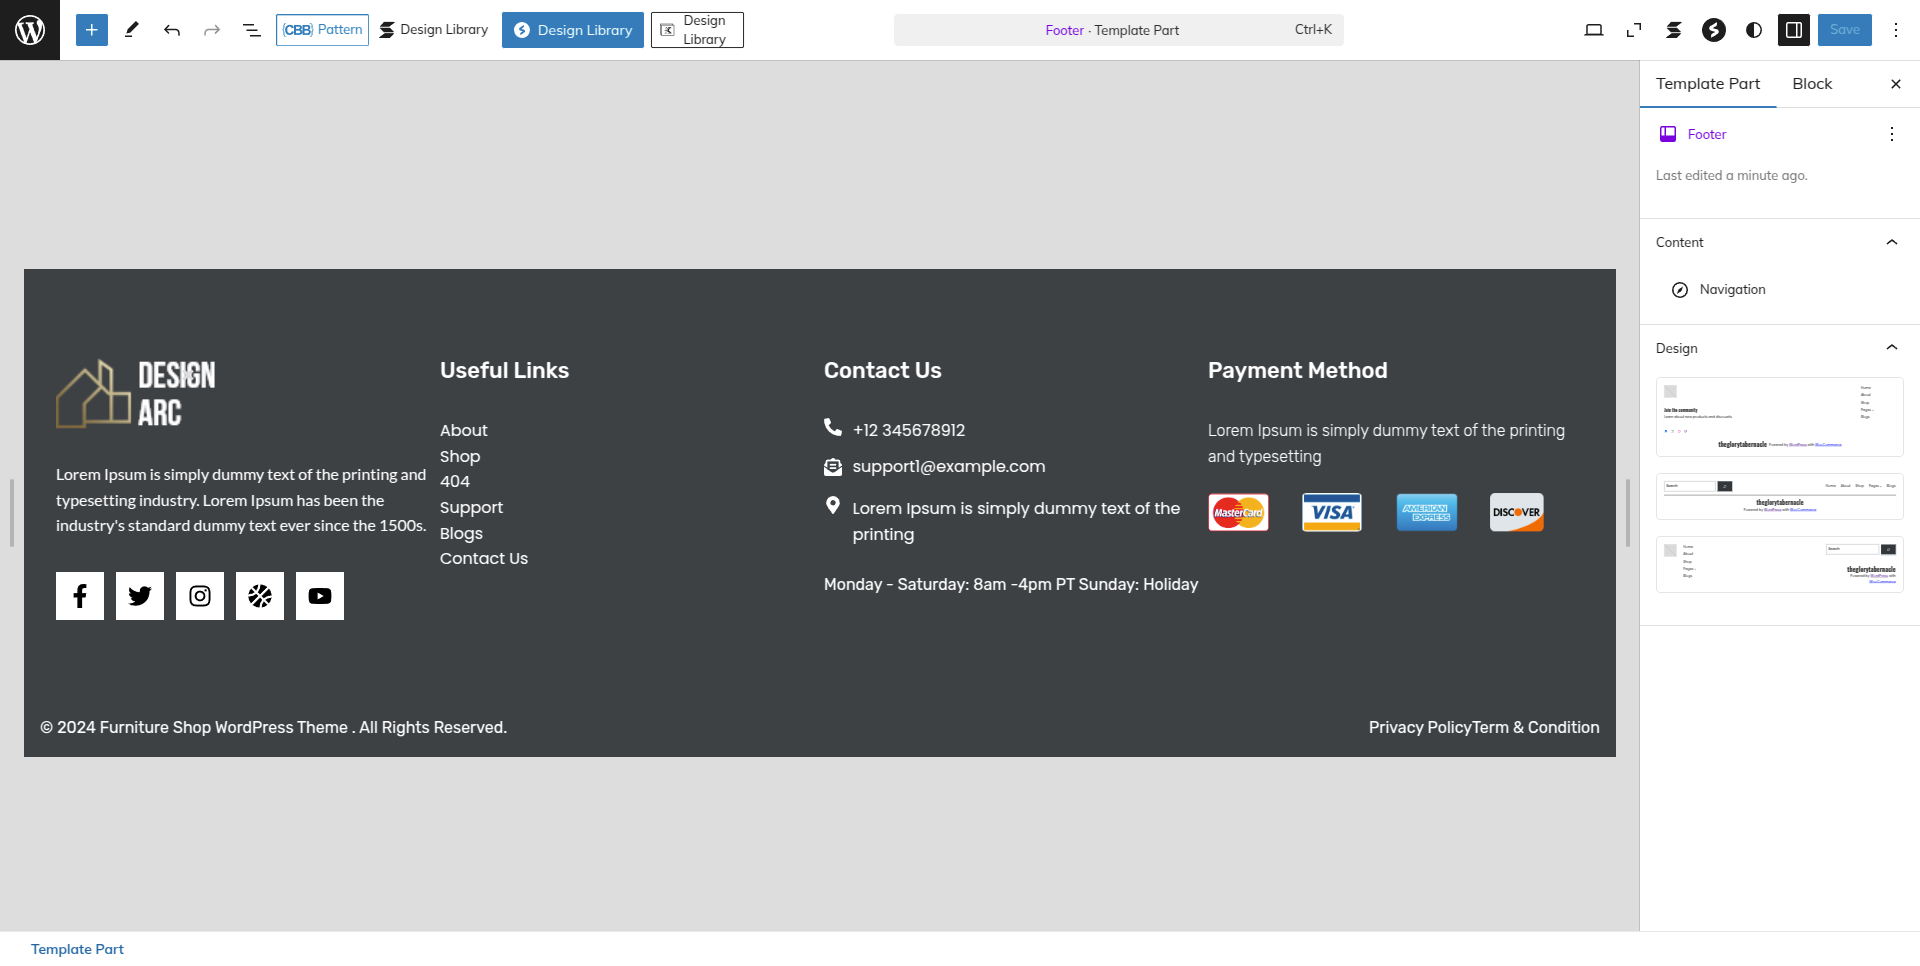
SETUP HEADER
Set up the header by following the steps mentioned below.
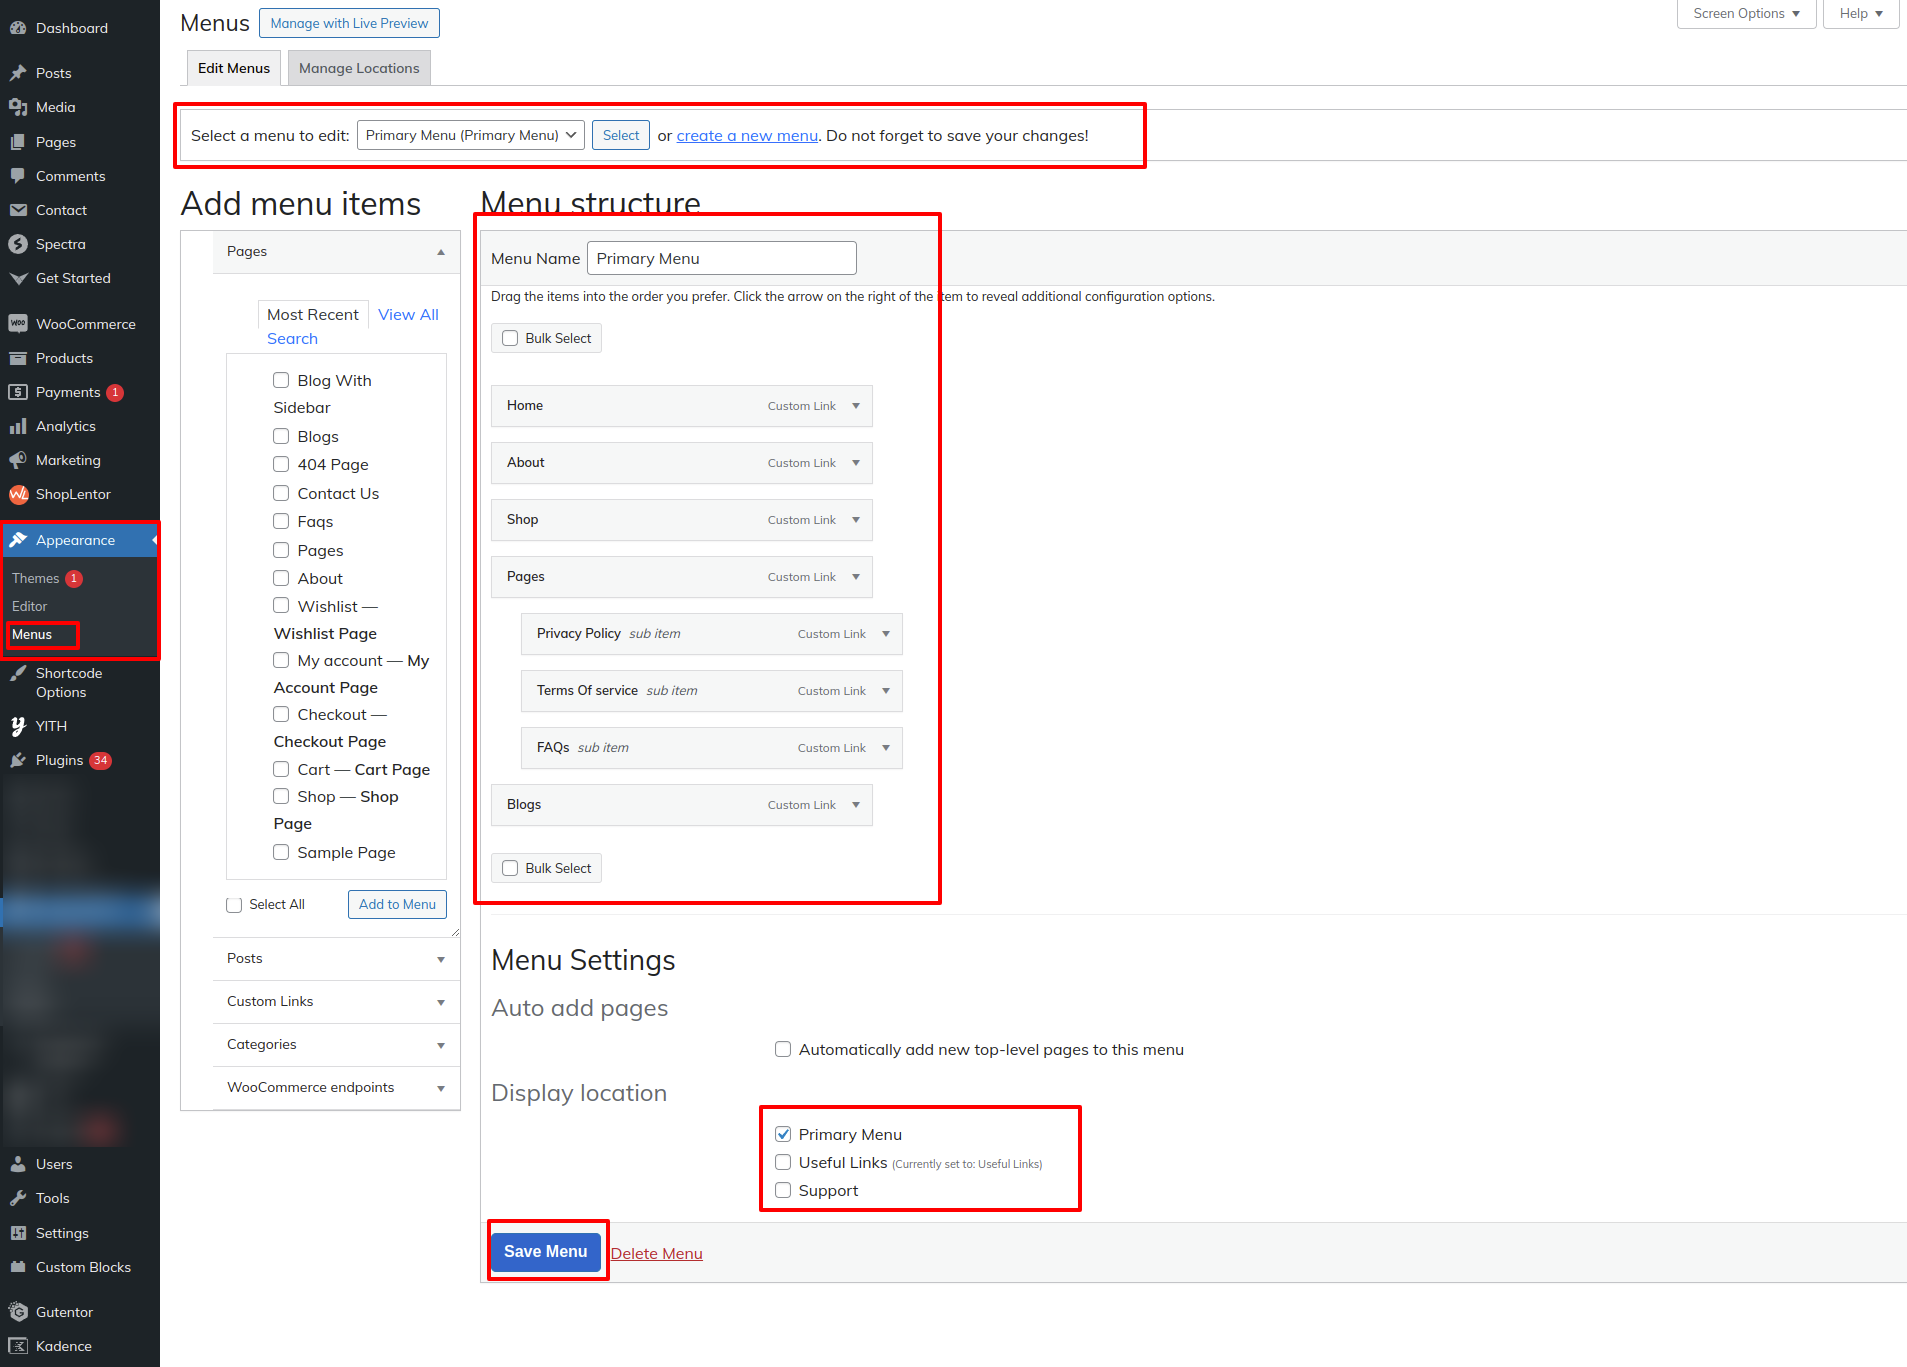
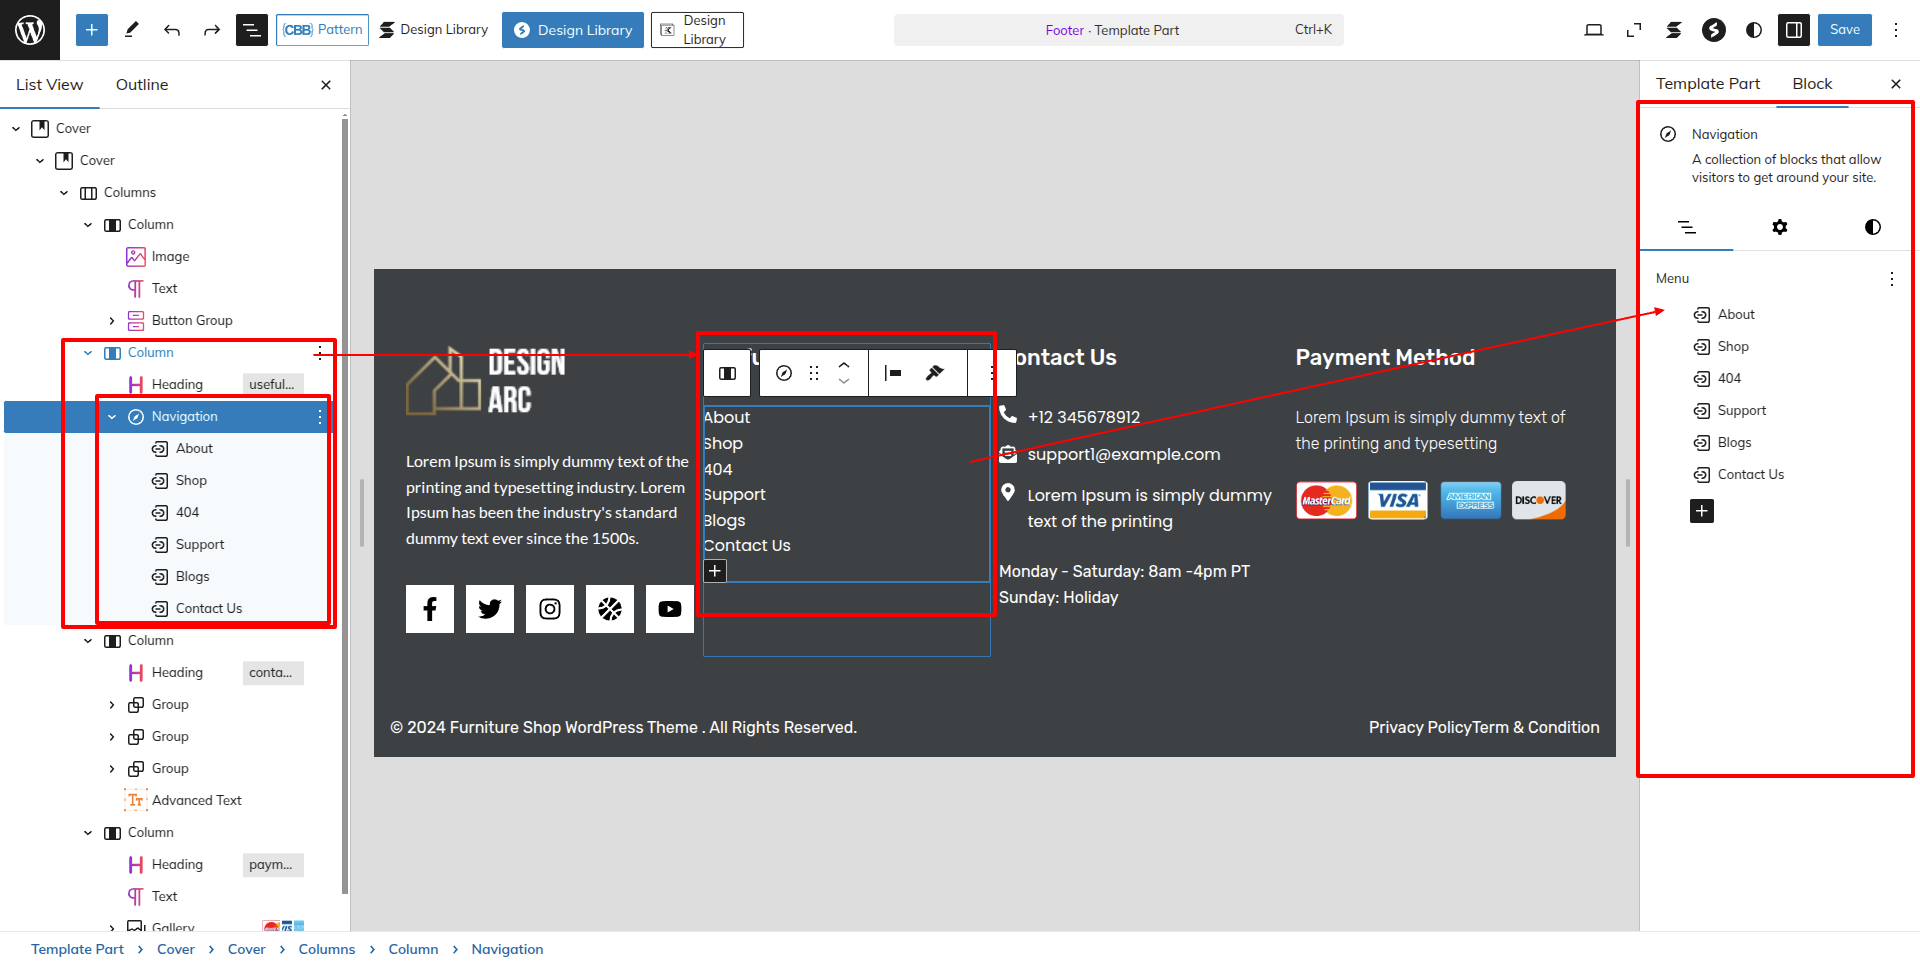
Before adding menus from the Add menu items menu, you must first create a menu.
Go to Dashboard Appearance Menus.
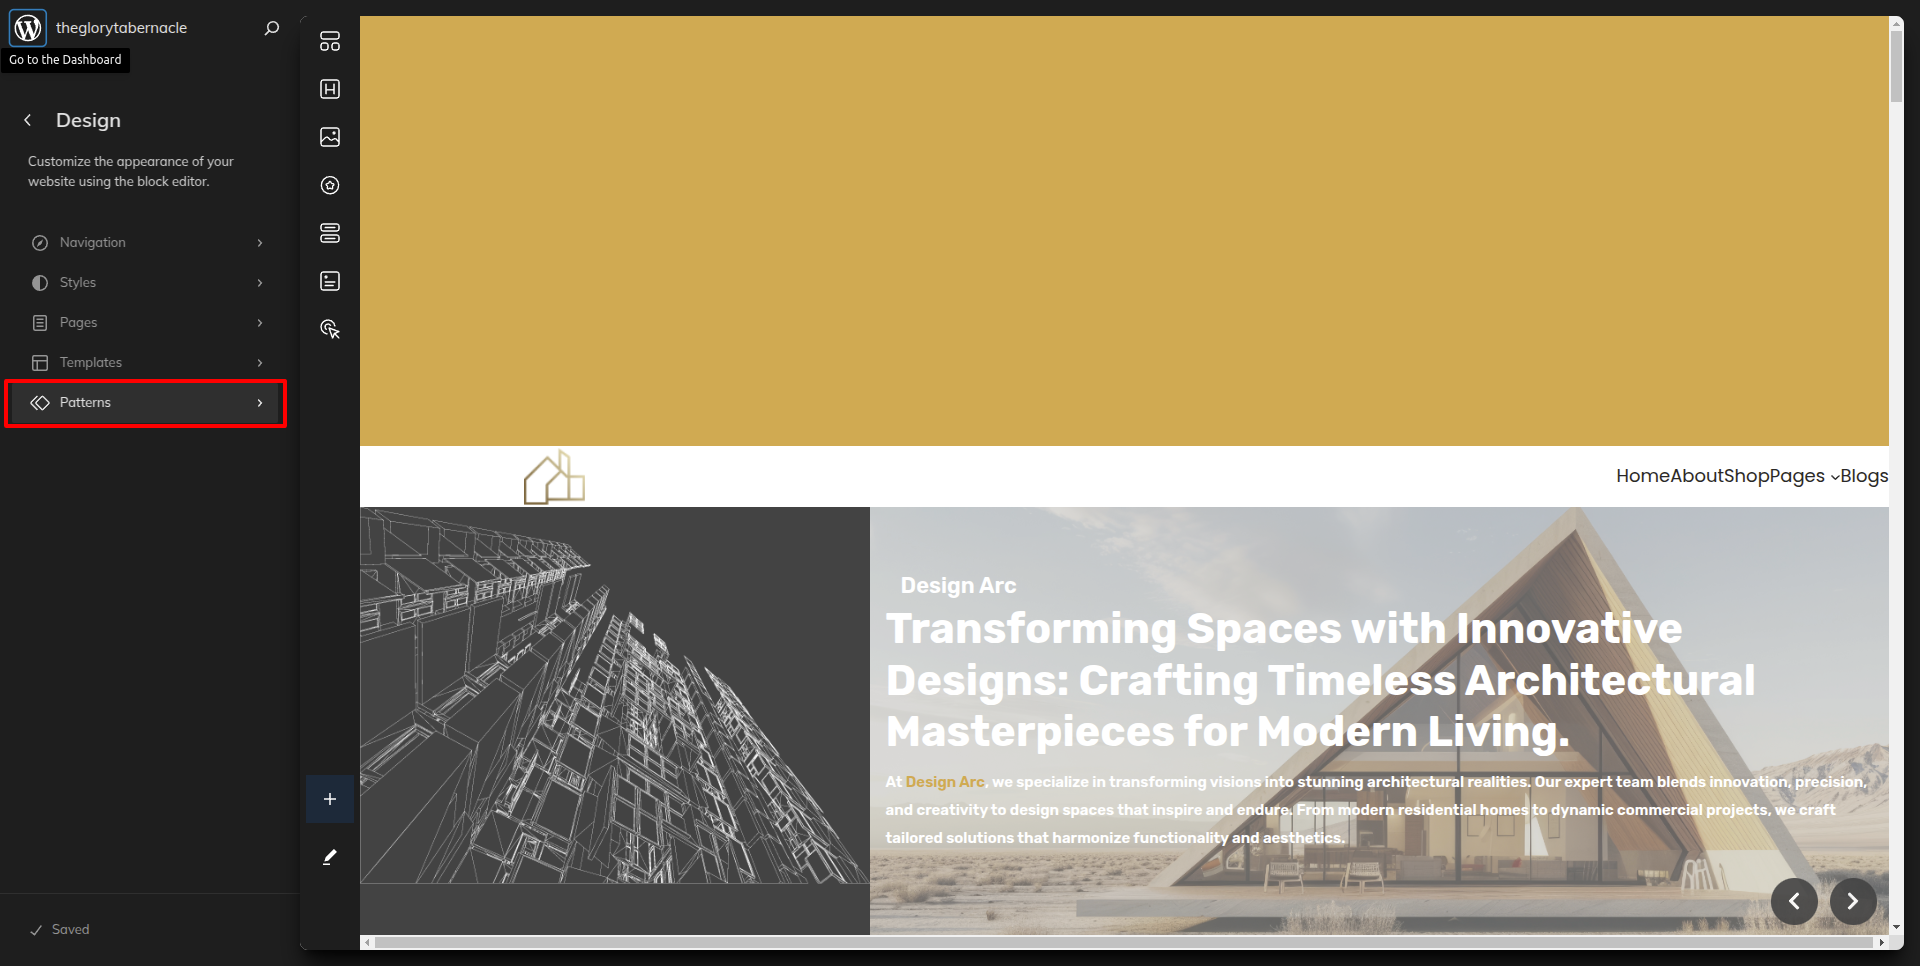
Go to the Dashboard Appearance Editor.
Click on "Patterns" as indicated in the screenshot below.
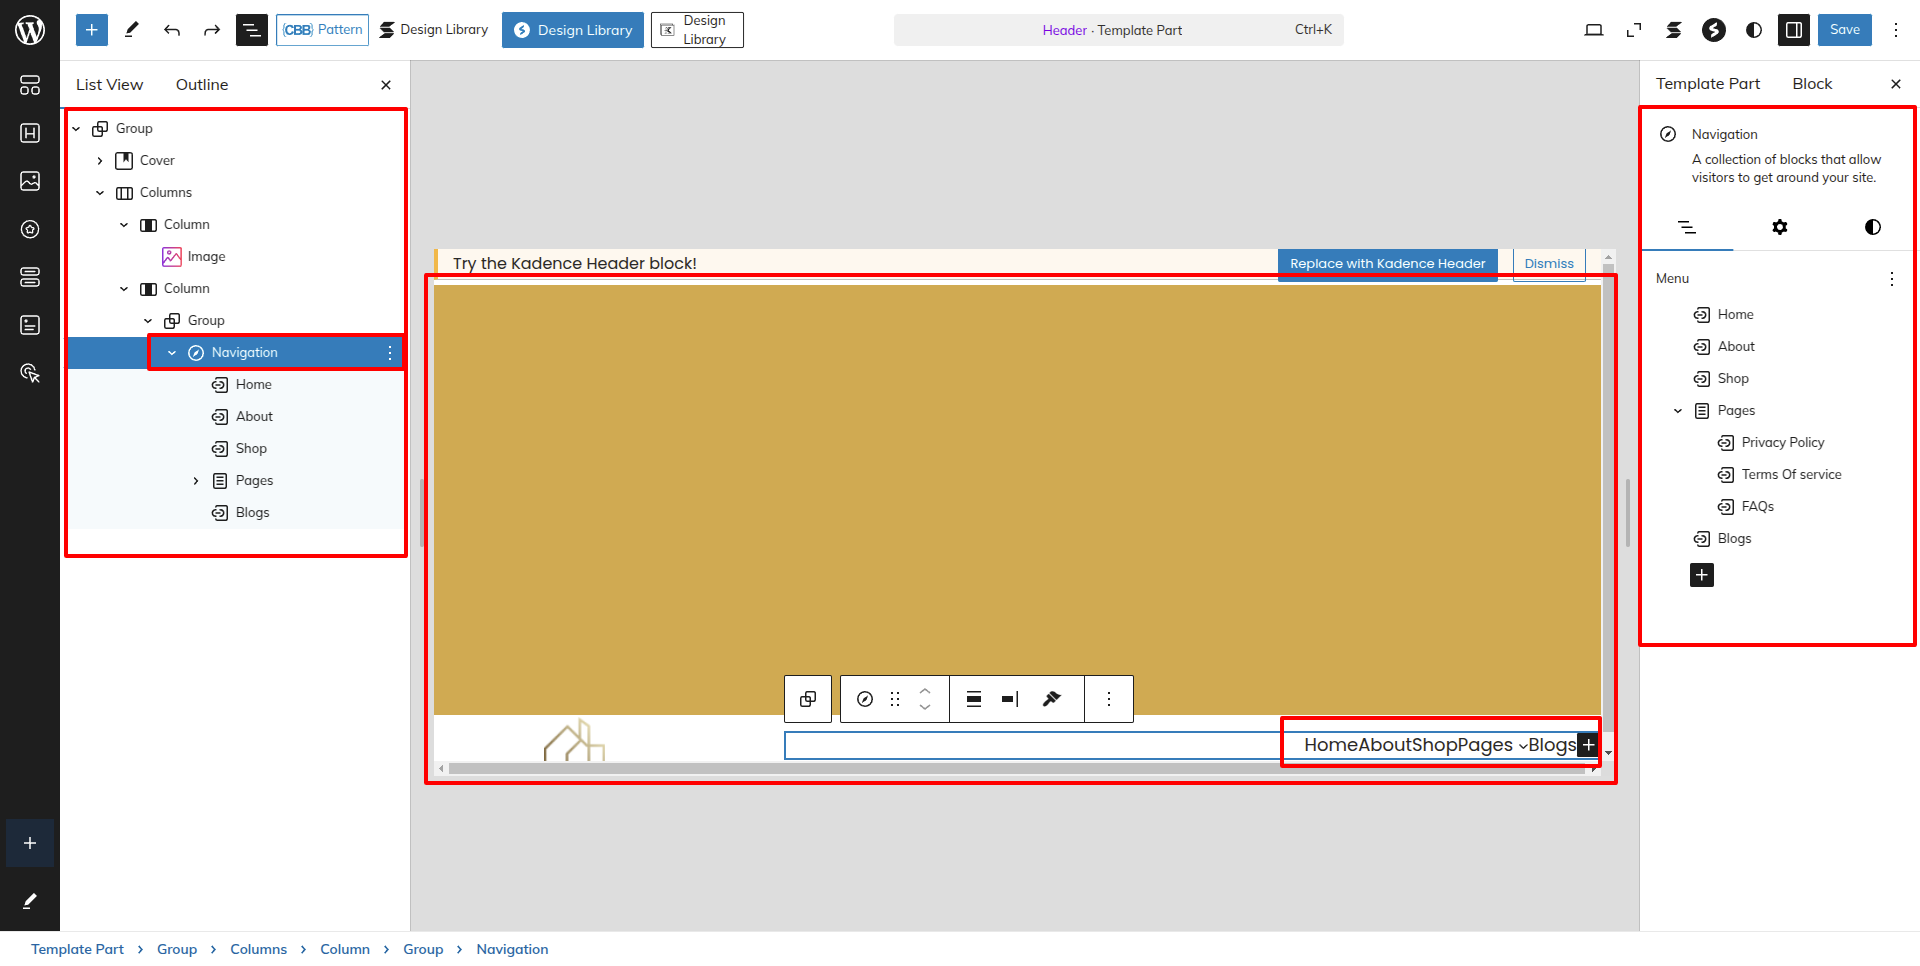
To modify, click Header Section from here.
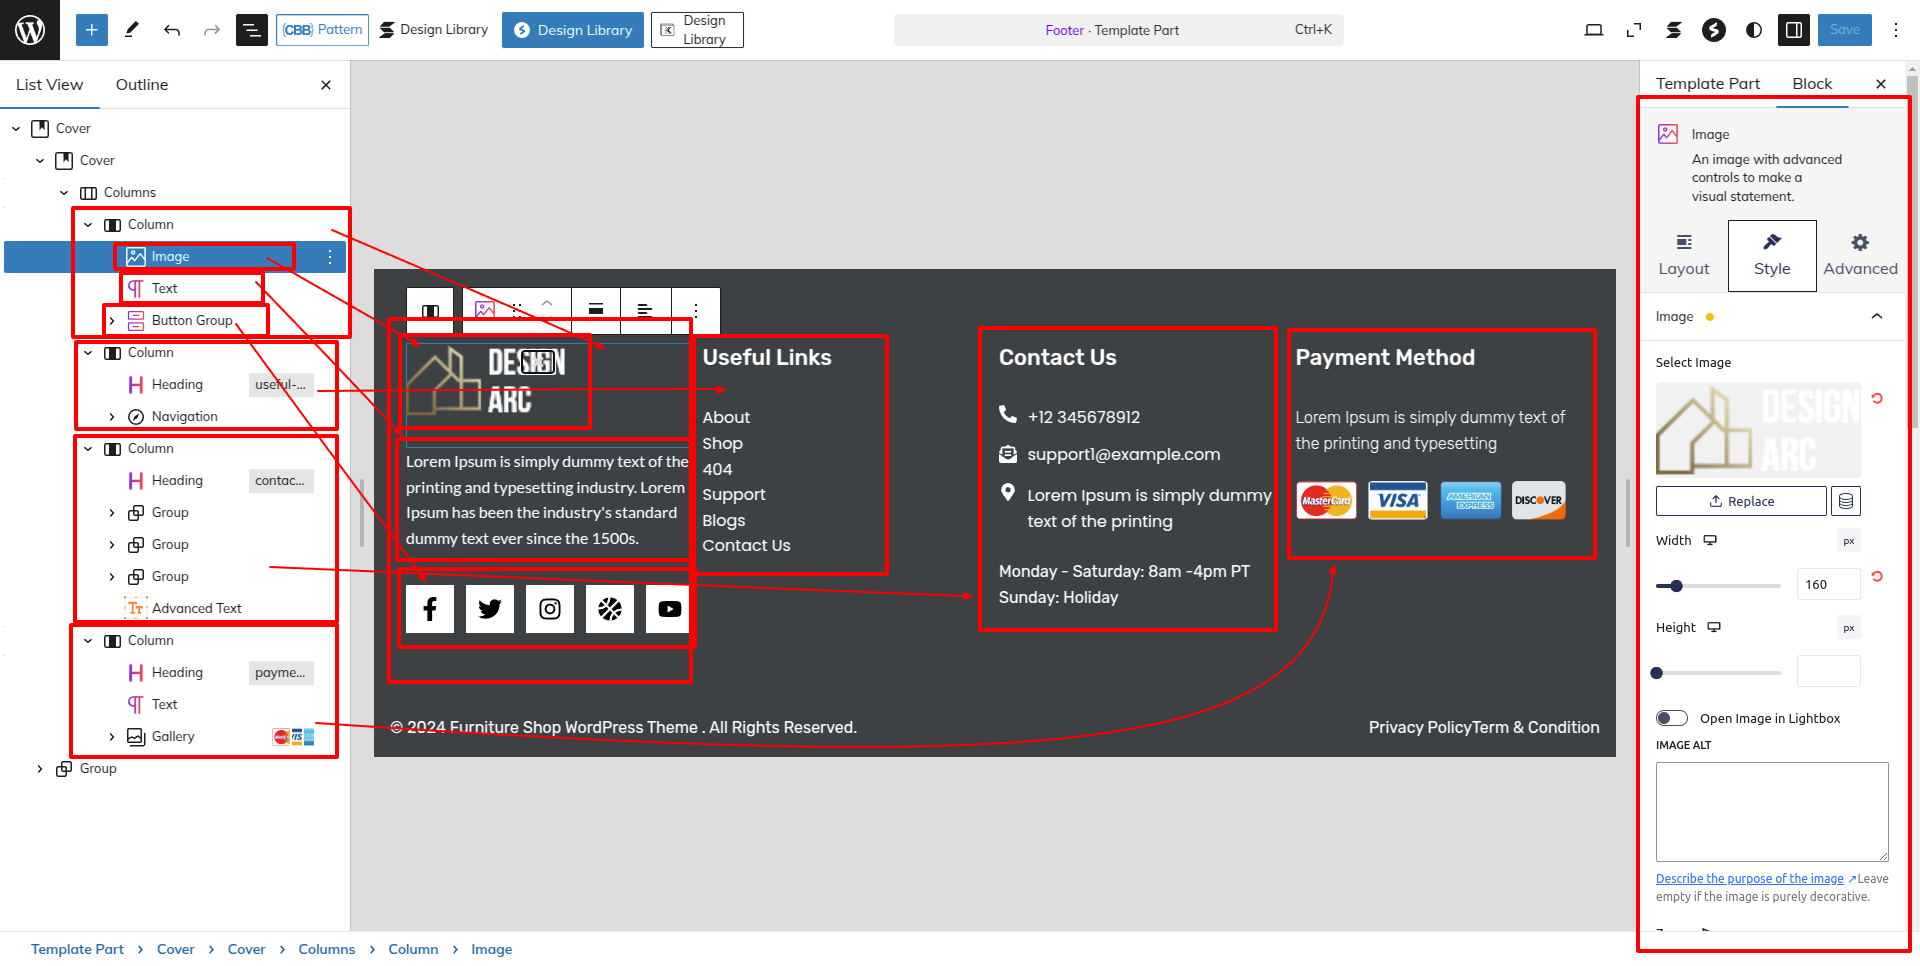
This is how you may set up and add the Header section.
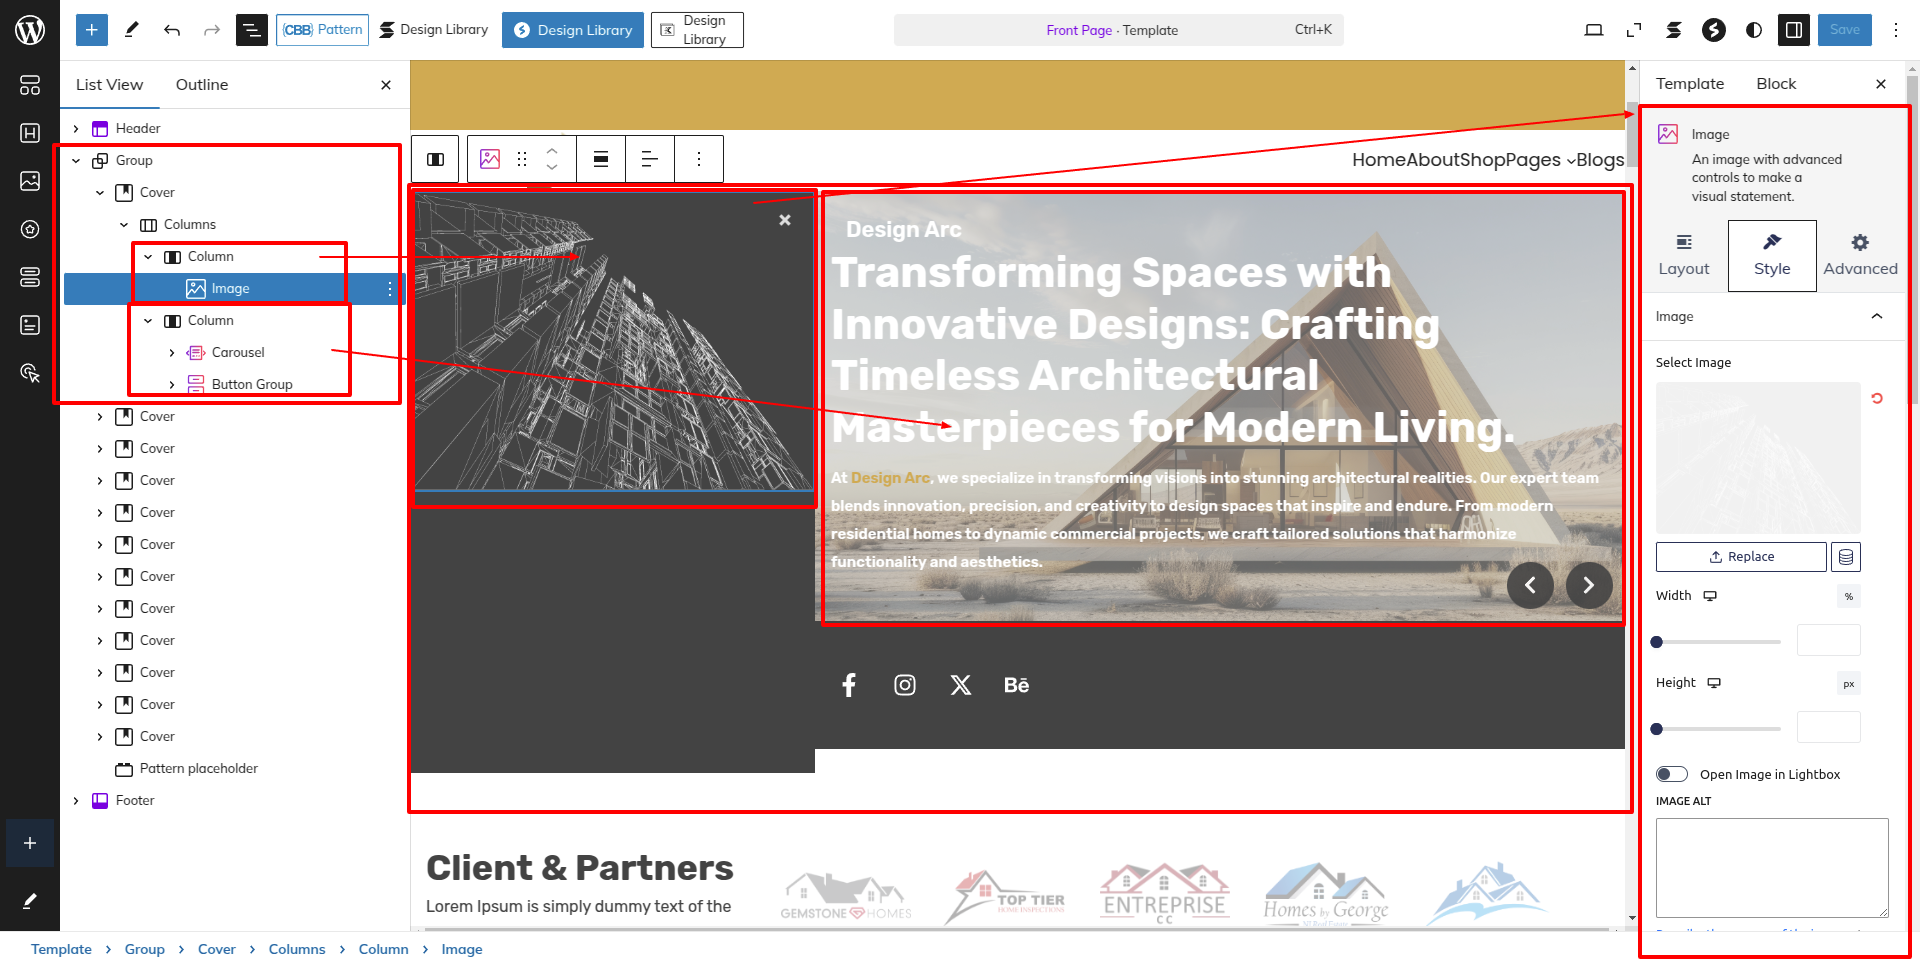
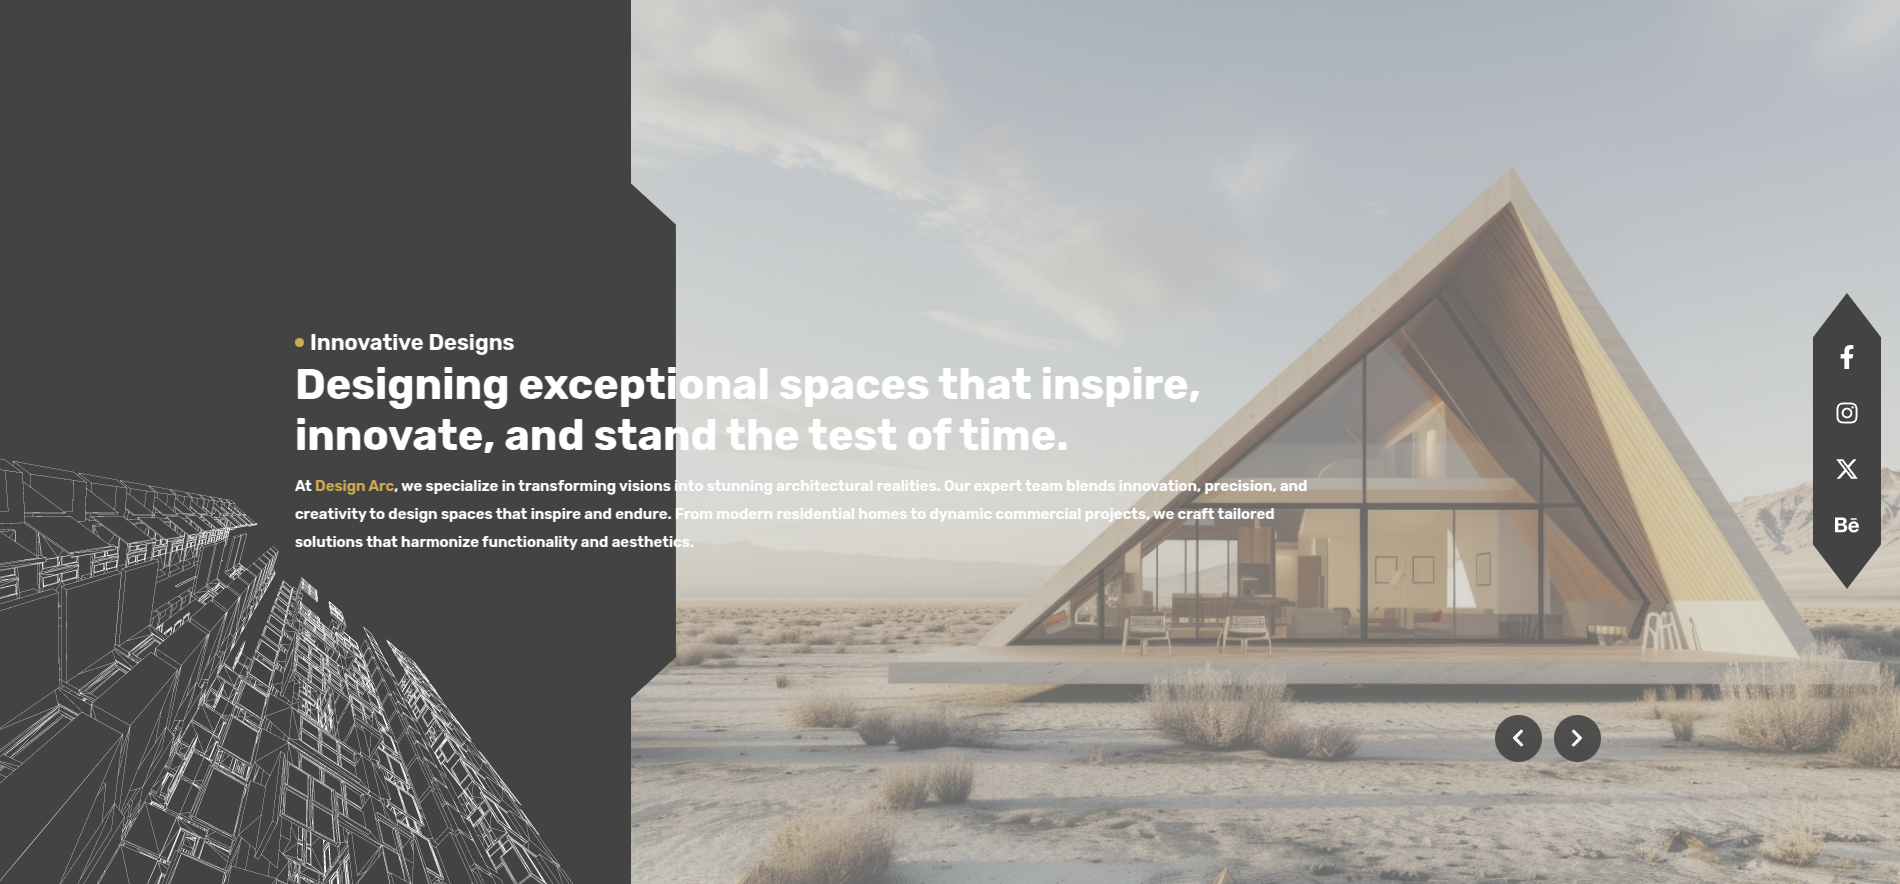
Setup Slider Section
Set up the Banner Section according to the instructions below.
Go to the Dashboard Appearance Editor.
This is how you may set up and add the Slider Section.
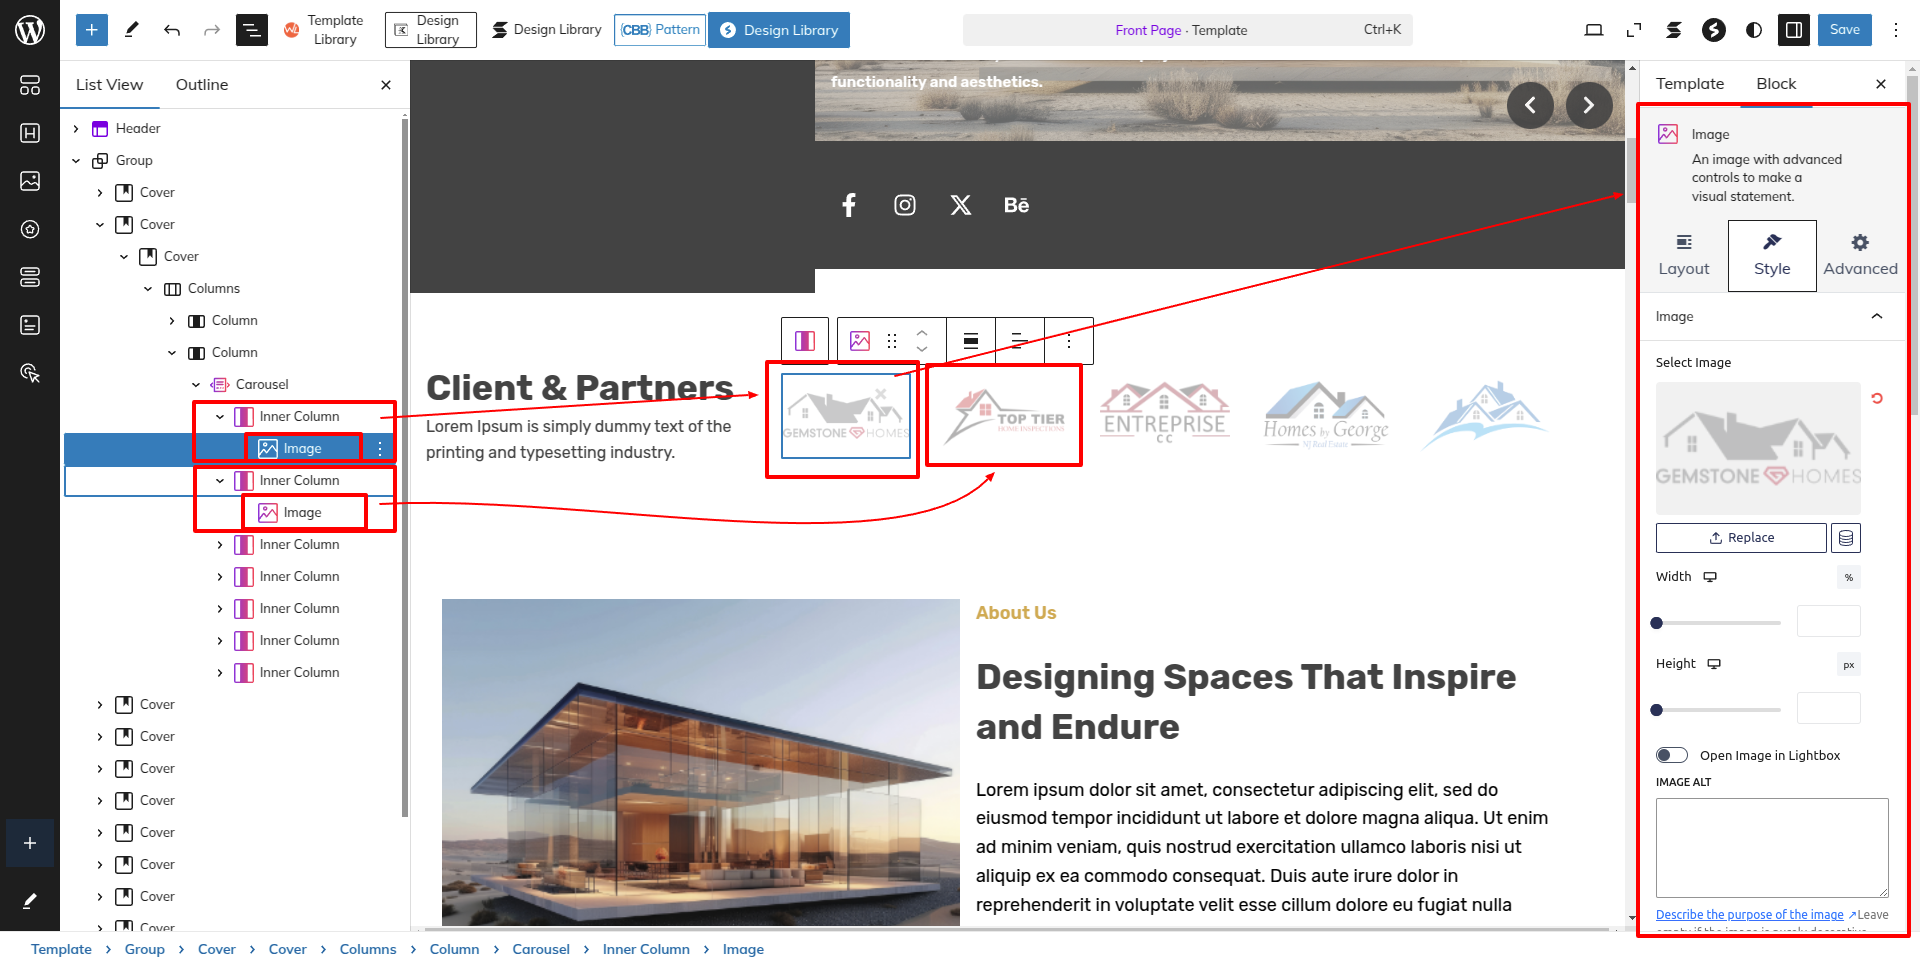
Client & Partners Section
Set up the Client & Partners Section according to the instructions below.
As seen in the screenshot, enter the title, Description, Image, the Shortcode and the Button.
Then the Client's Section would Look like This
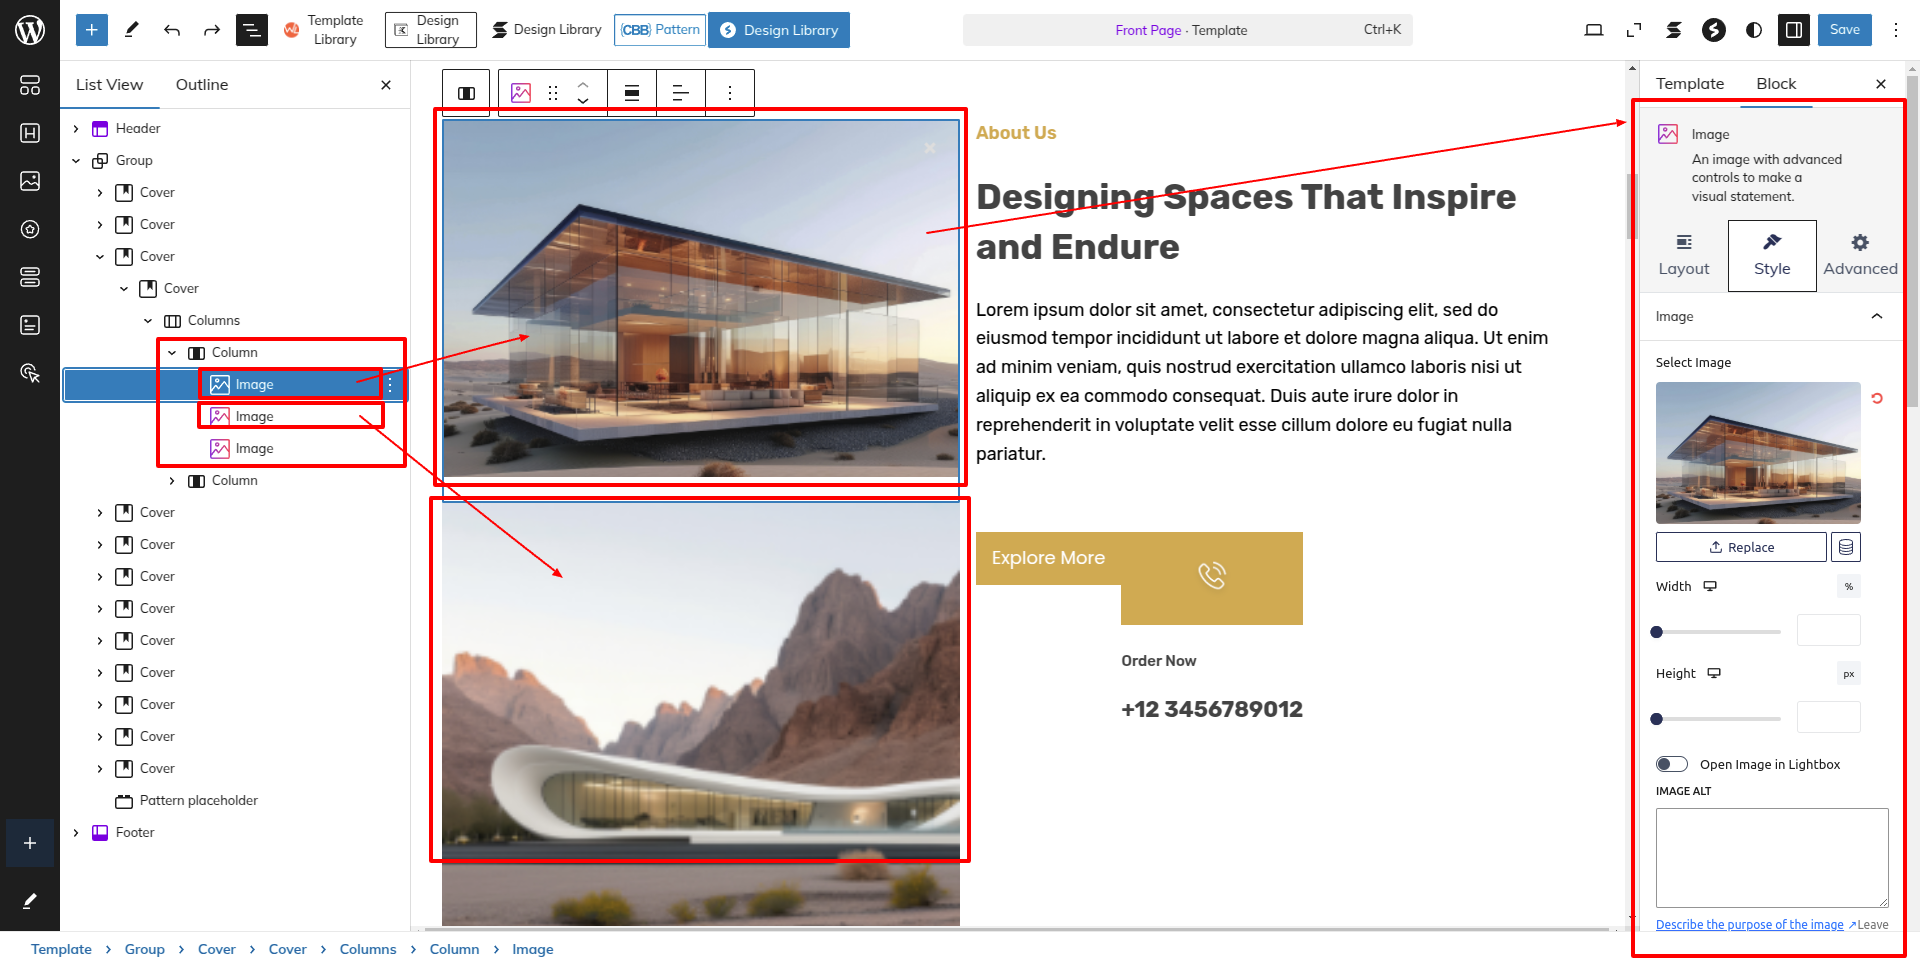
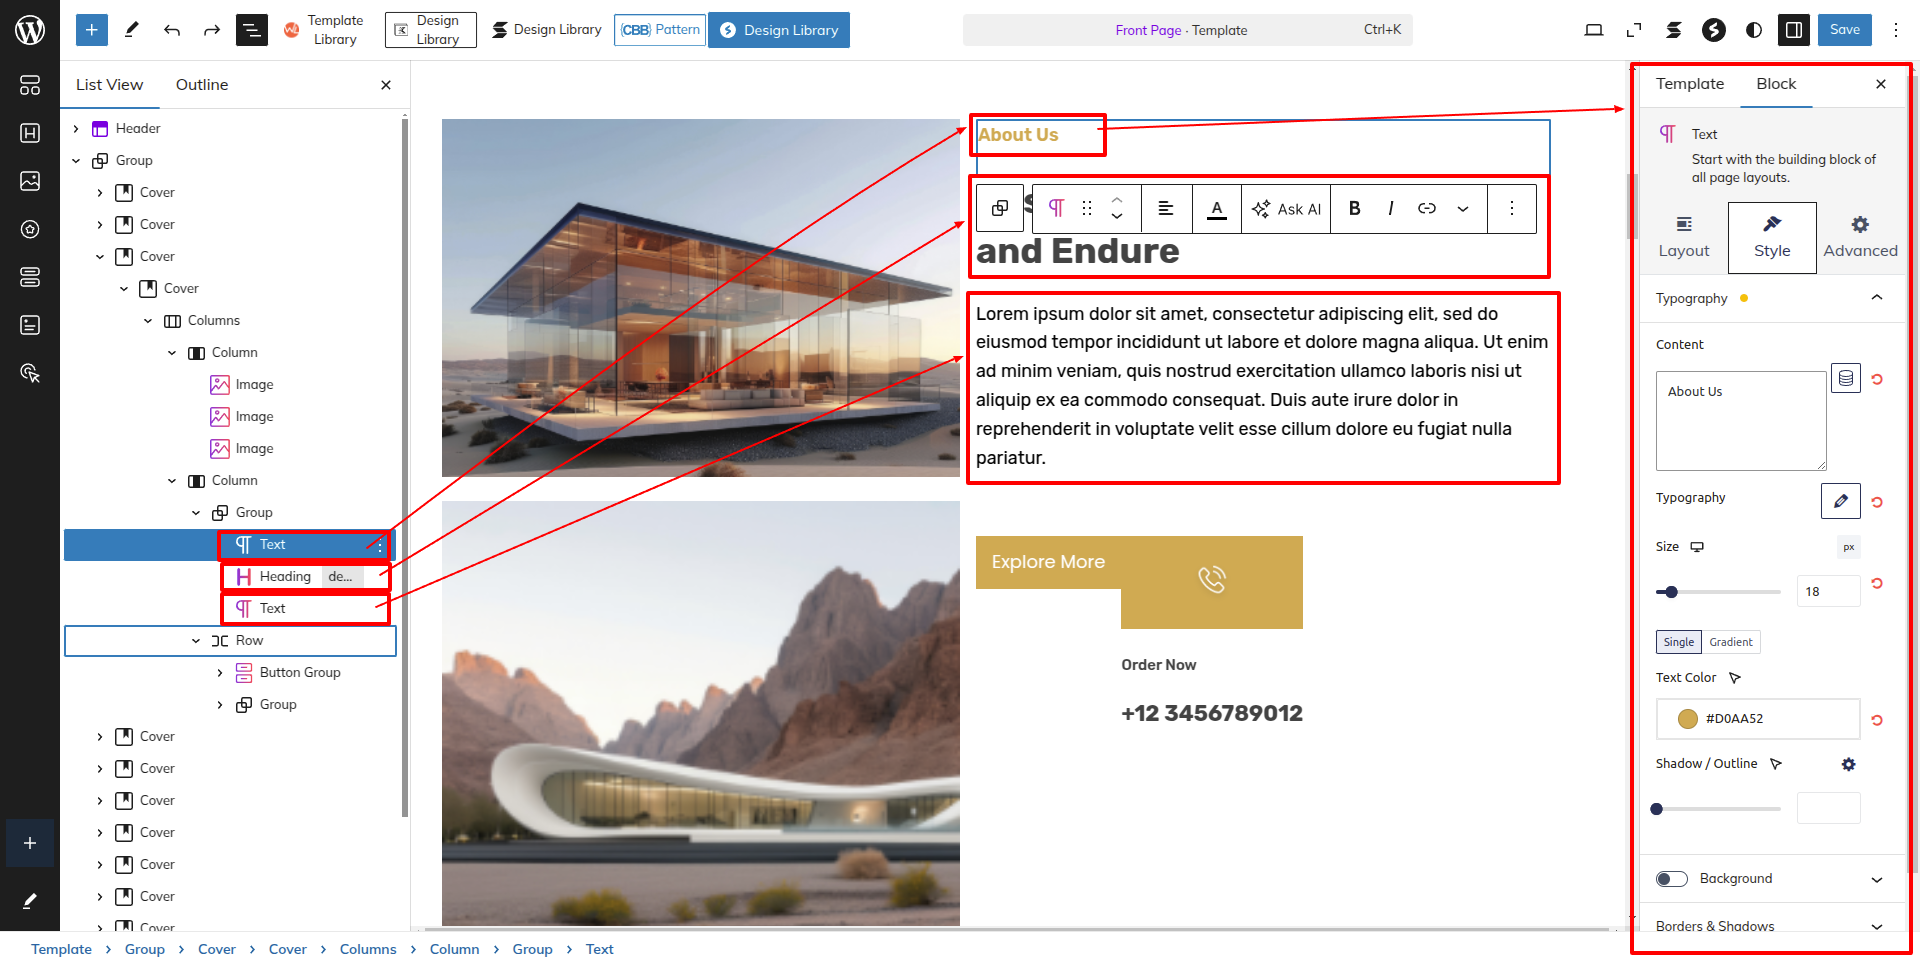
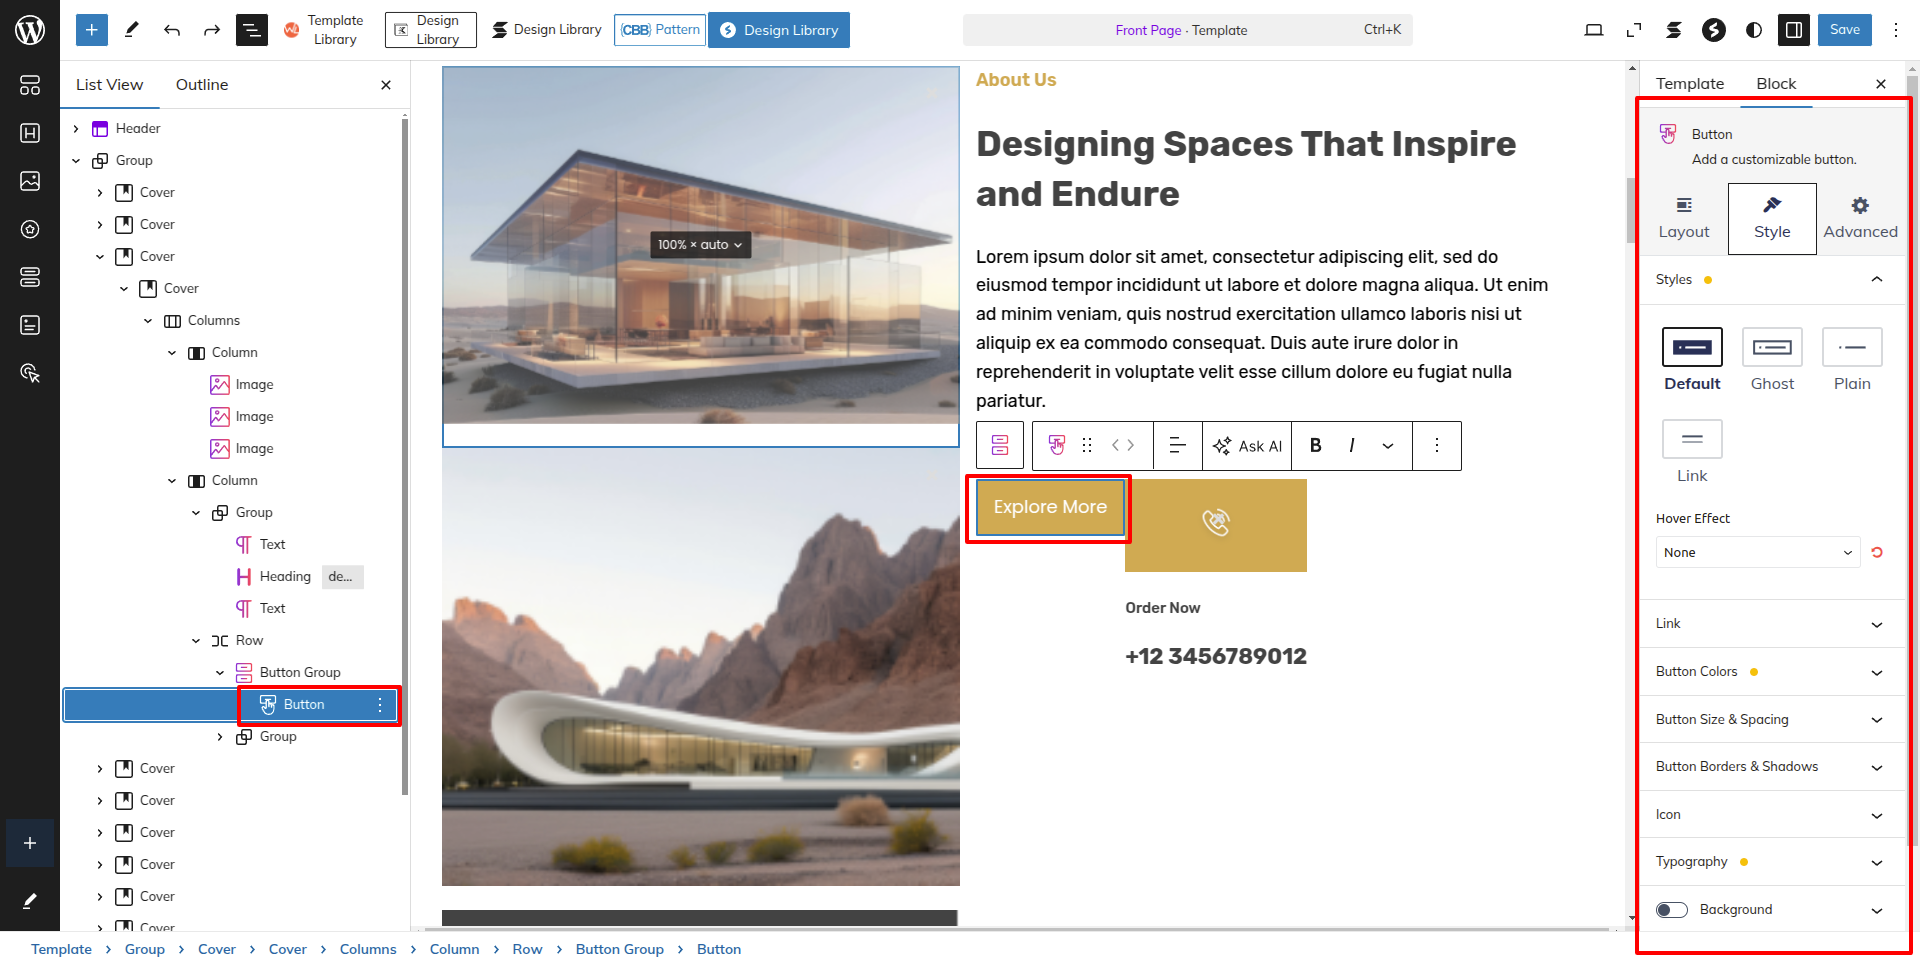
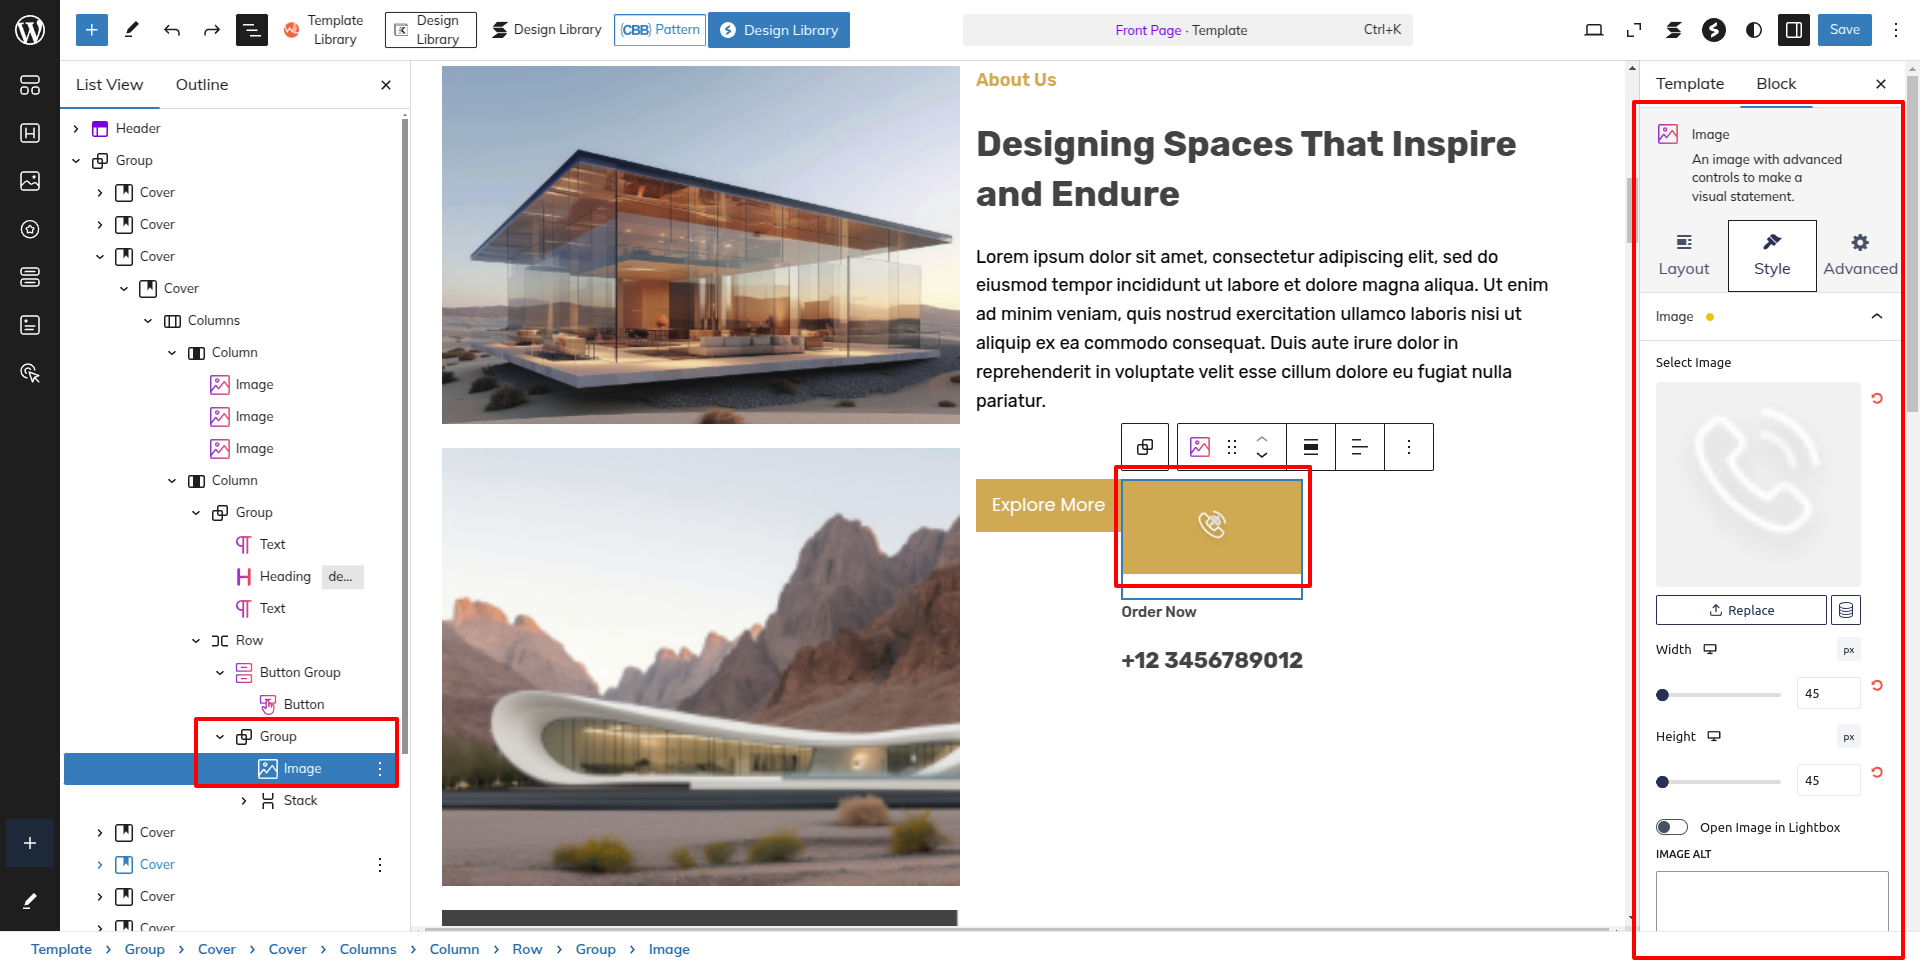
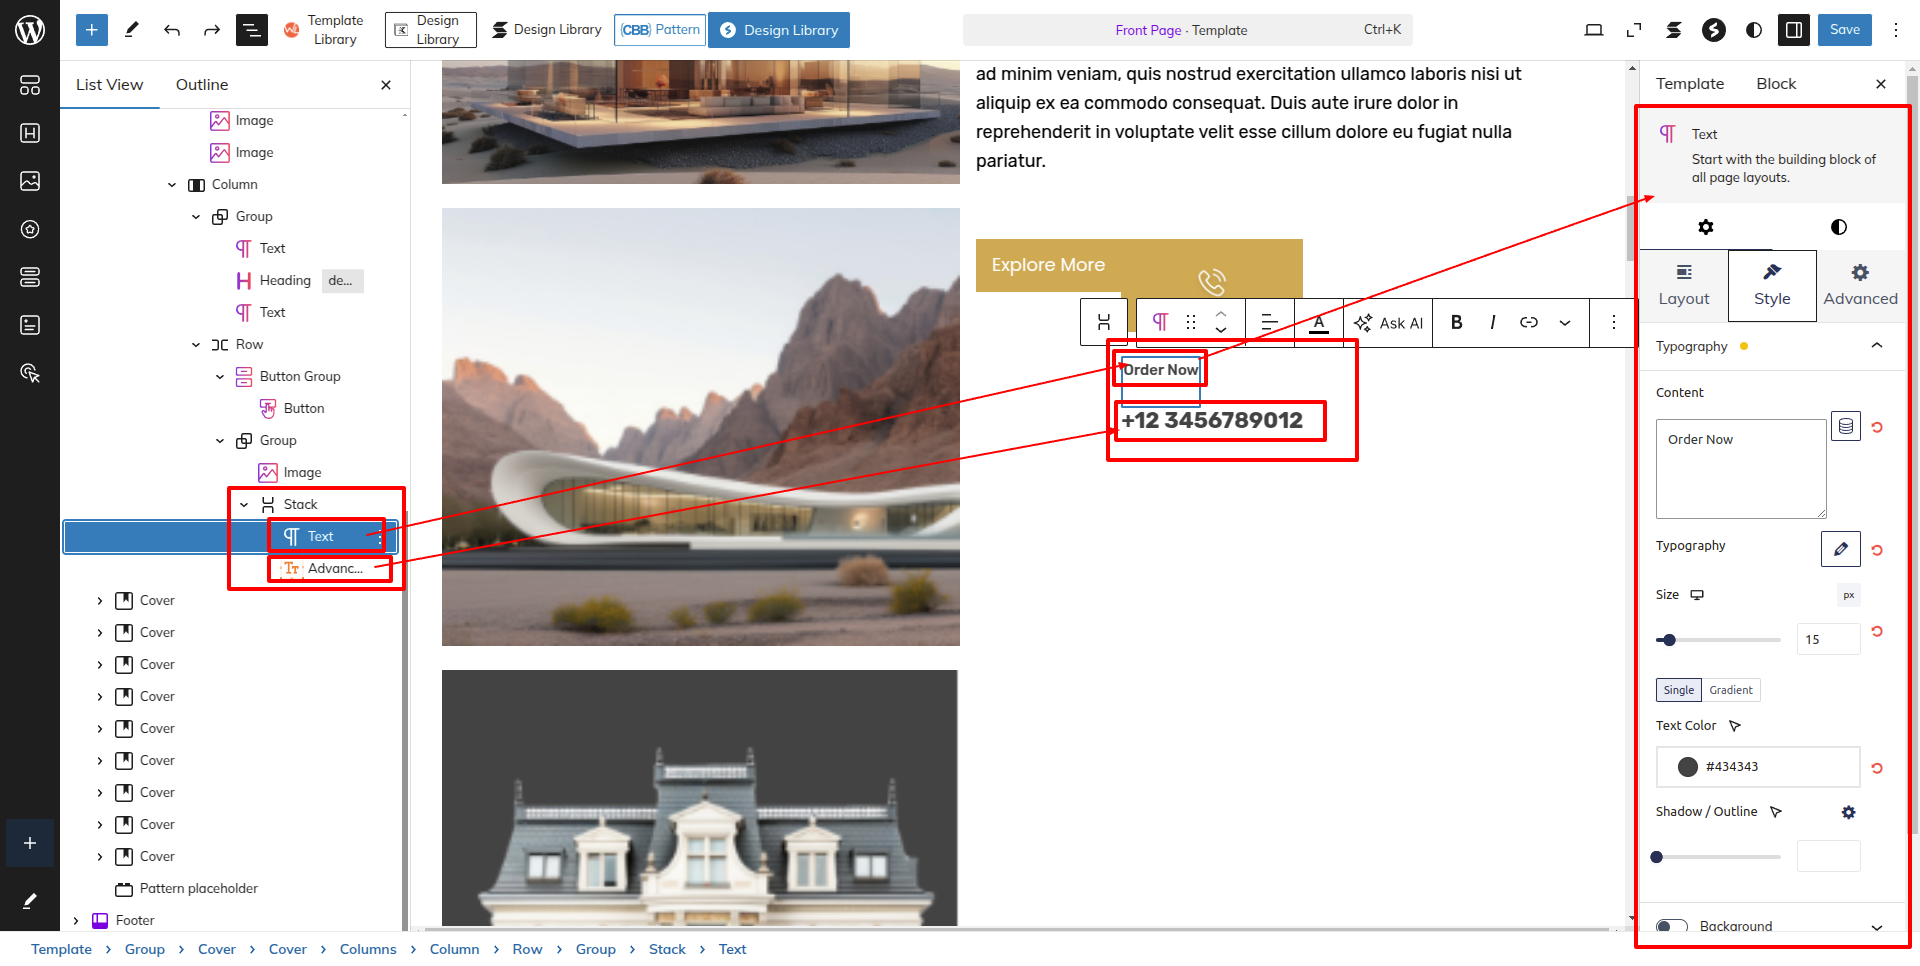
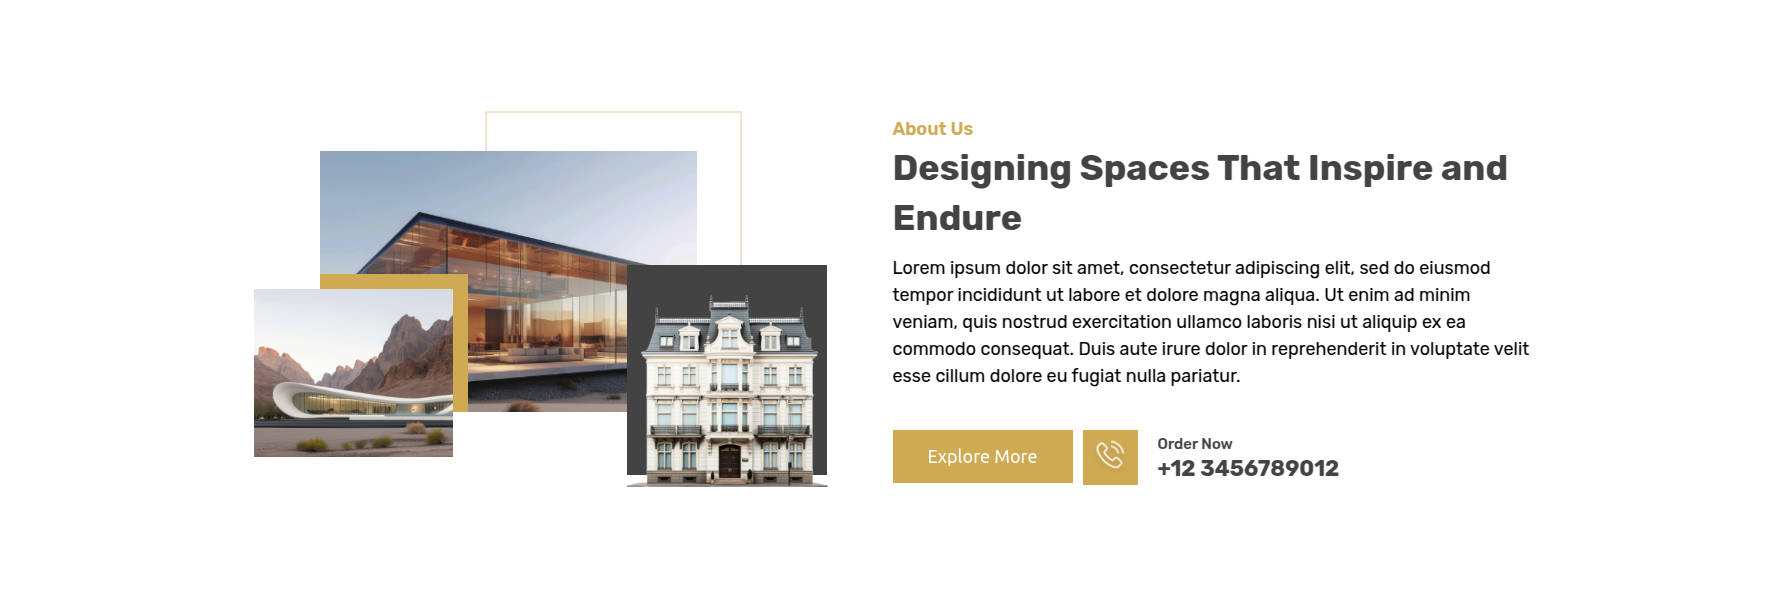
Setup About Us Section
Setup About Us Section according to the instructions below.
As seen in the screenshot, Enter the title, Description, Short Description and Images.
Go to Dashboard Appearance Editor.
This is how you may set up and add the Why Learn From Our Courses Section.
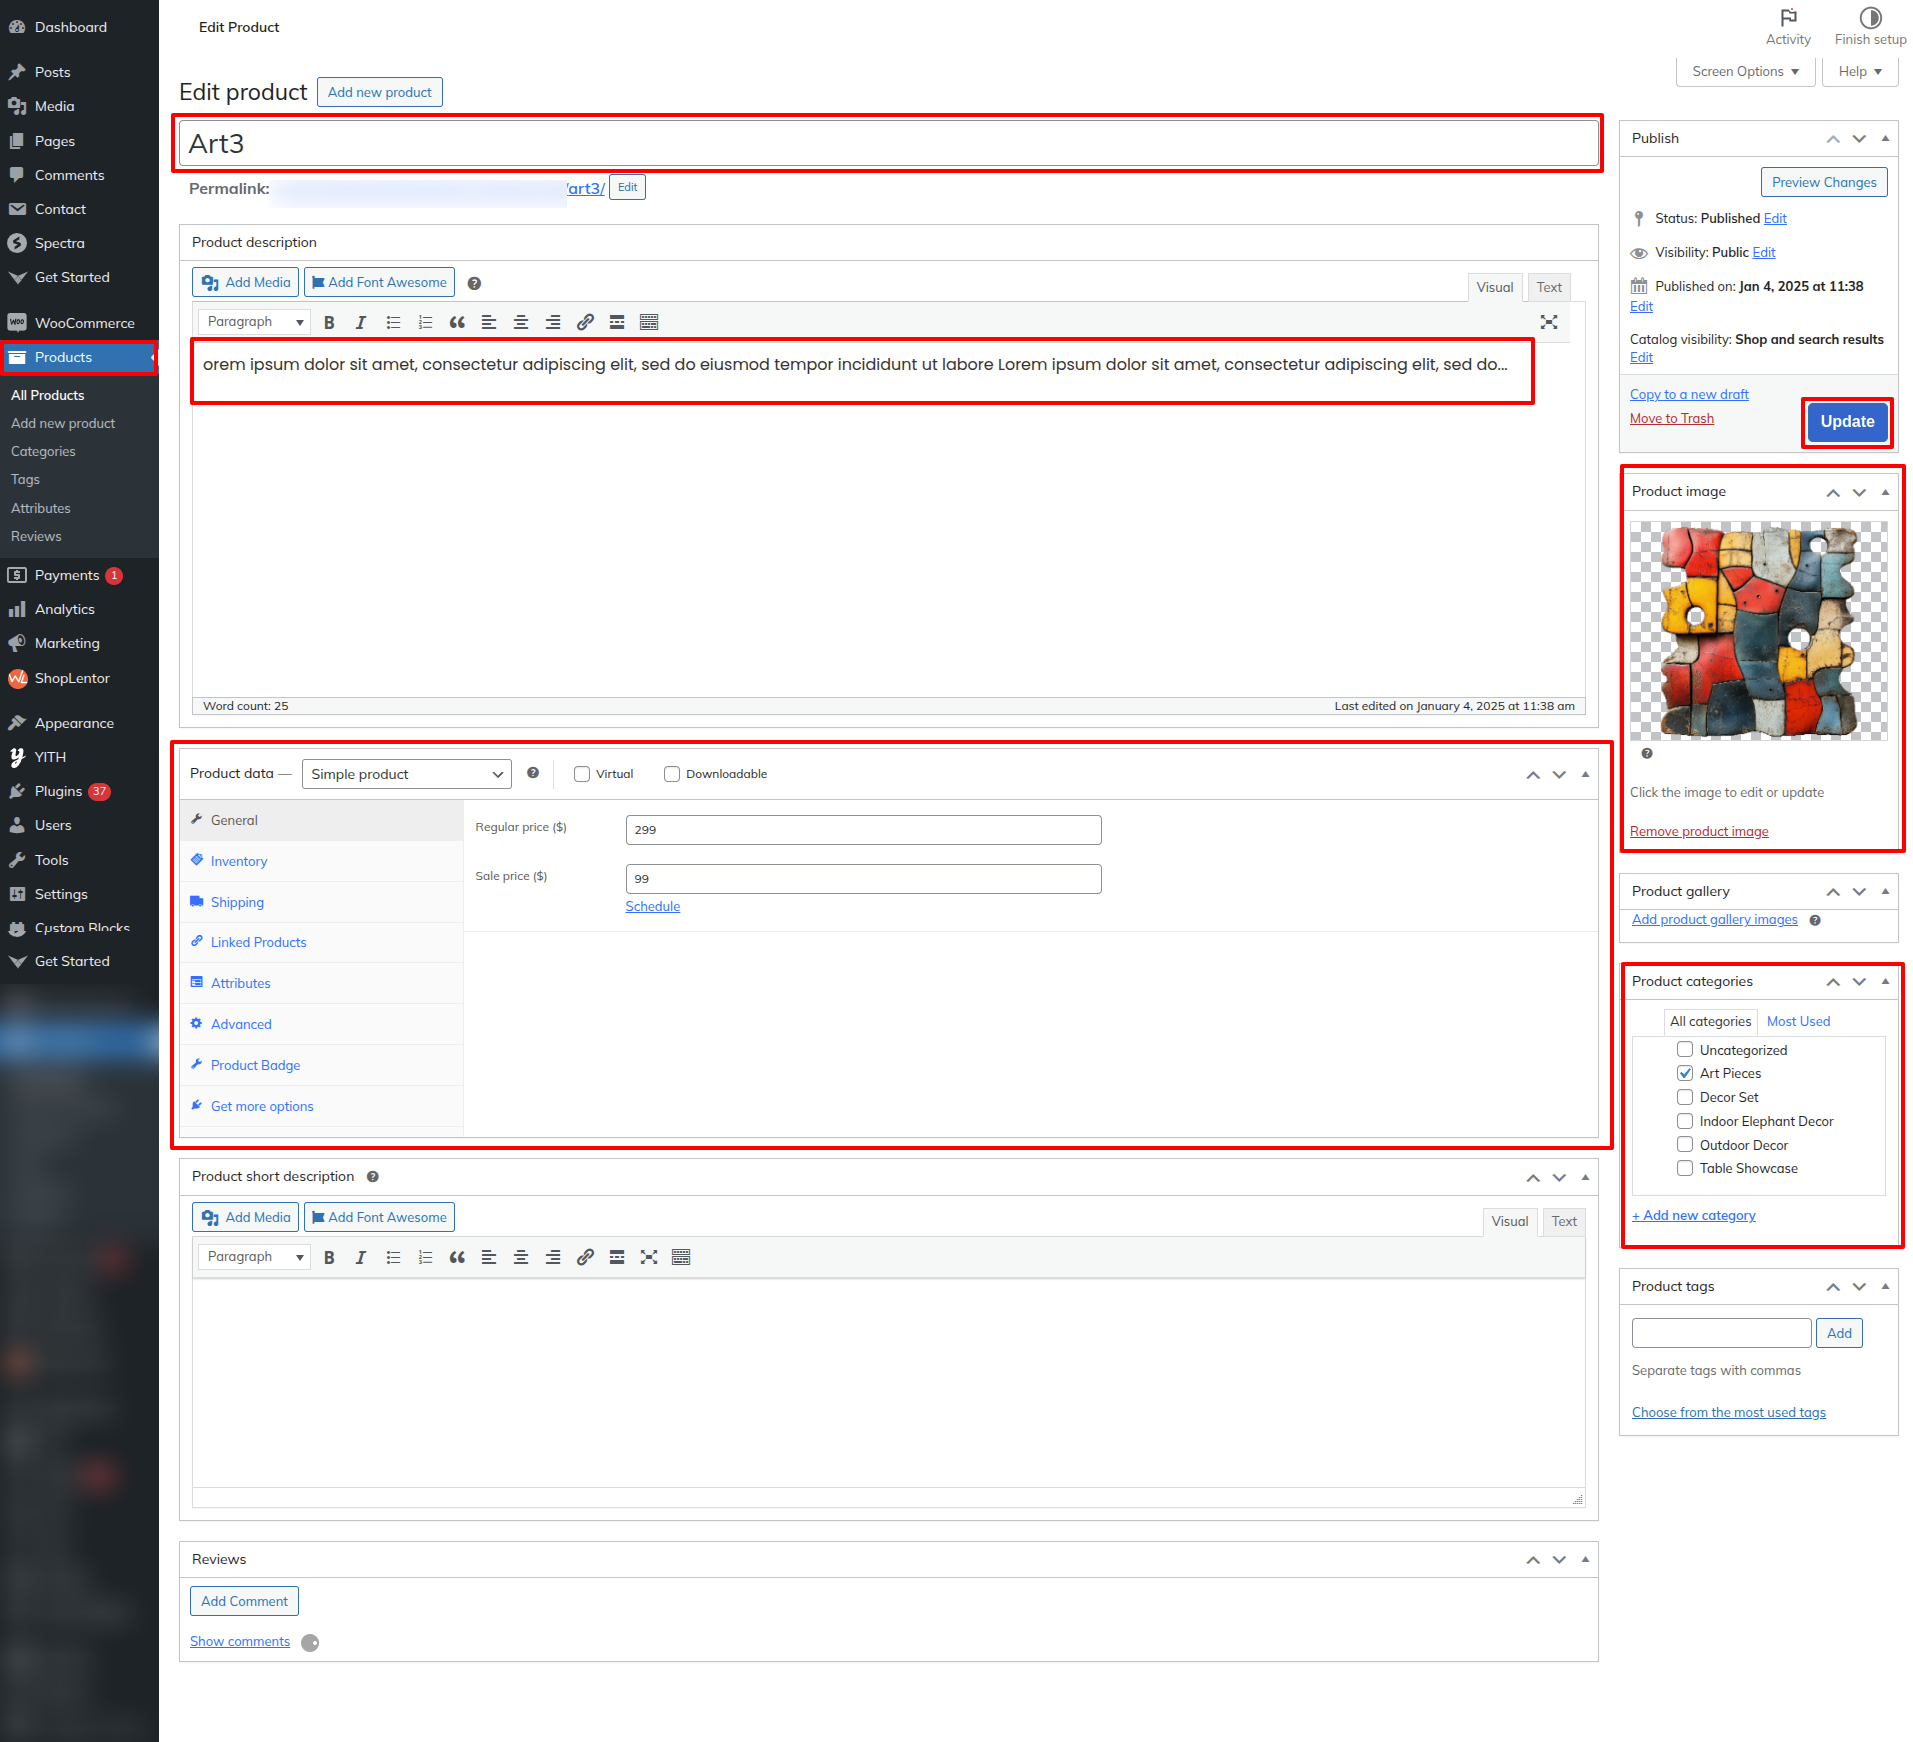
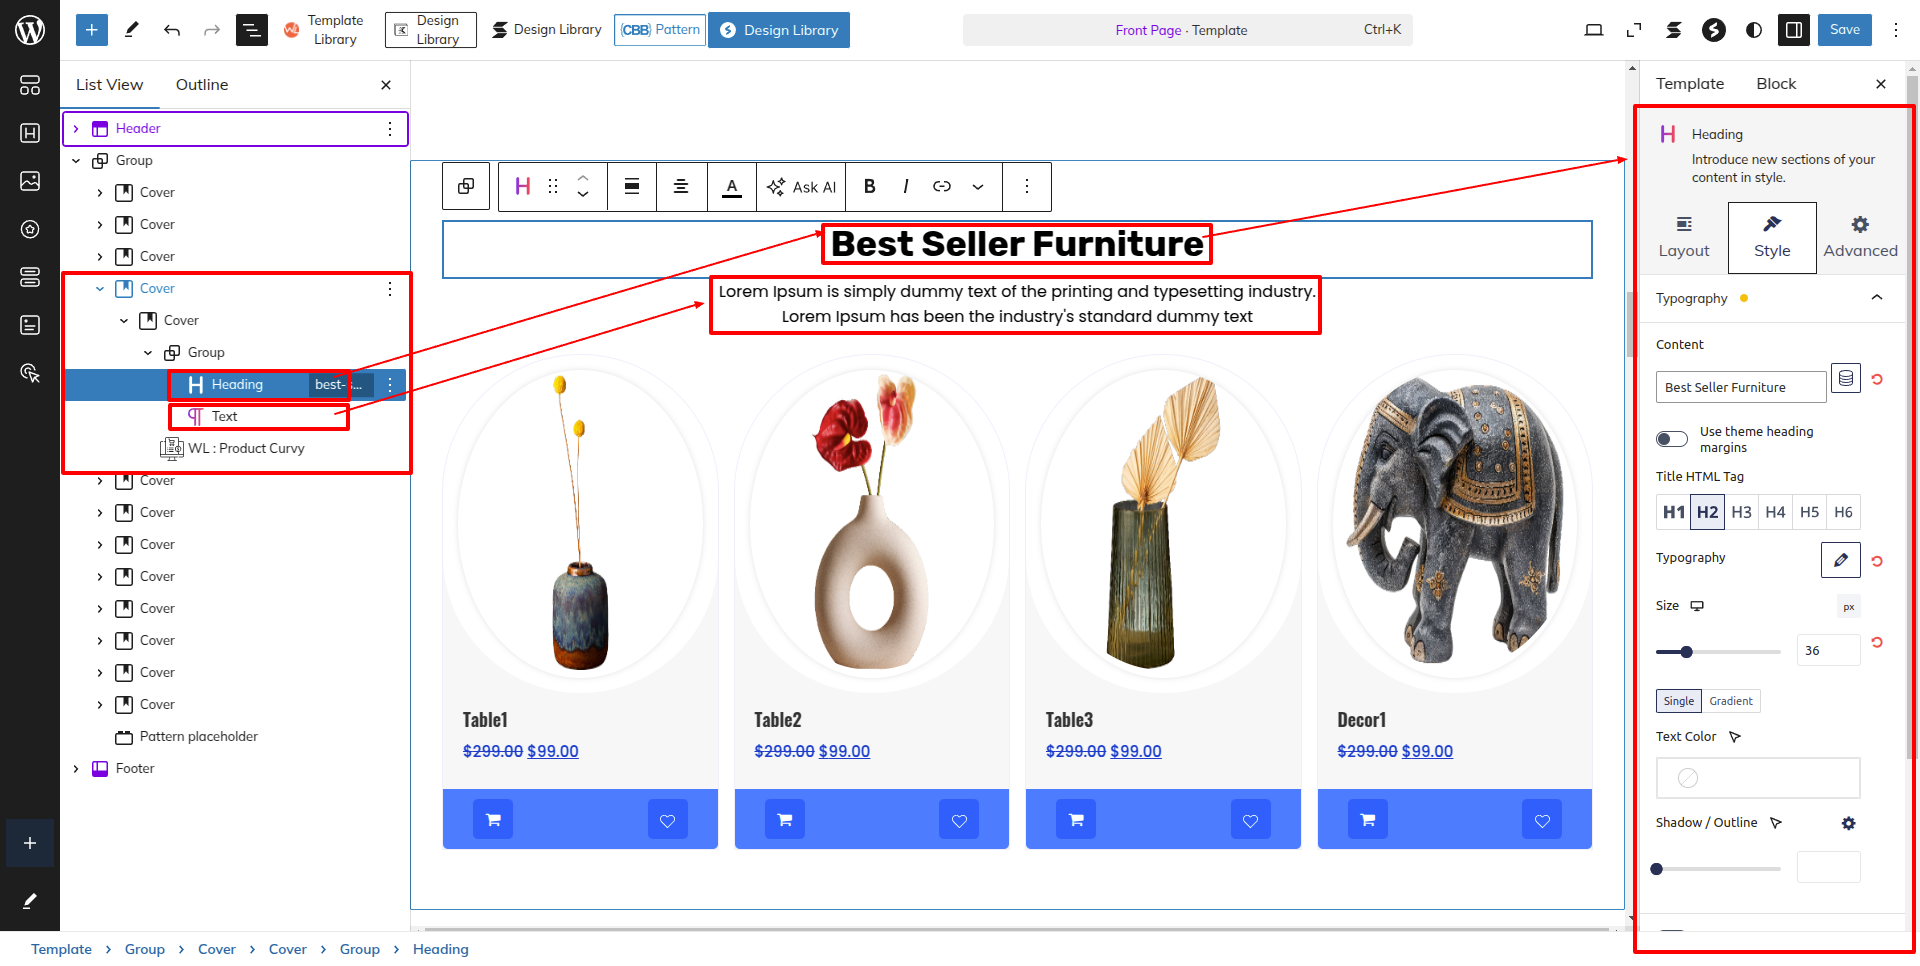
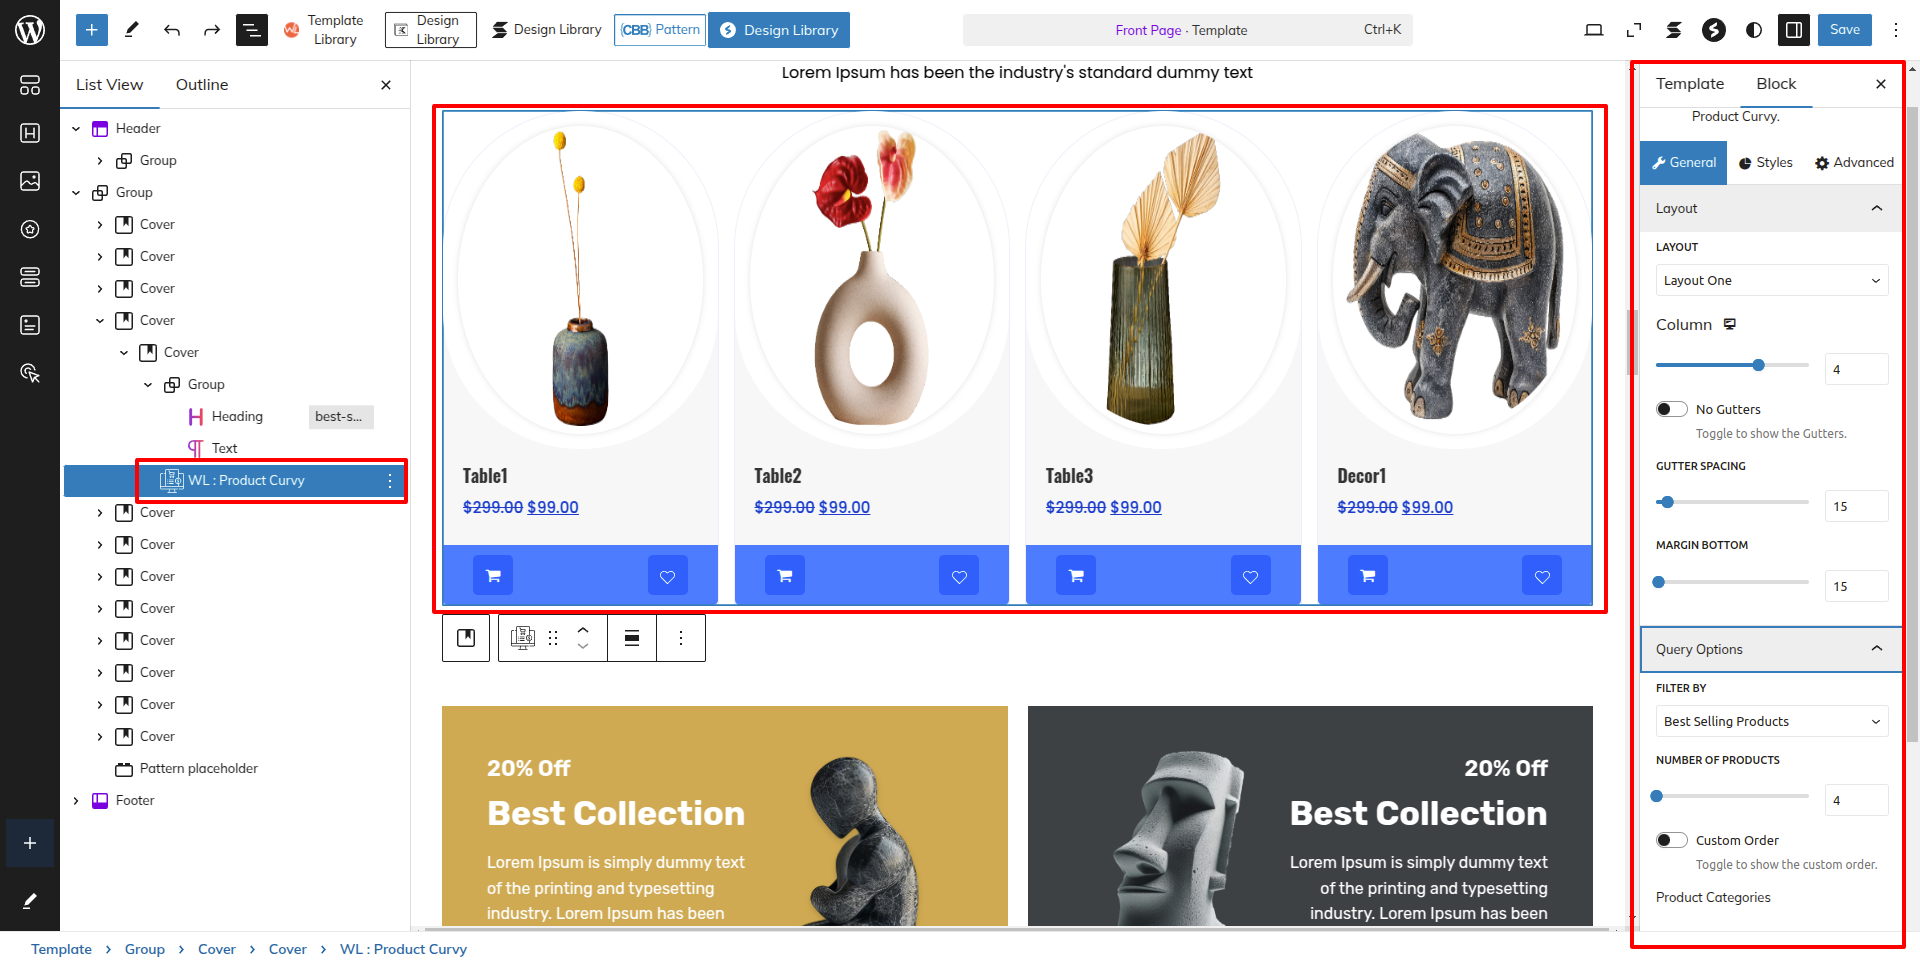
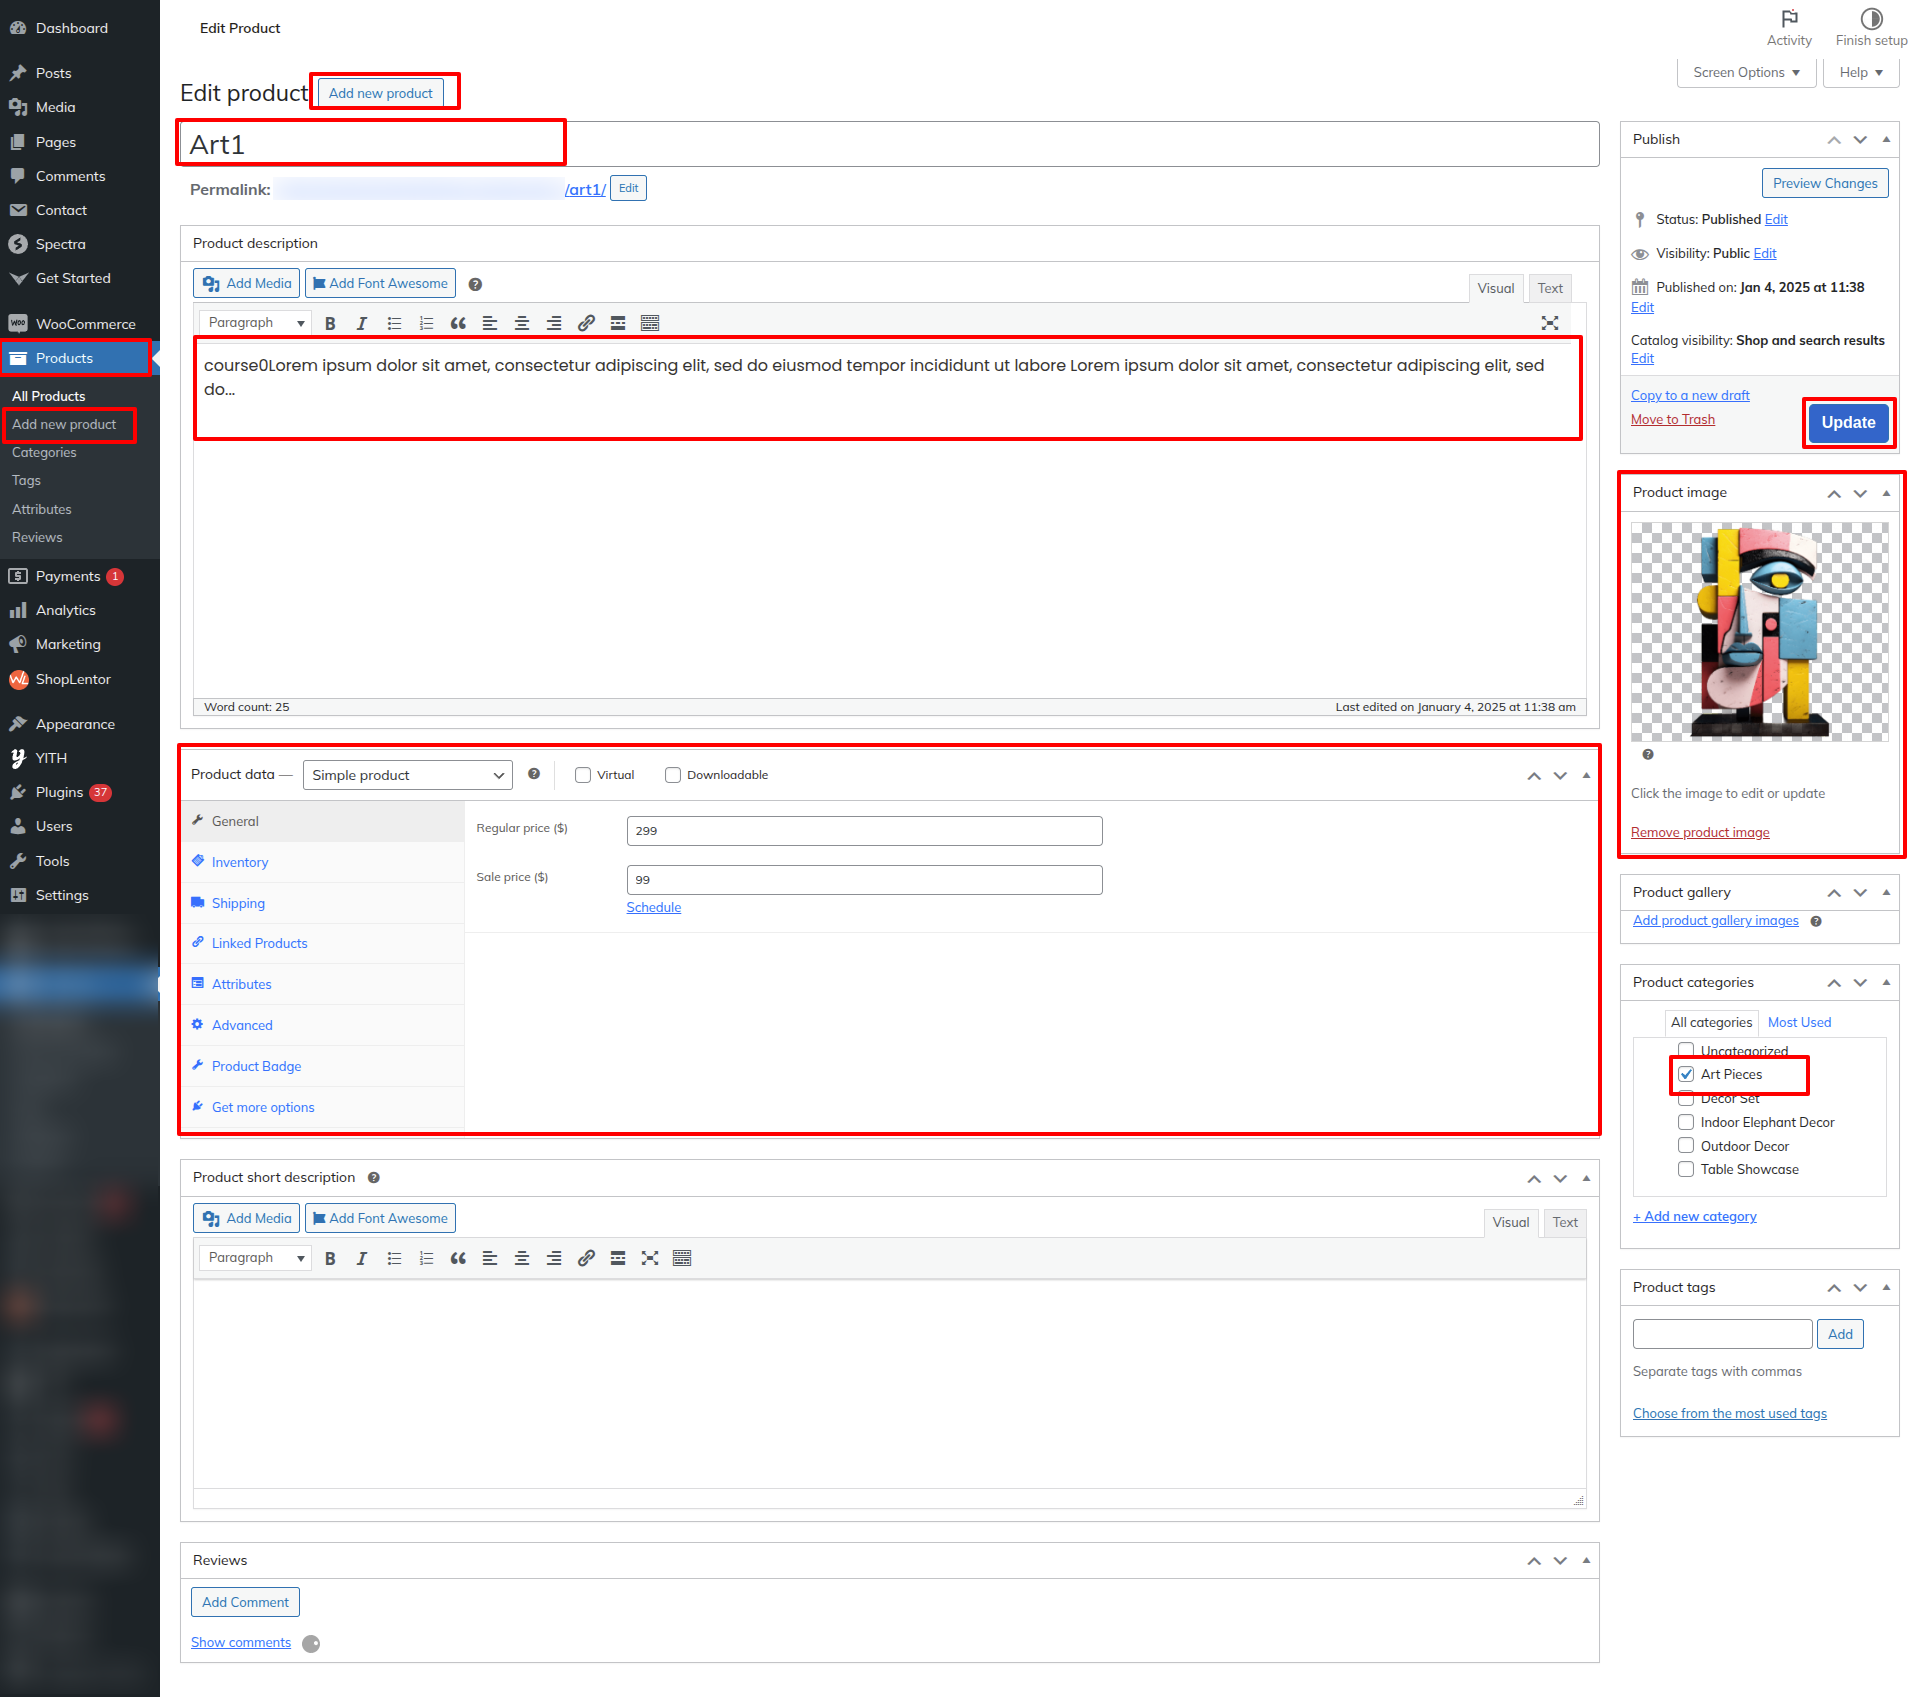
Setup Best Seller Sculptures Section
Set up the Best Seller Section according to the instructions below.
First, Install The Woocommerce plugin. This plugin is generally used to integrate all the ecommerce store functionalities and features with your wordpress site.
Go on Dashboard Products Add New.
Now Go On to Dashboard Appearance Editor.
This is how you may set up Best Seller Section.
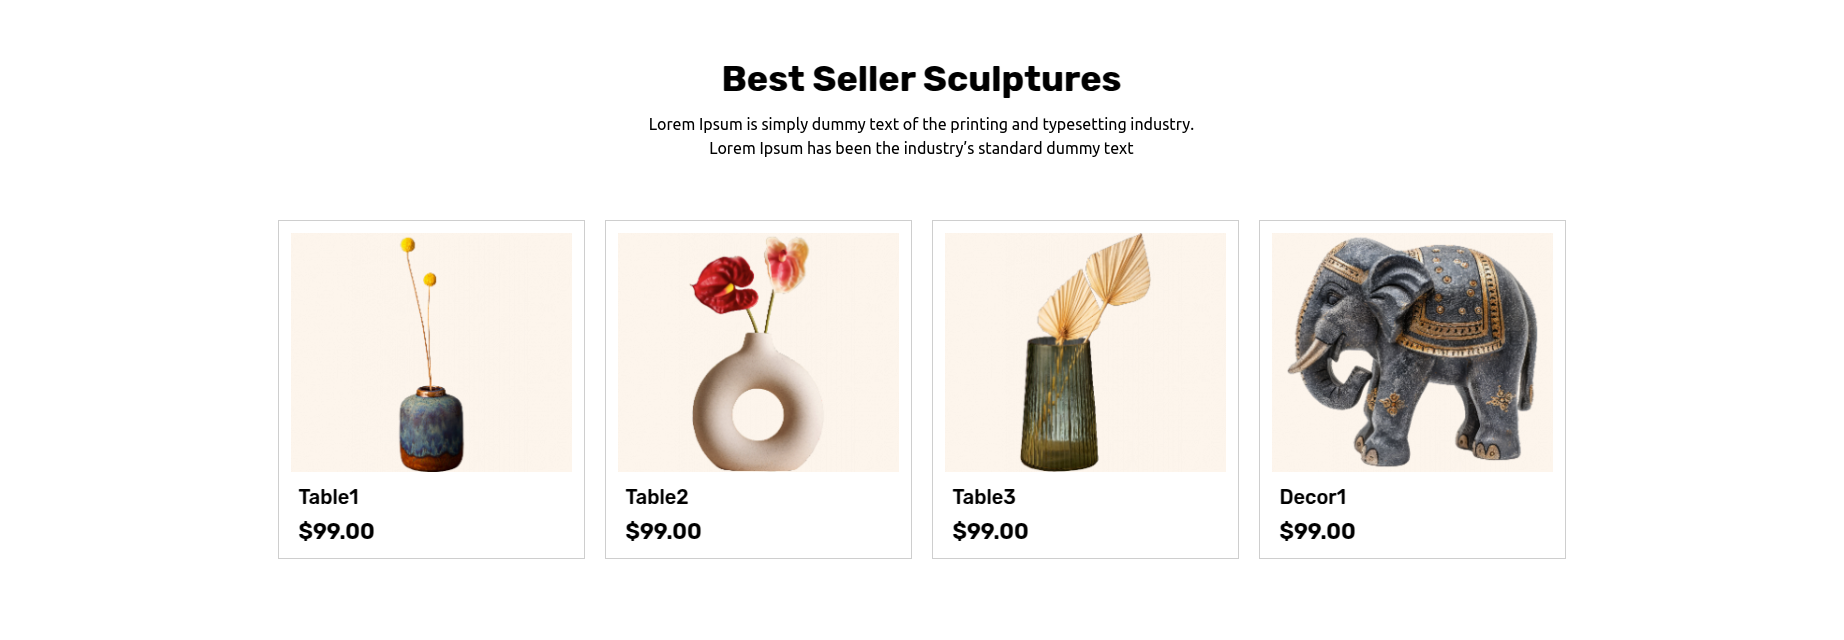
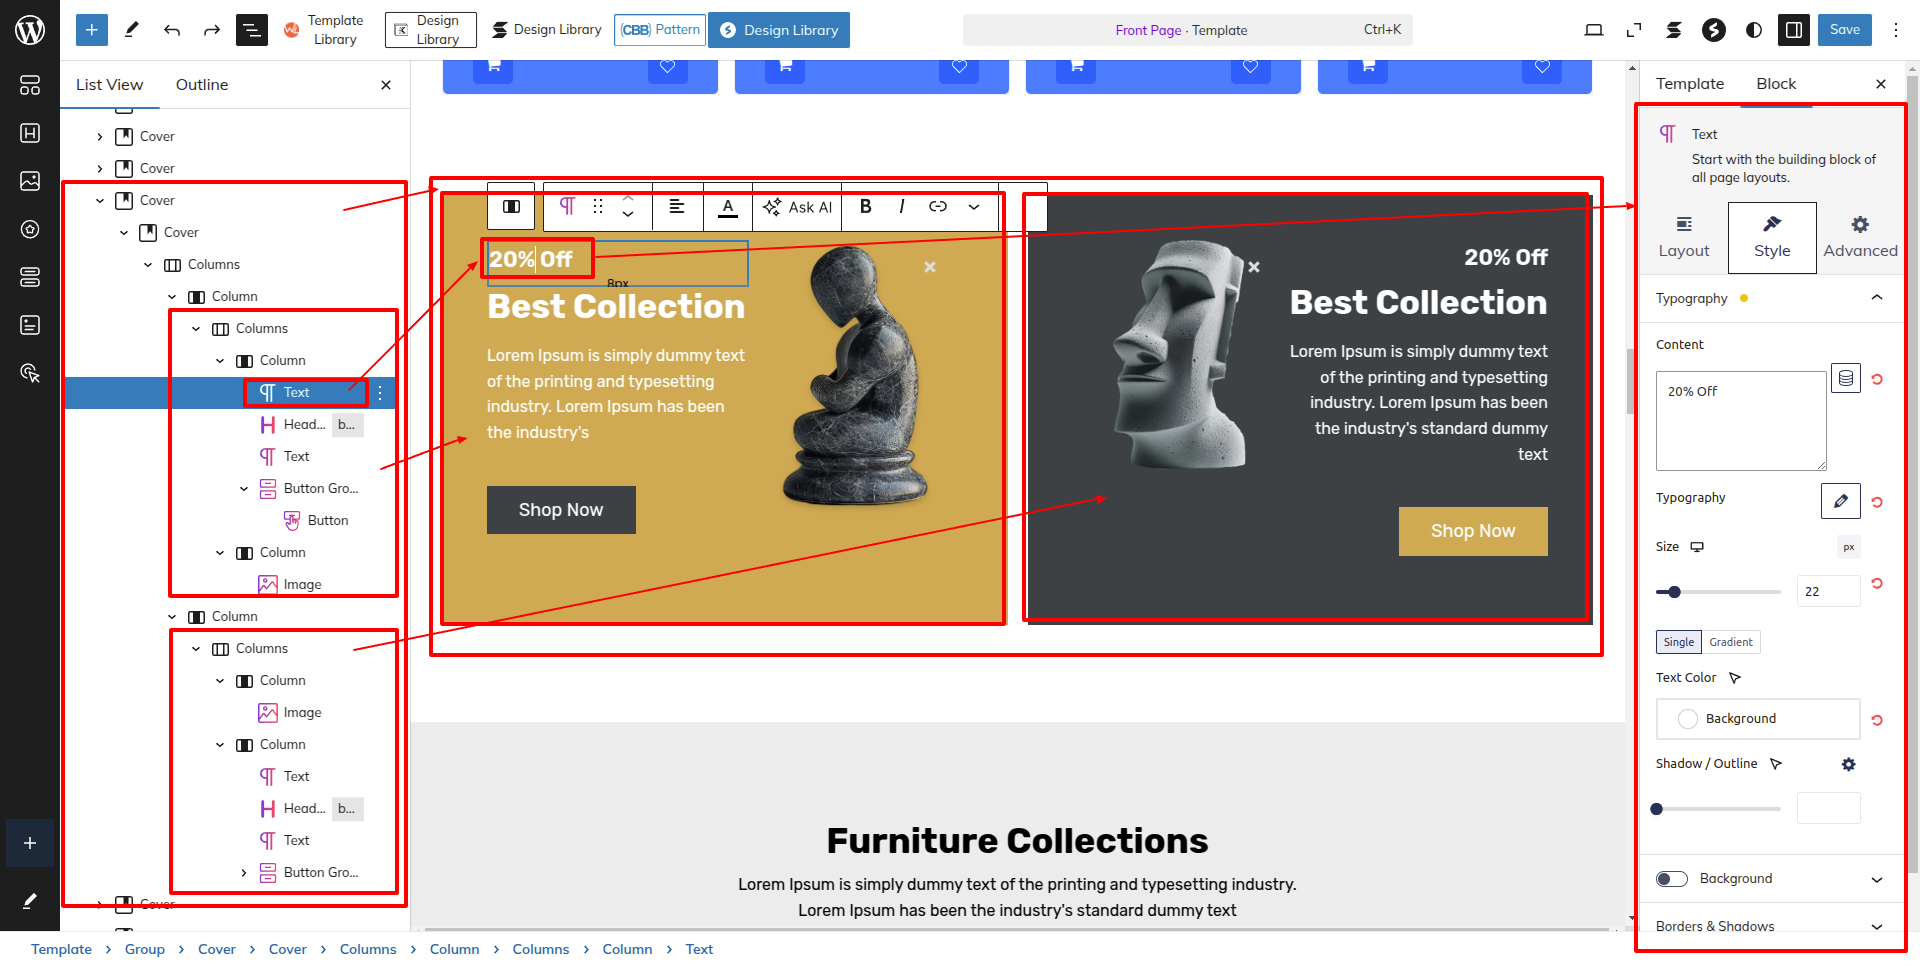
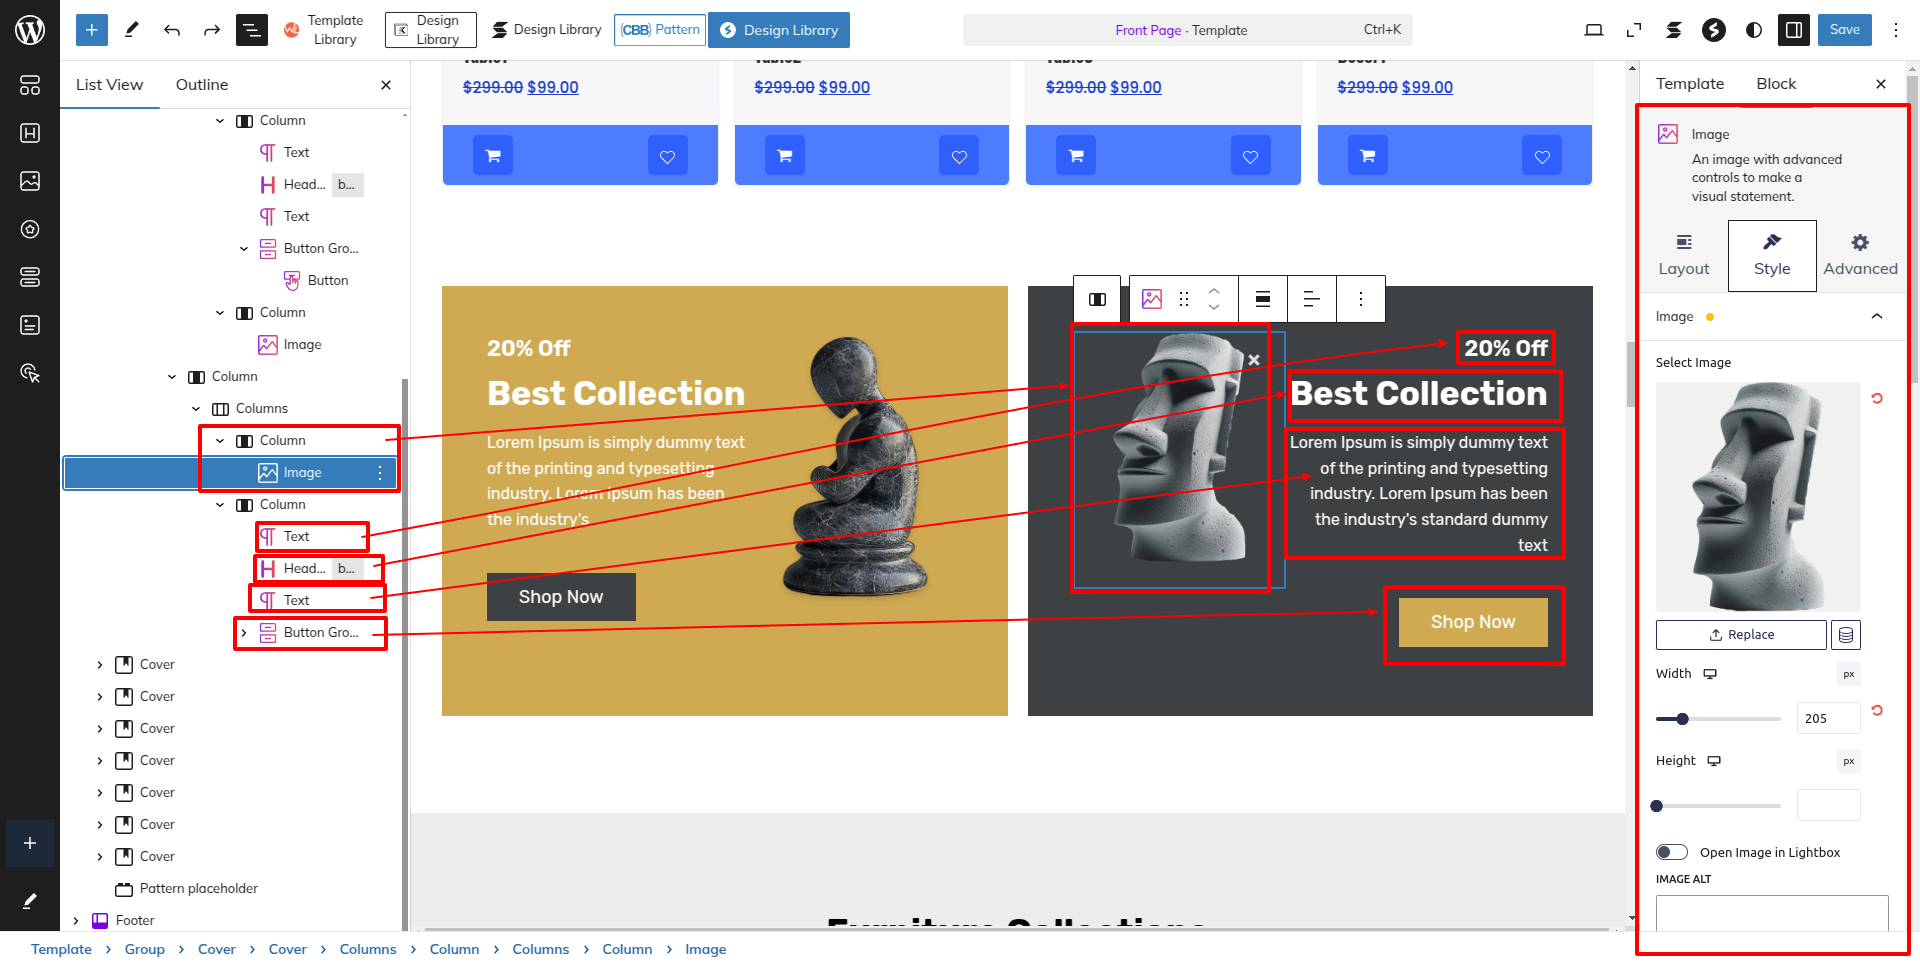
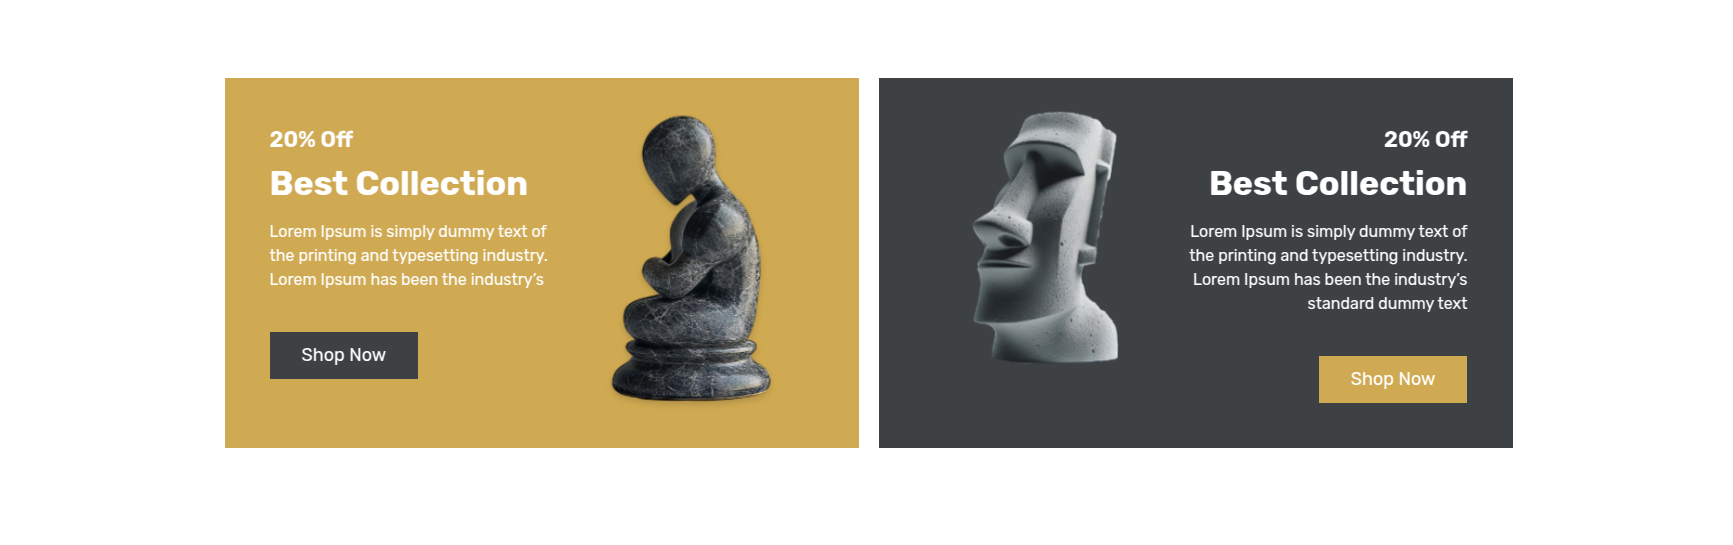
Setup Offer Banner Section
Set up the Offer Banner Section according to the instructions below.
Go to Dashboard Appearance Editor.
This is how you may set up and add the Offer Banner Section.
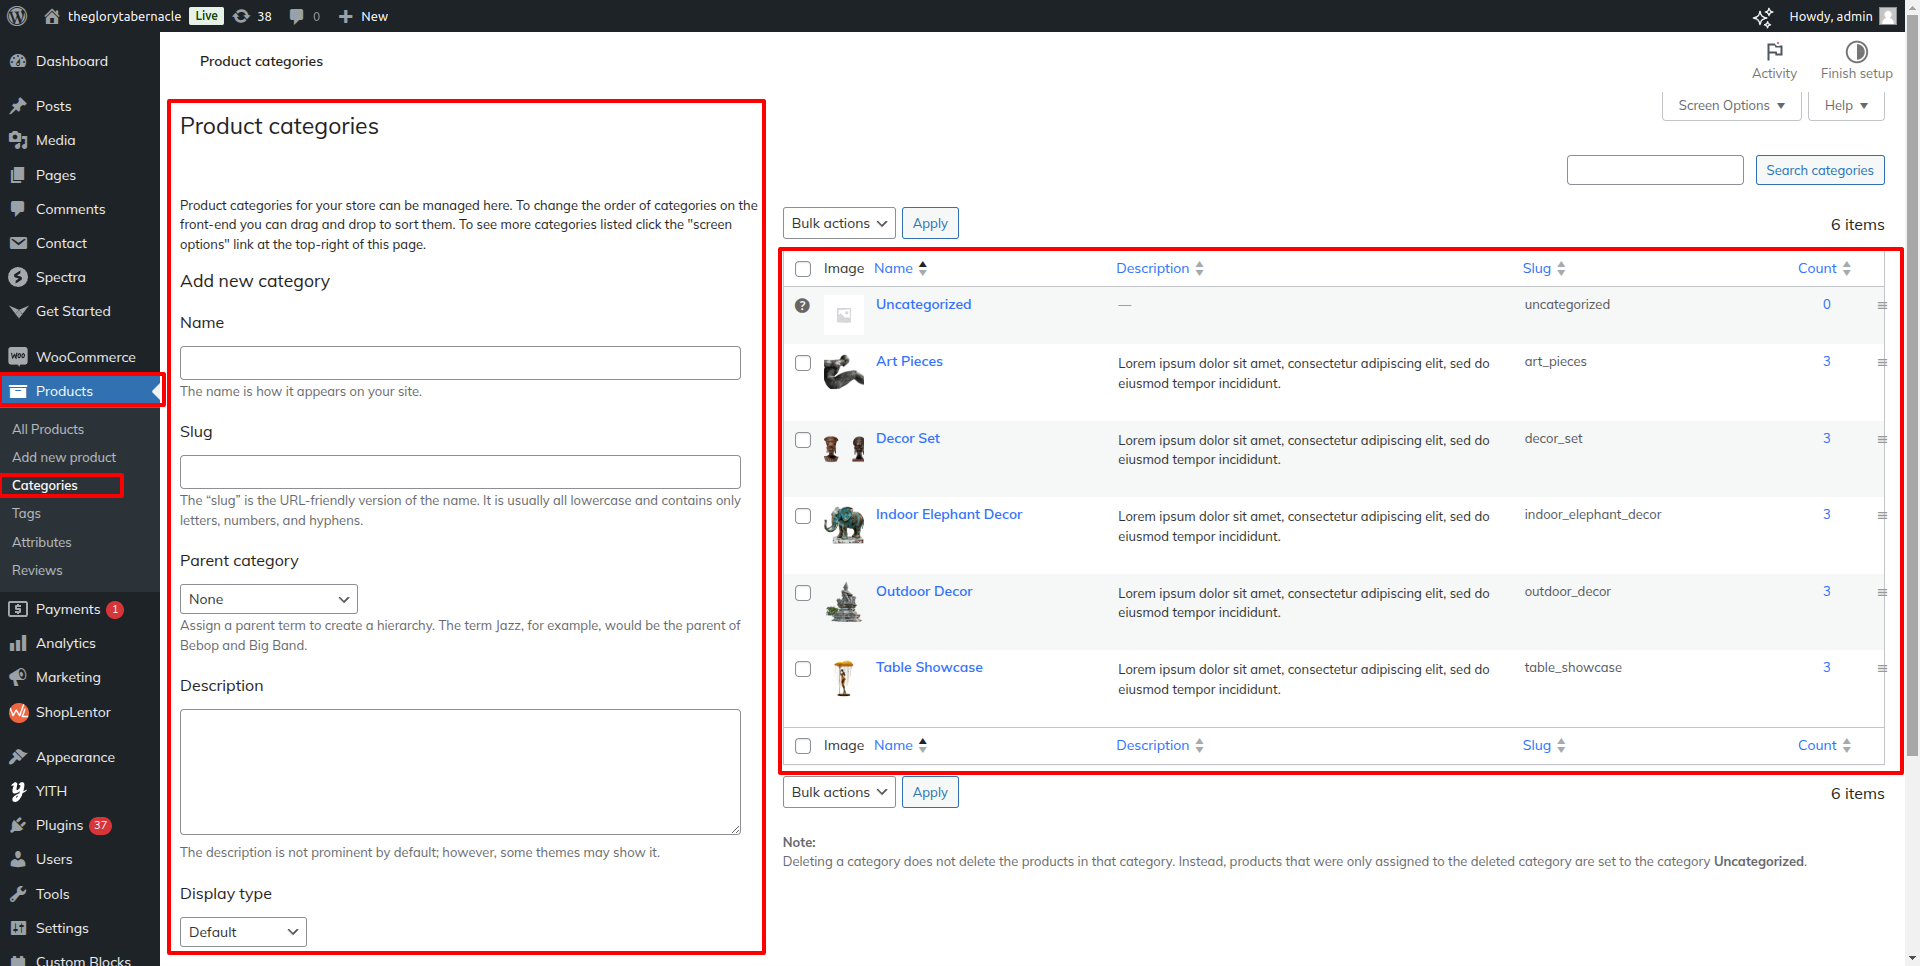
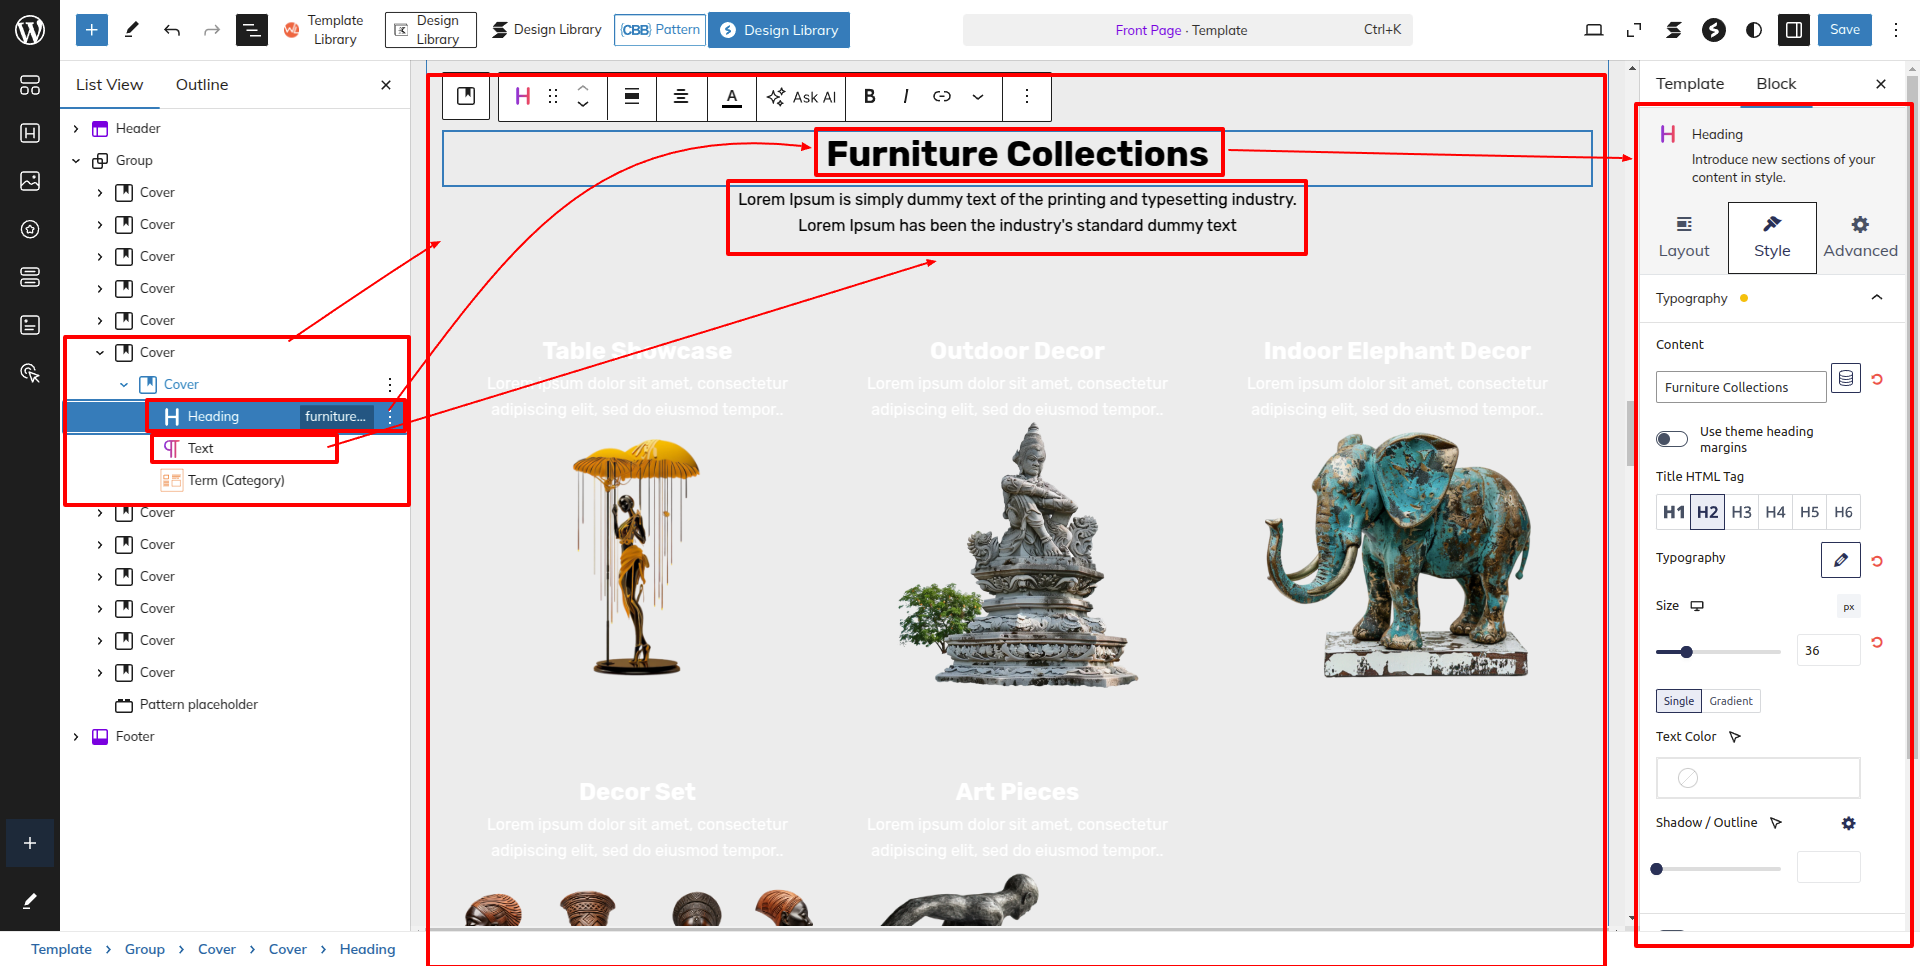
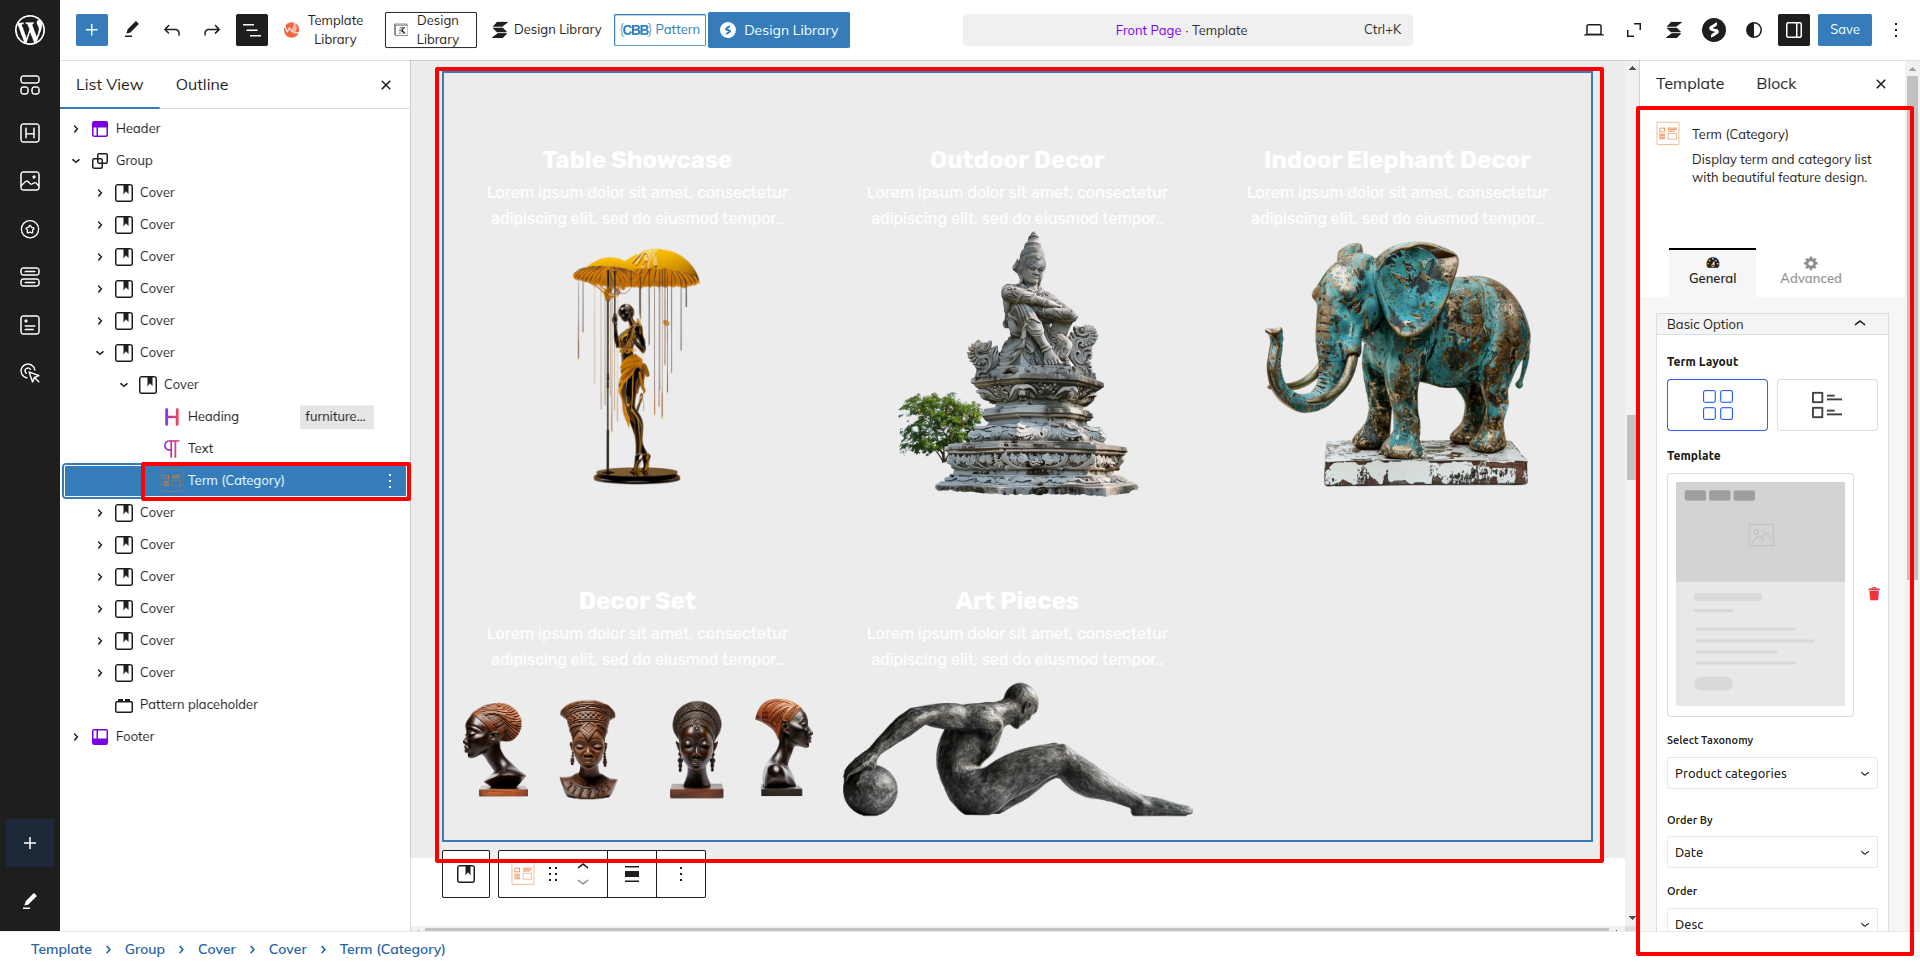
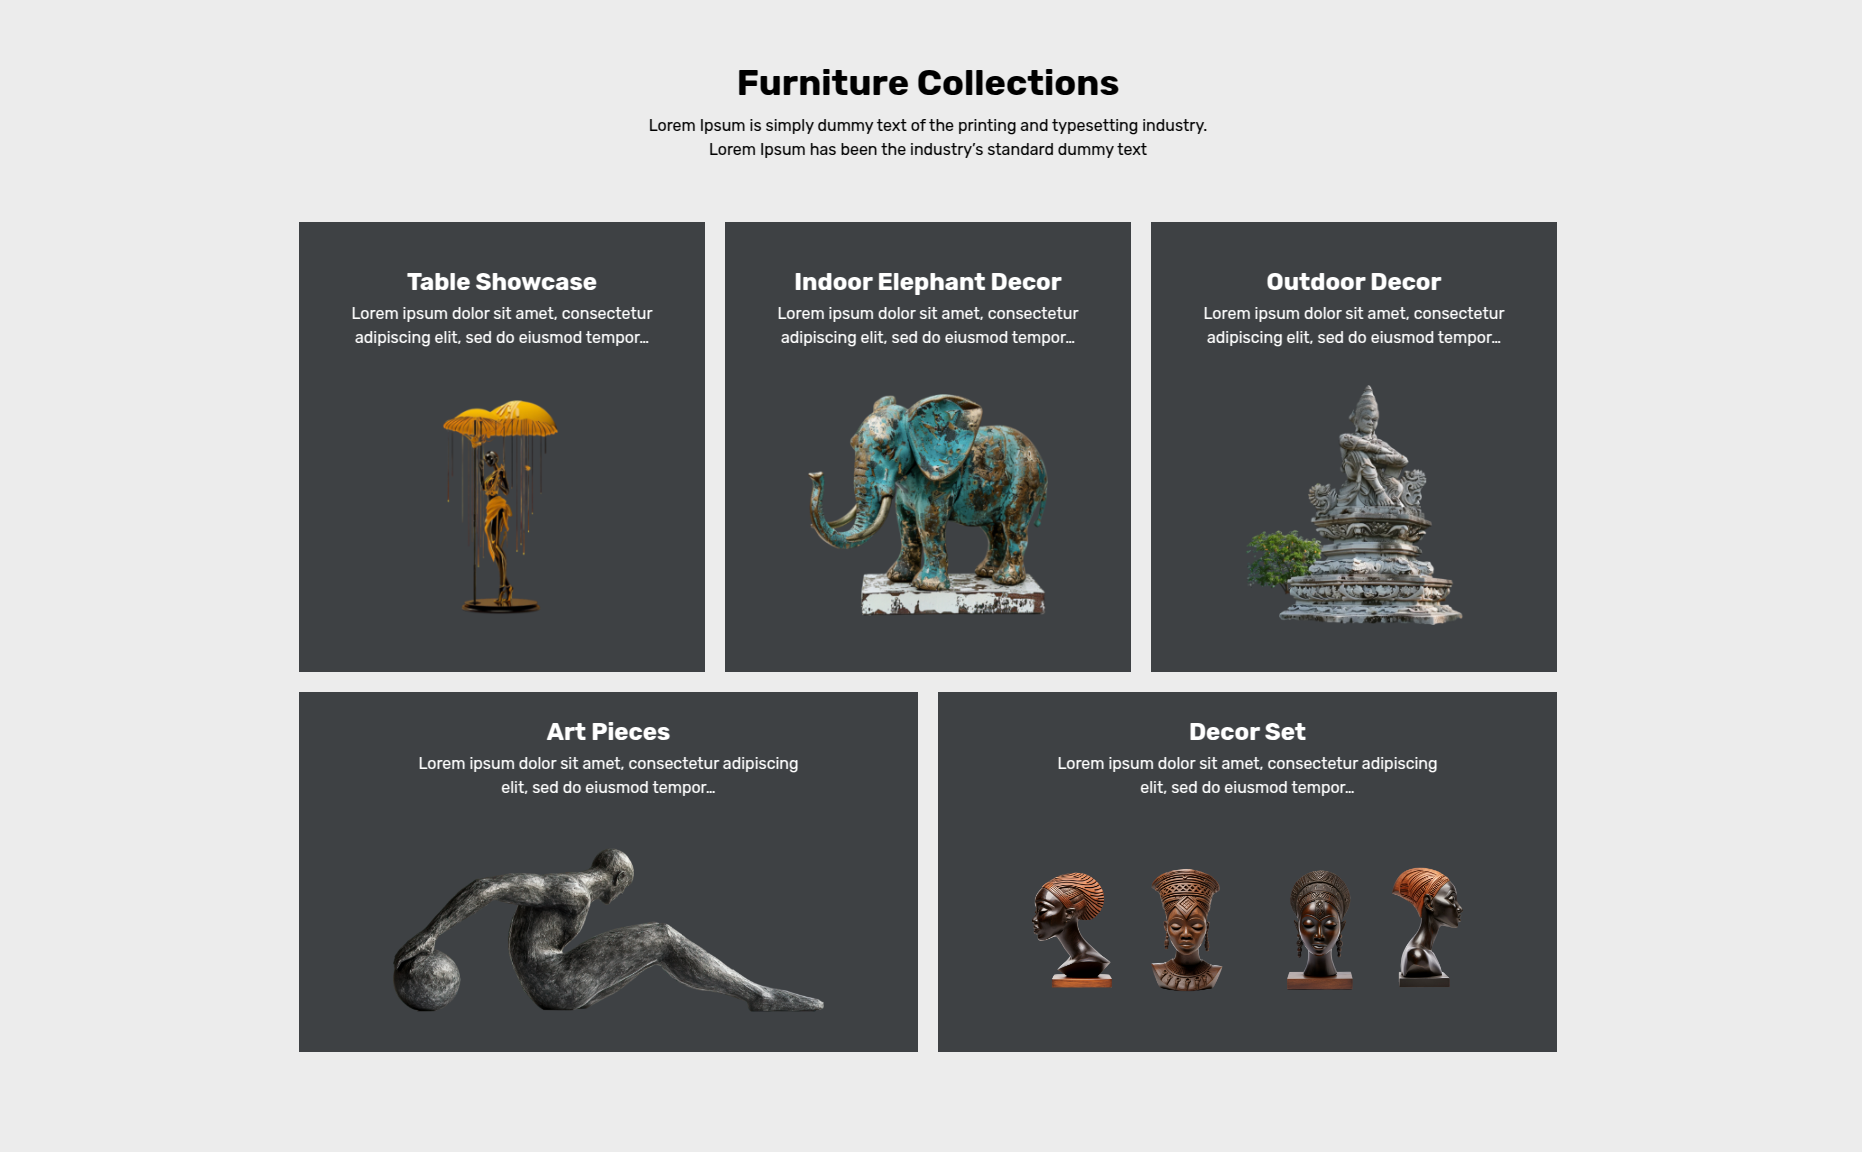
Setup Furniture Categories Section
Set up the Furniture Categories Section according to the instructions below.
First, Install The Woocommerce plugin. This plugin is generally used to integrate all the ecommerce store functionalities and features with your wordpress site.
Dashboard Products Categories Add New
Now Add the products by Following the steps in the Best Seller Section given above, and assign the category to the products as per your Need.
As seen in the screenshot, Enter the title, Description, Short Description.
This is how you may set up The Furniture Categories Section.
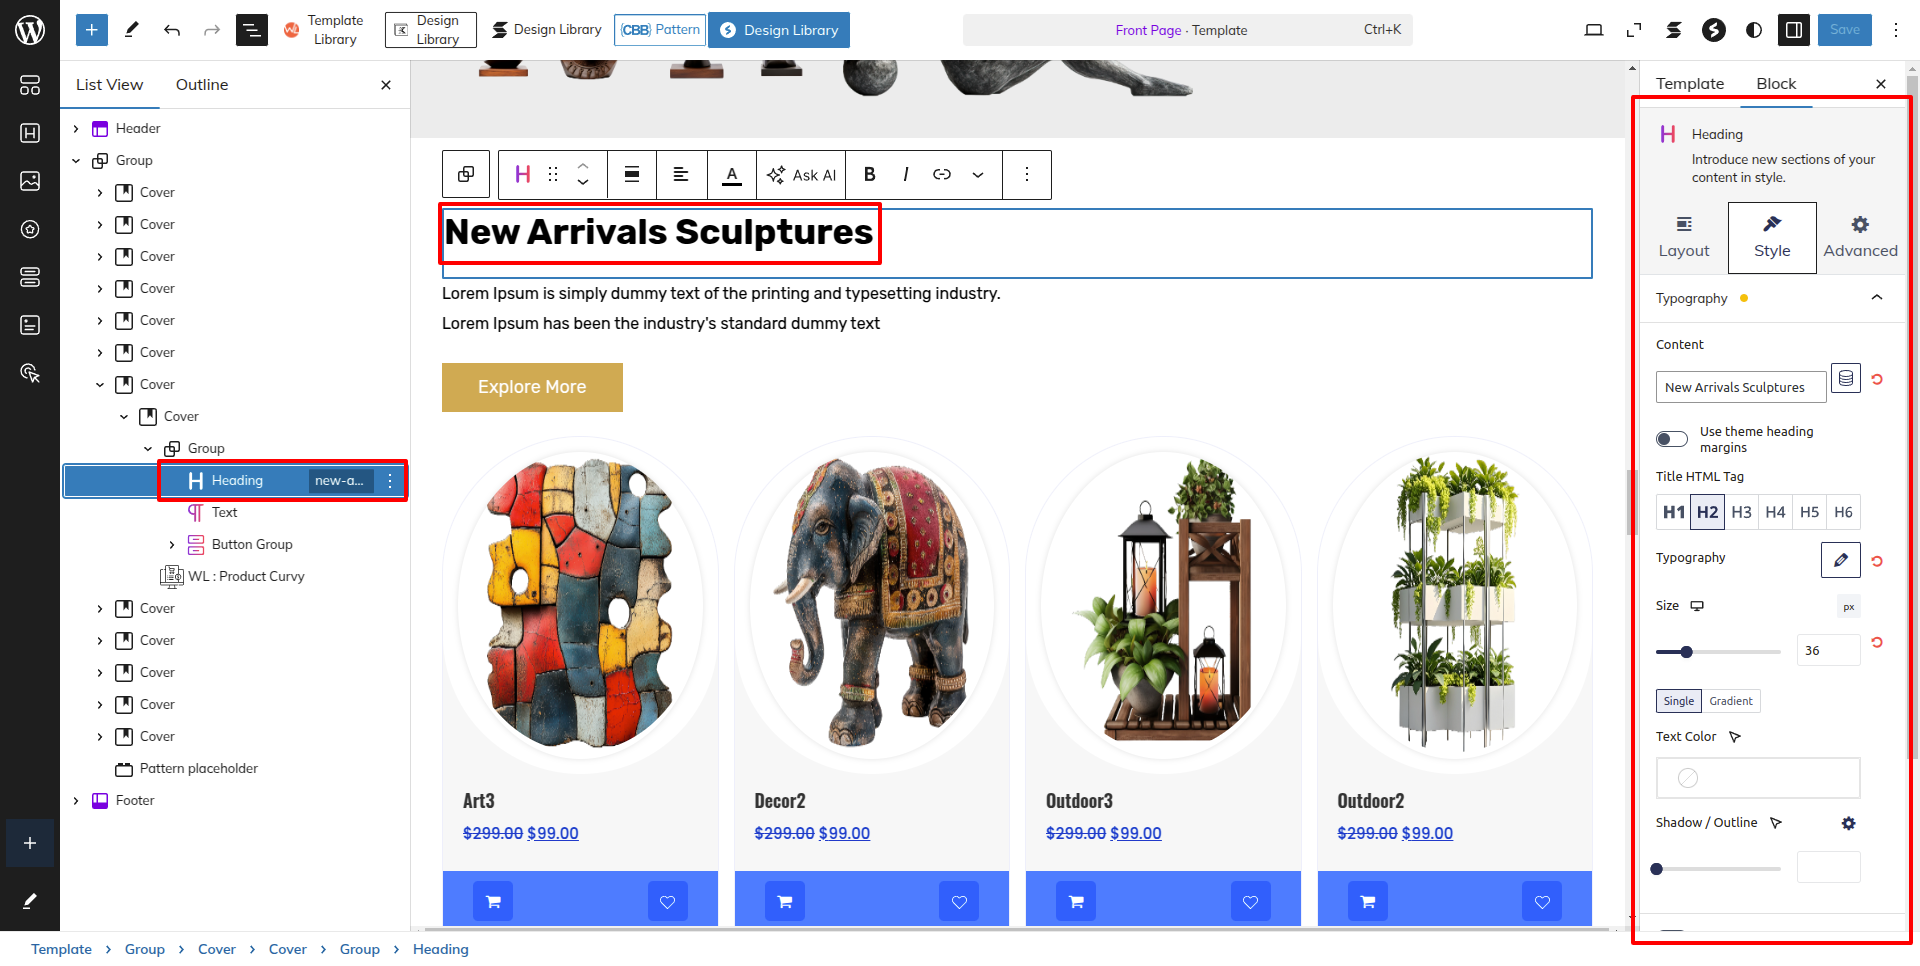
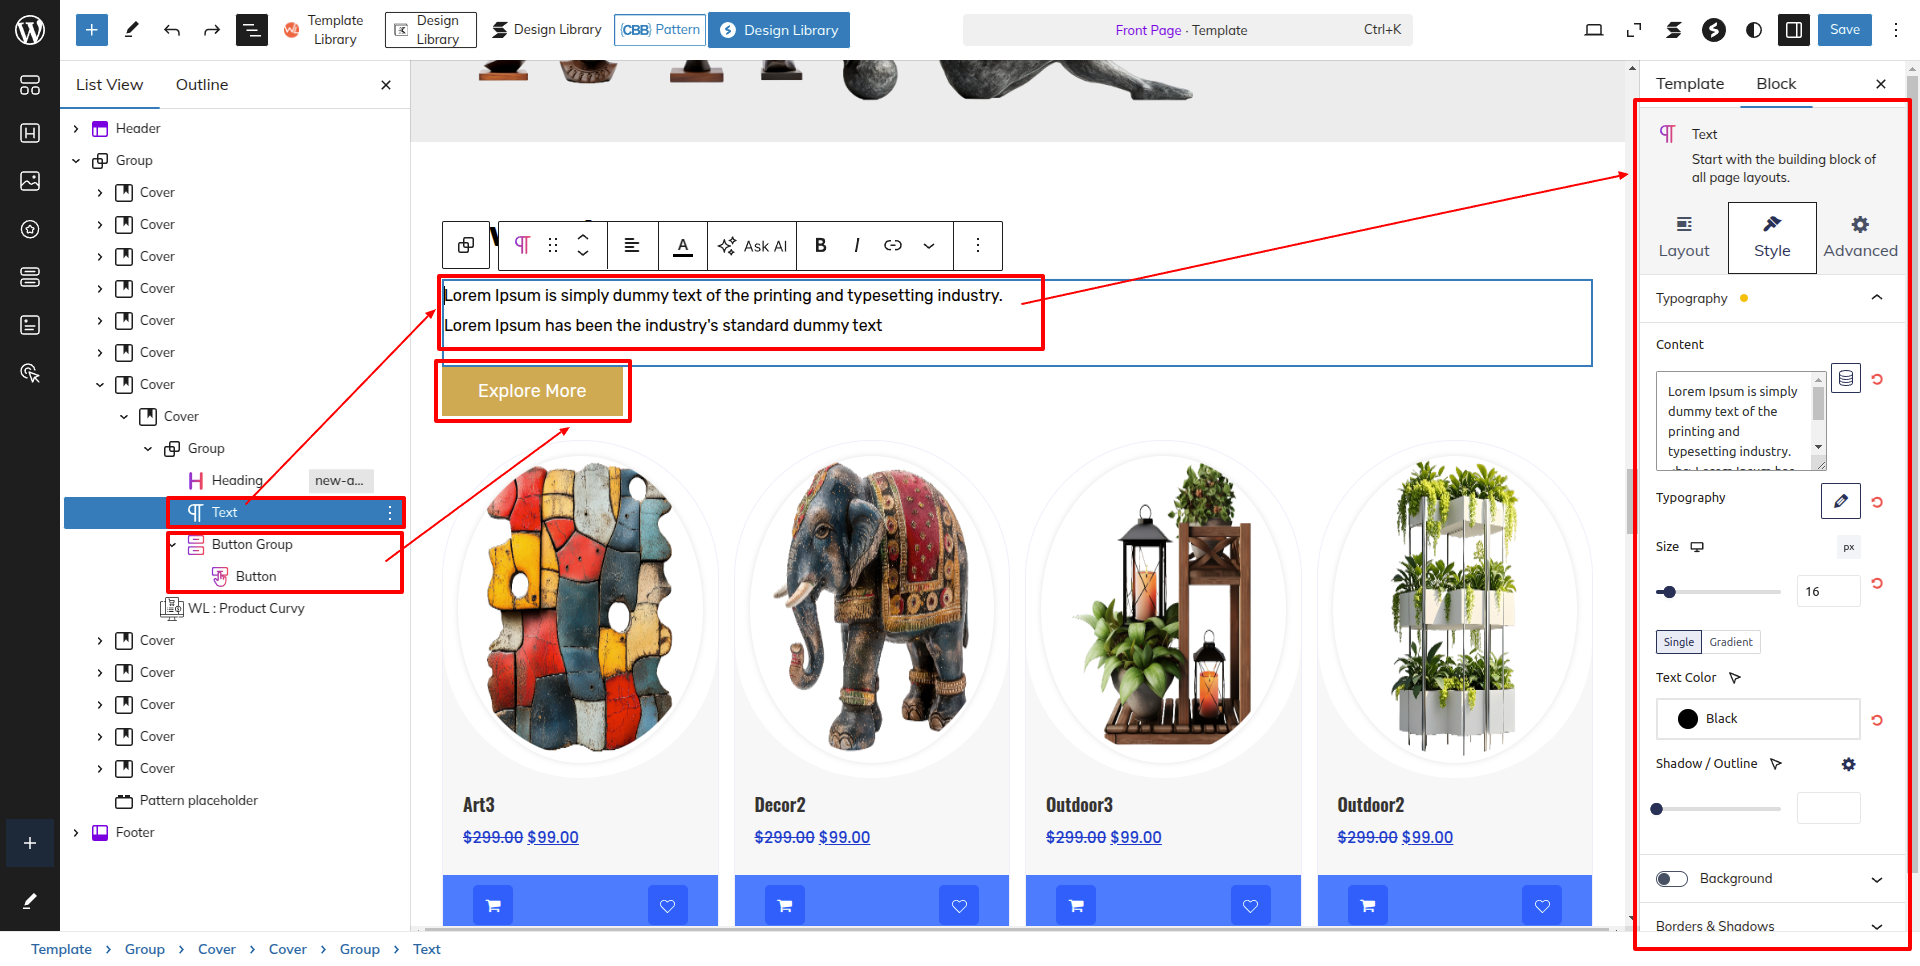
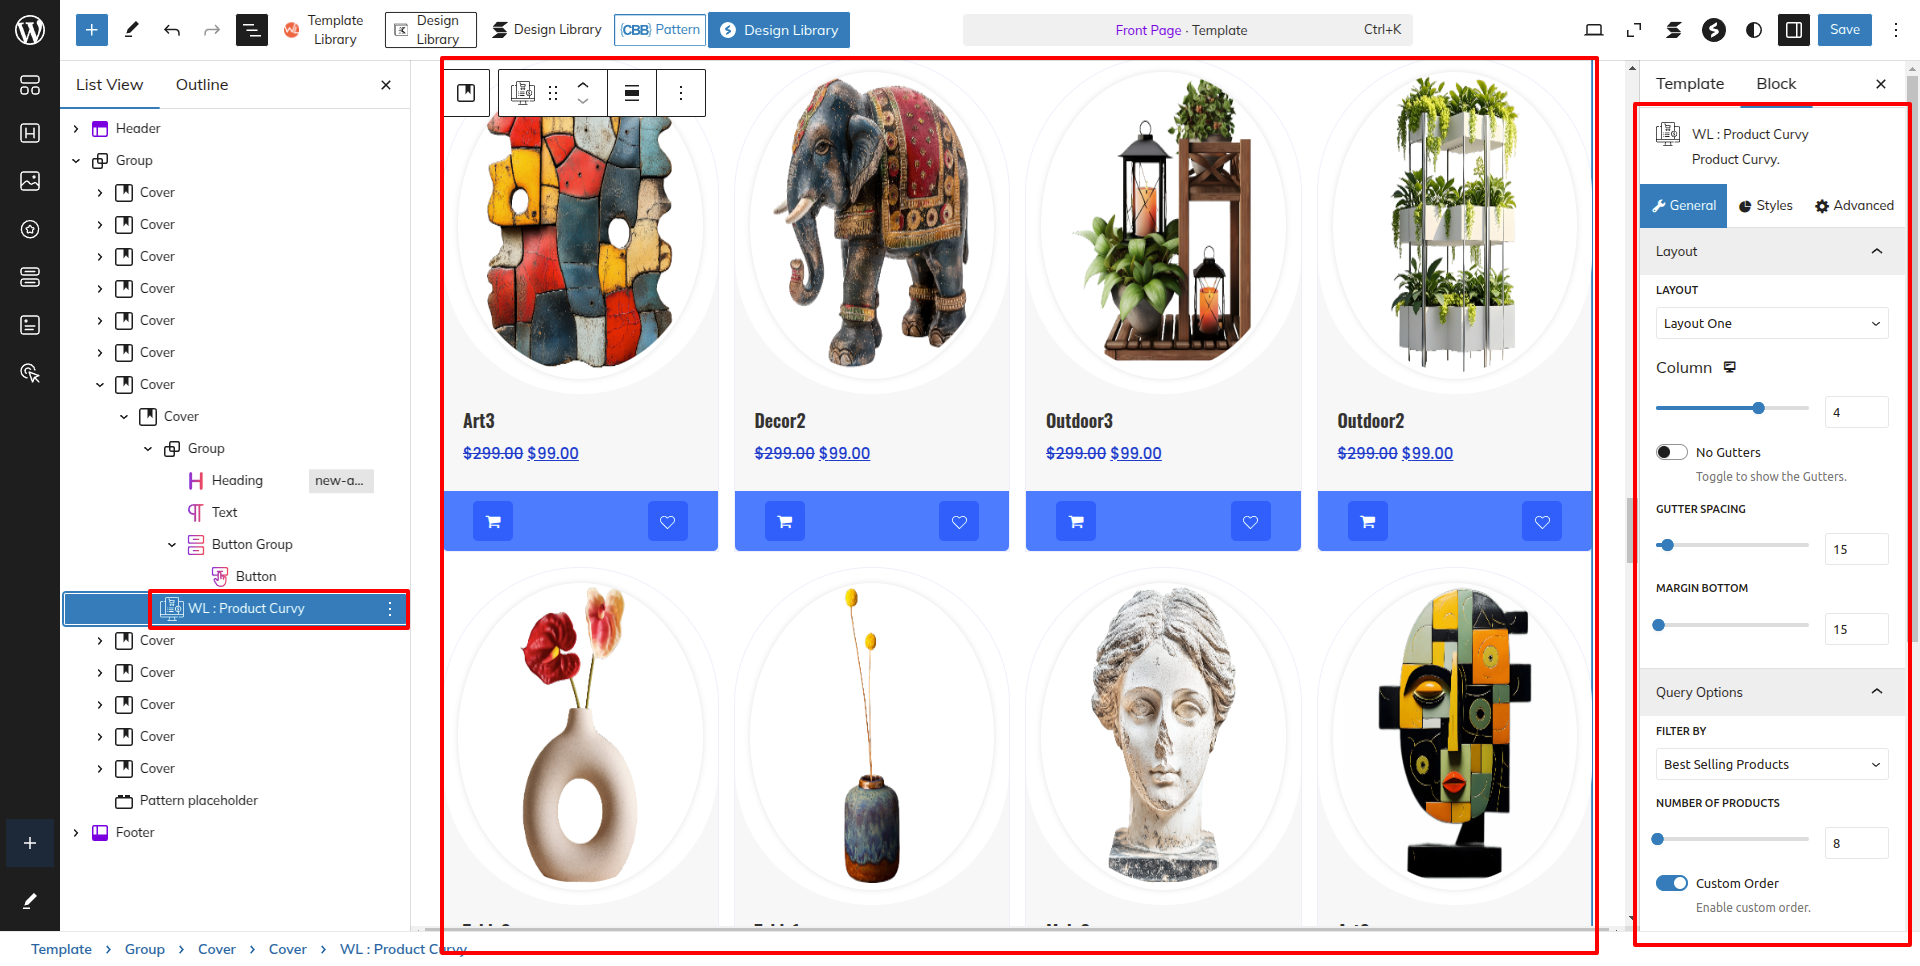
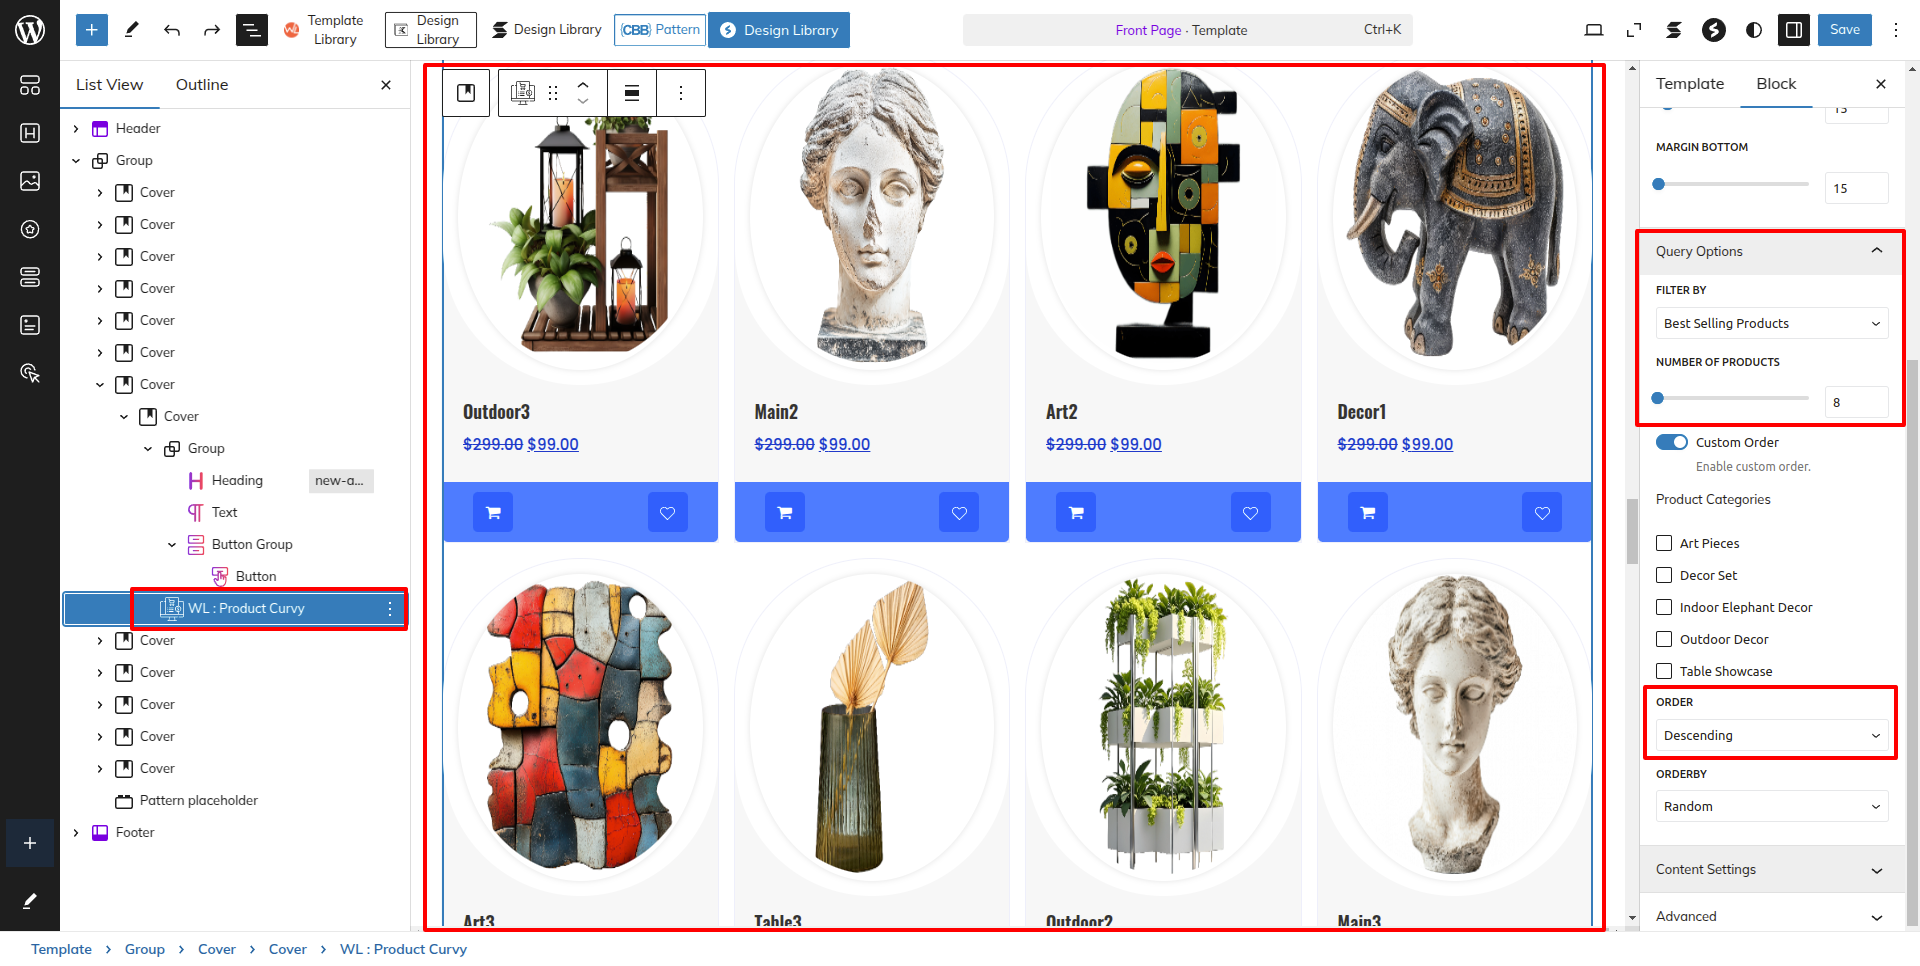
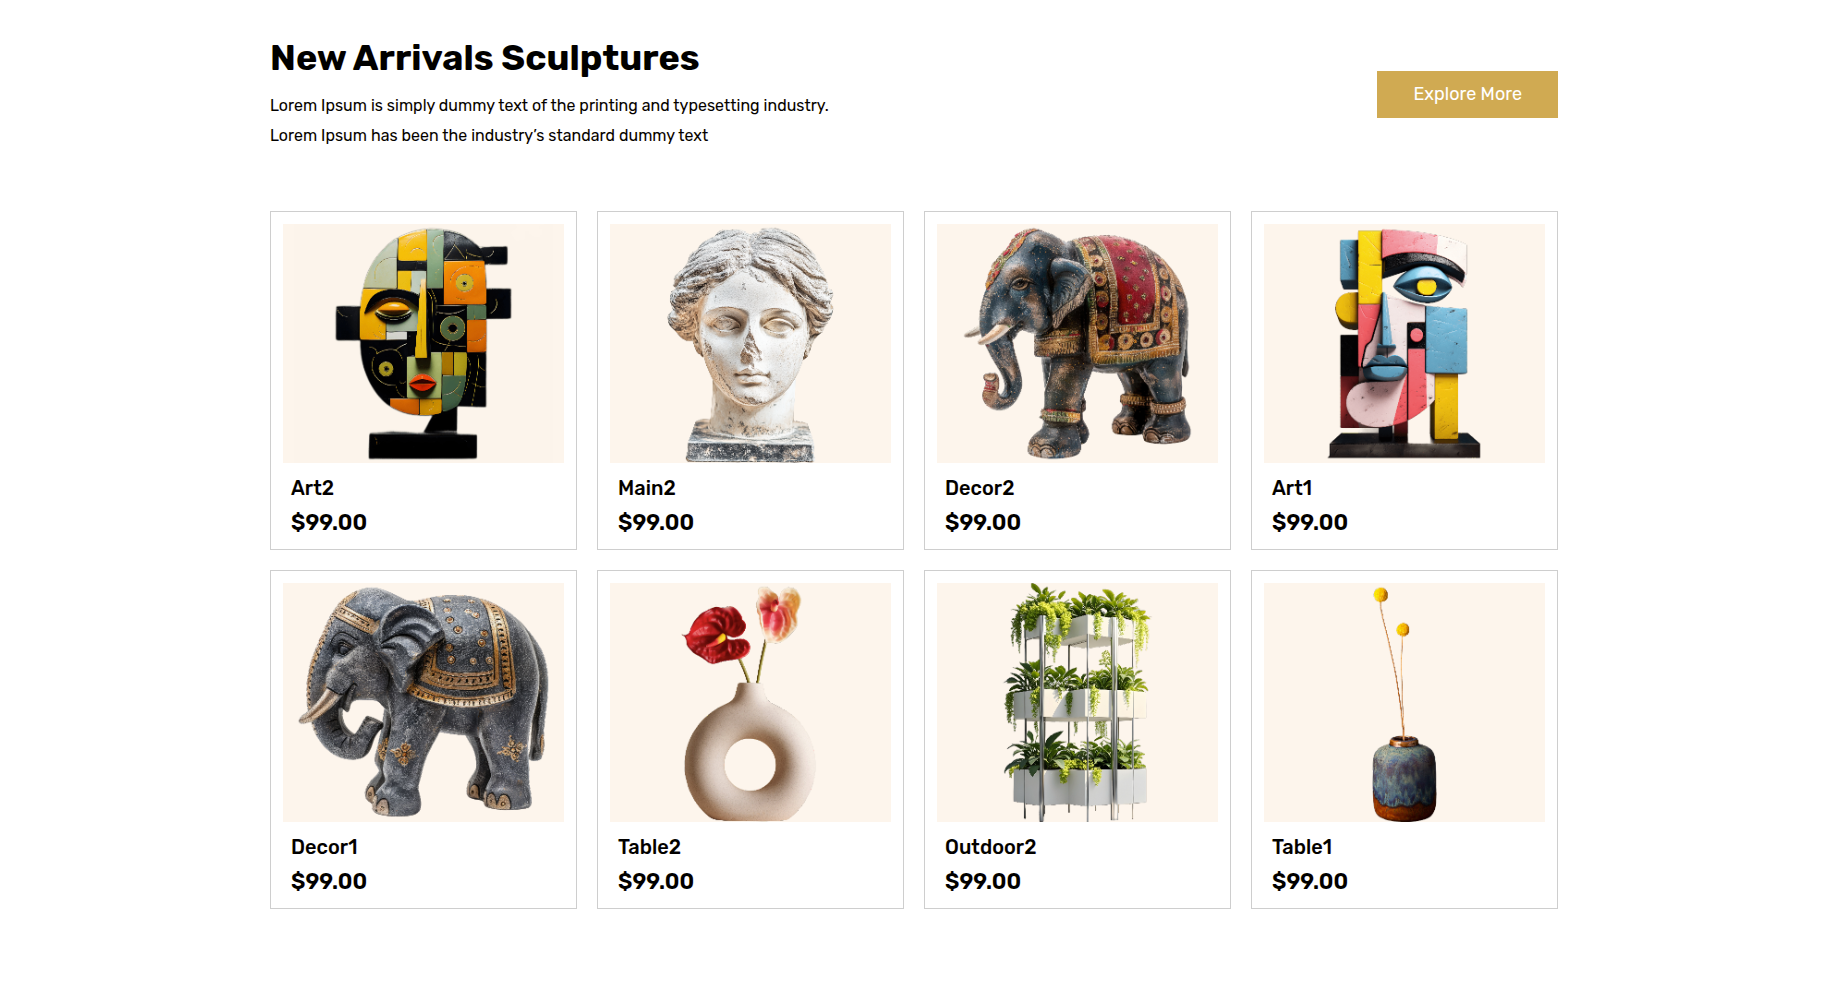
Setup New Arrivals Section
To start setting up the New Arrivals Section on your WordPress site,
Follow the Steps Given for the Best Seller Furniture Section given Above to create the Products and Assign them to the products Categories.
Now to Manage the Content for the section, Navigate to Appearance Editor
To View Latest Arrived Products, all you have to do is to Select the Order to show the Products to "Descending" option from the dropdown.
This is how you may set up and add the New Arrivals Section.
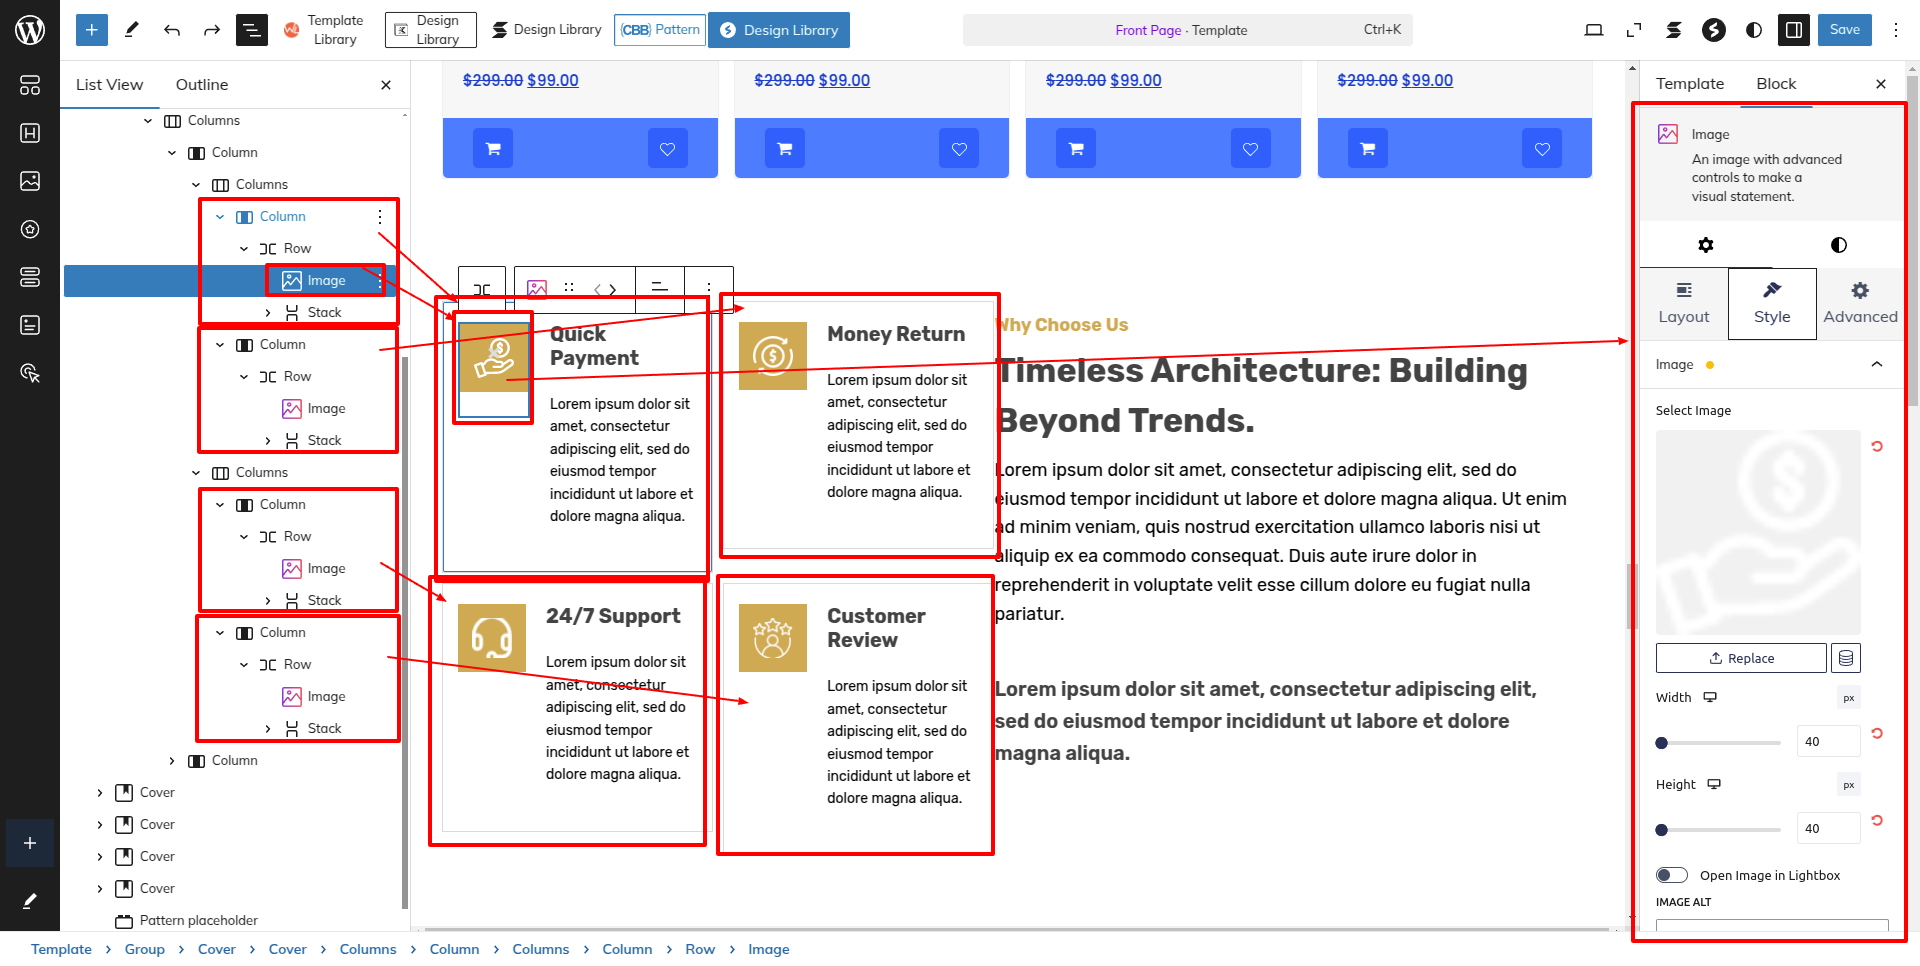
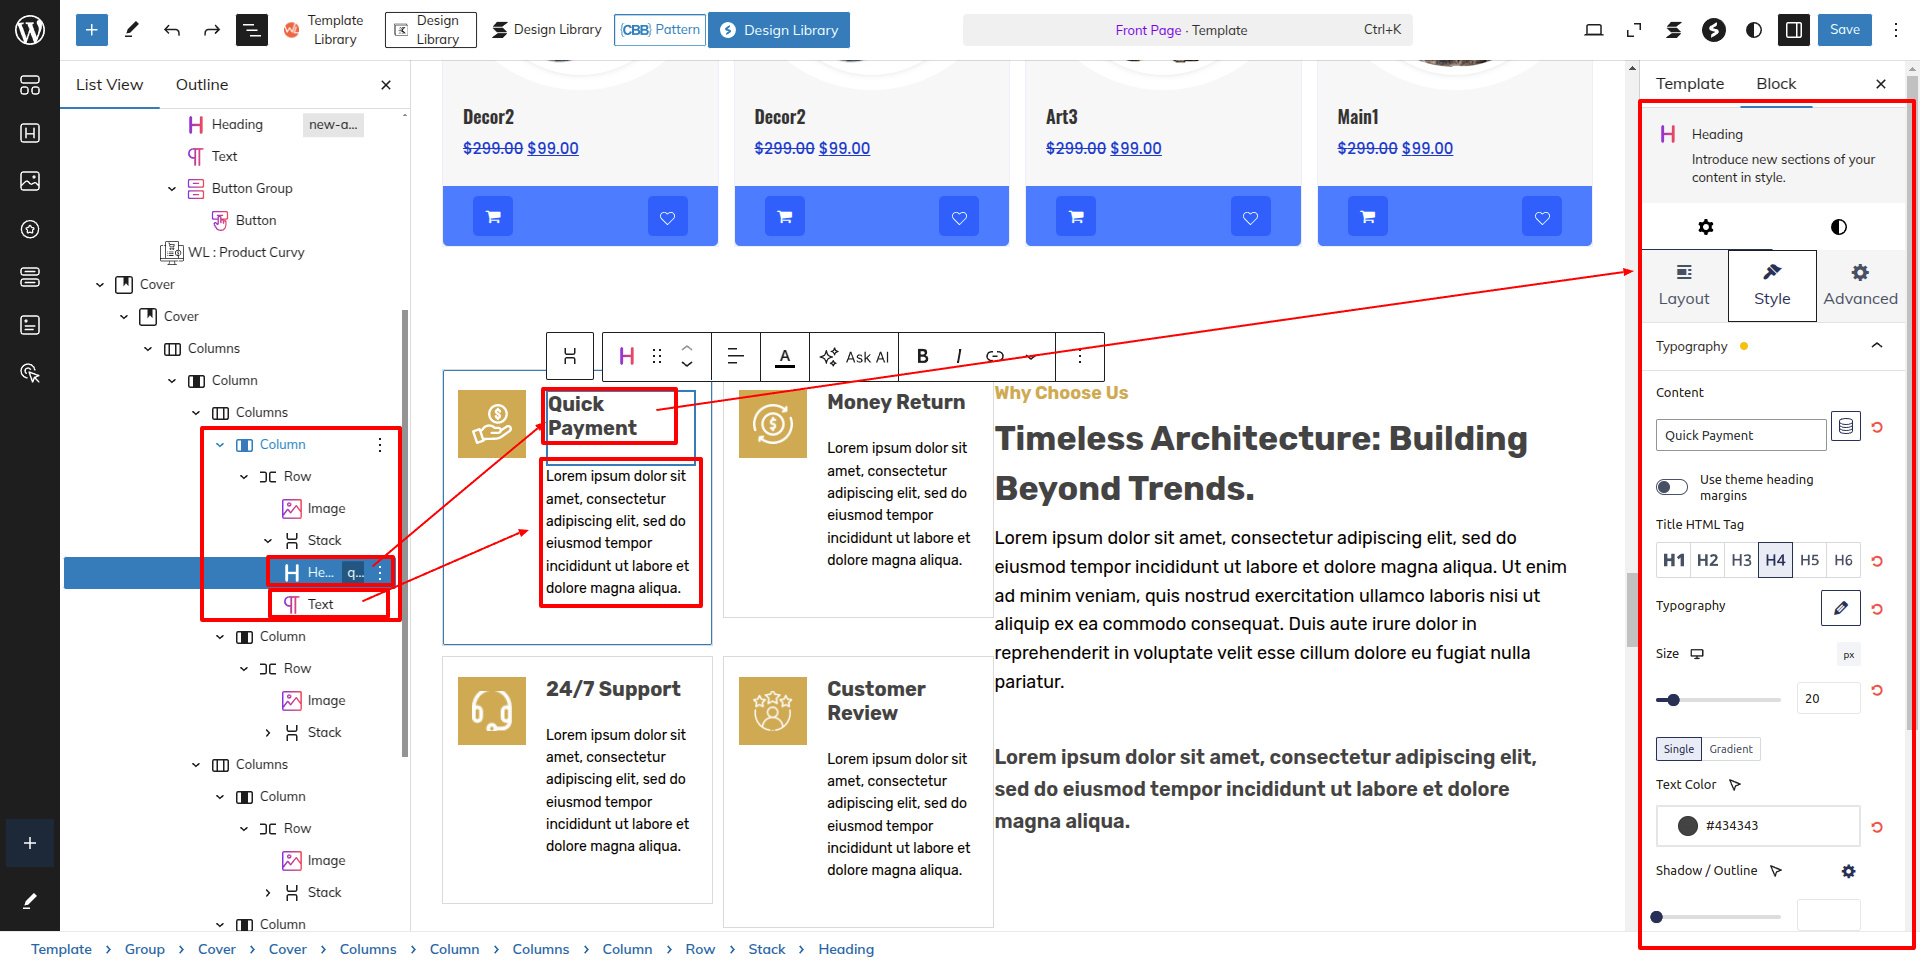
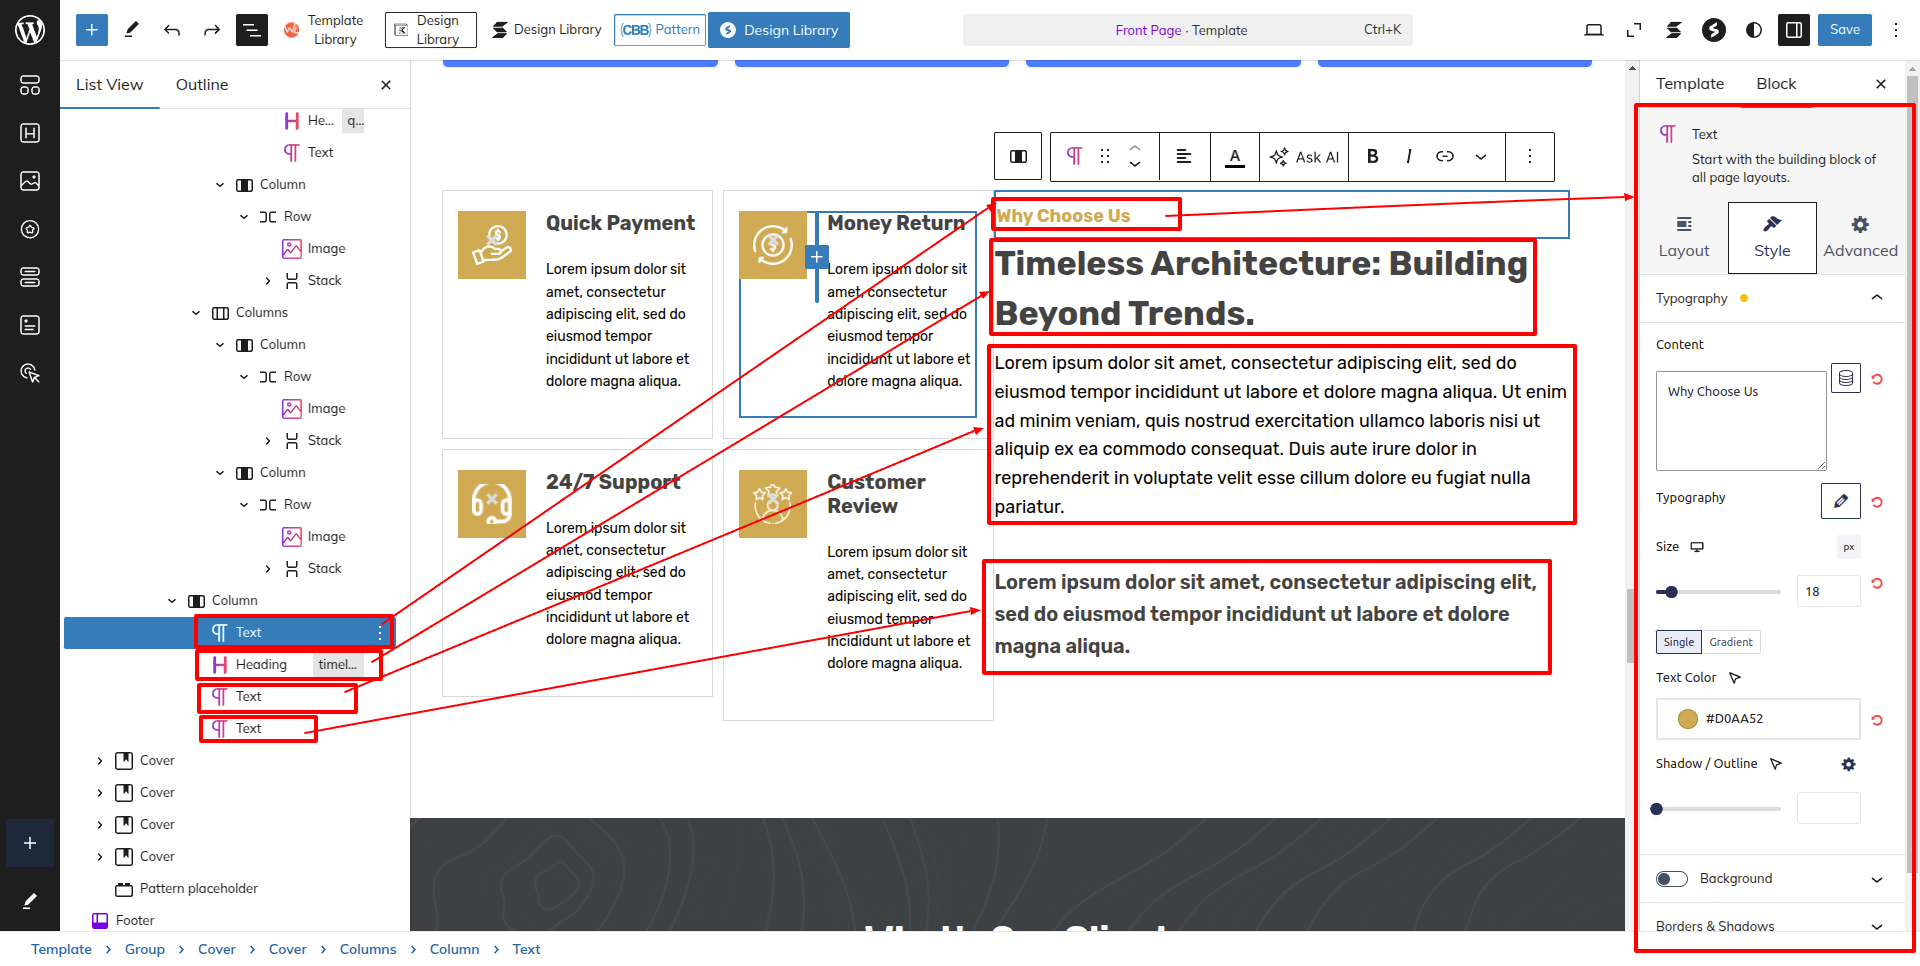
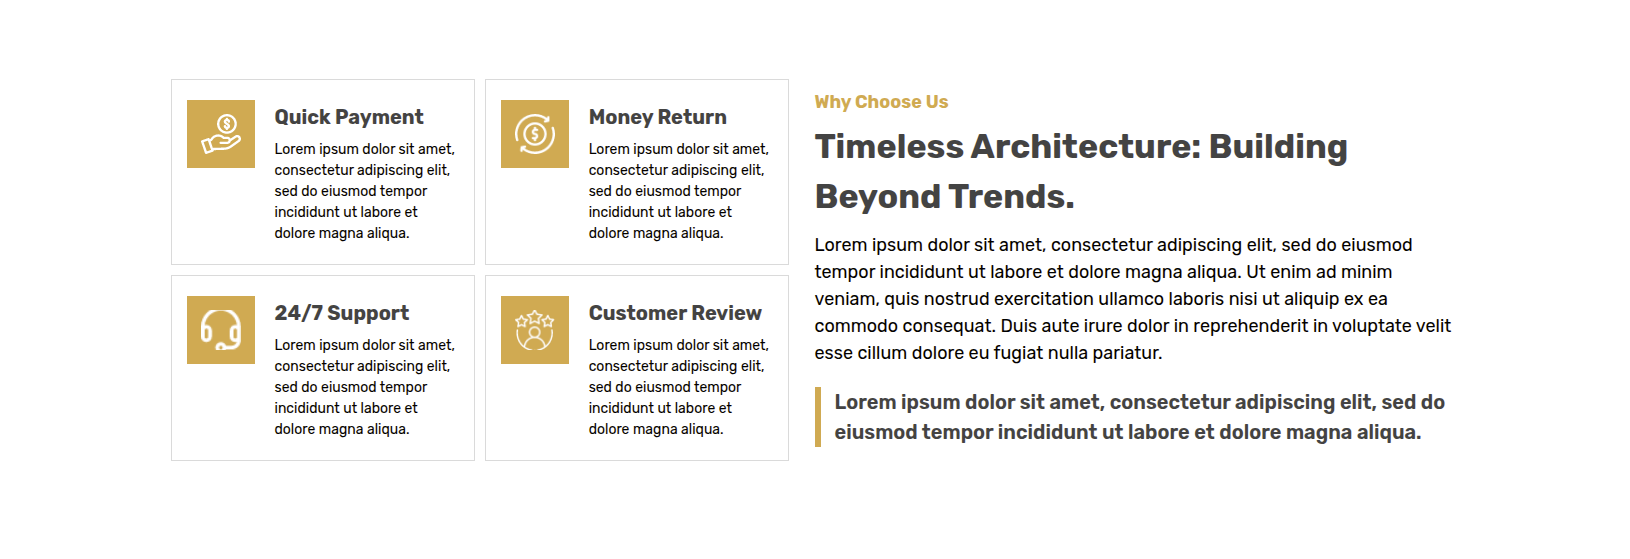
Setup Why Choose Us Section
Set up the Why Choose Us Section according to the instructions below.
Go to the Dashboard Appearance Editor.
This is how you may set up and add the Why Choose Us Section.
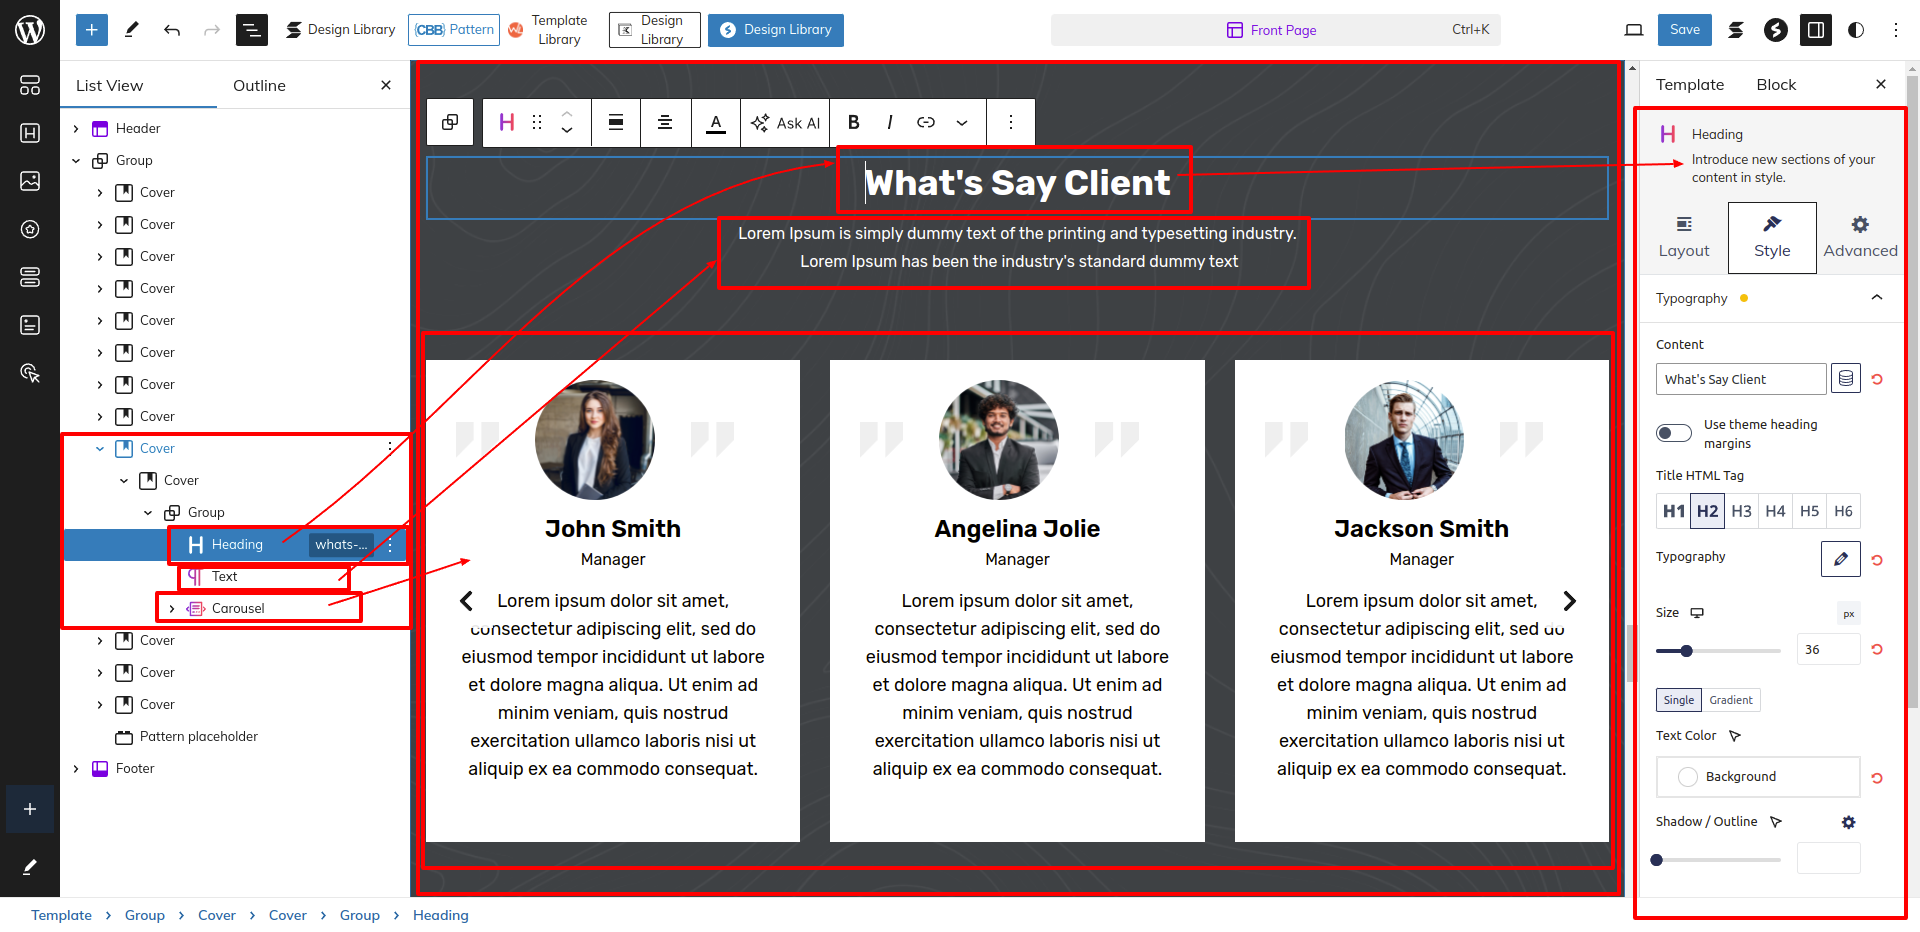
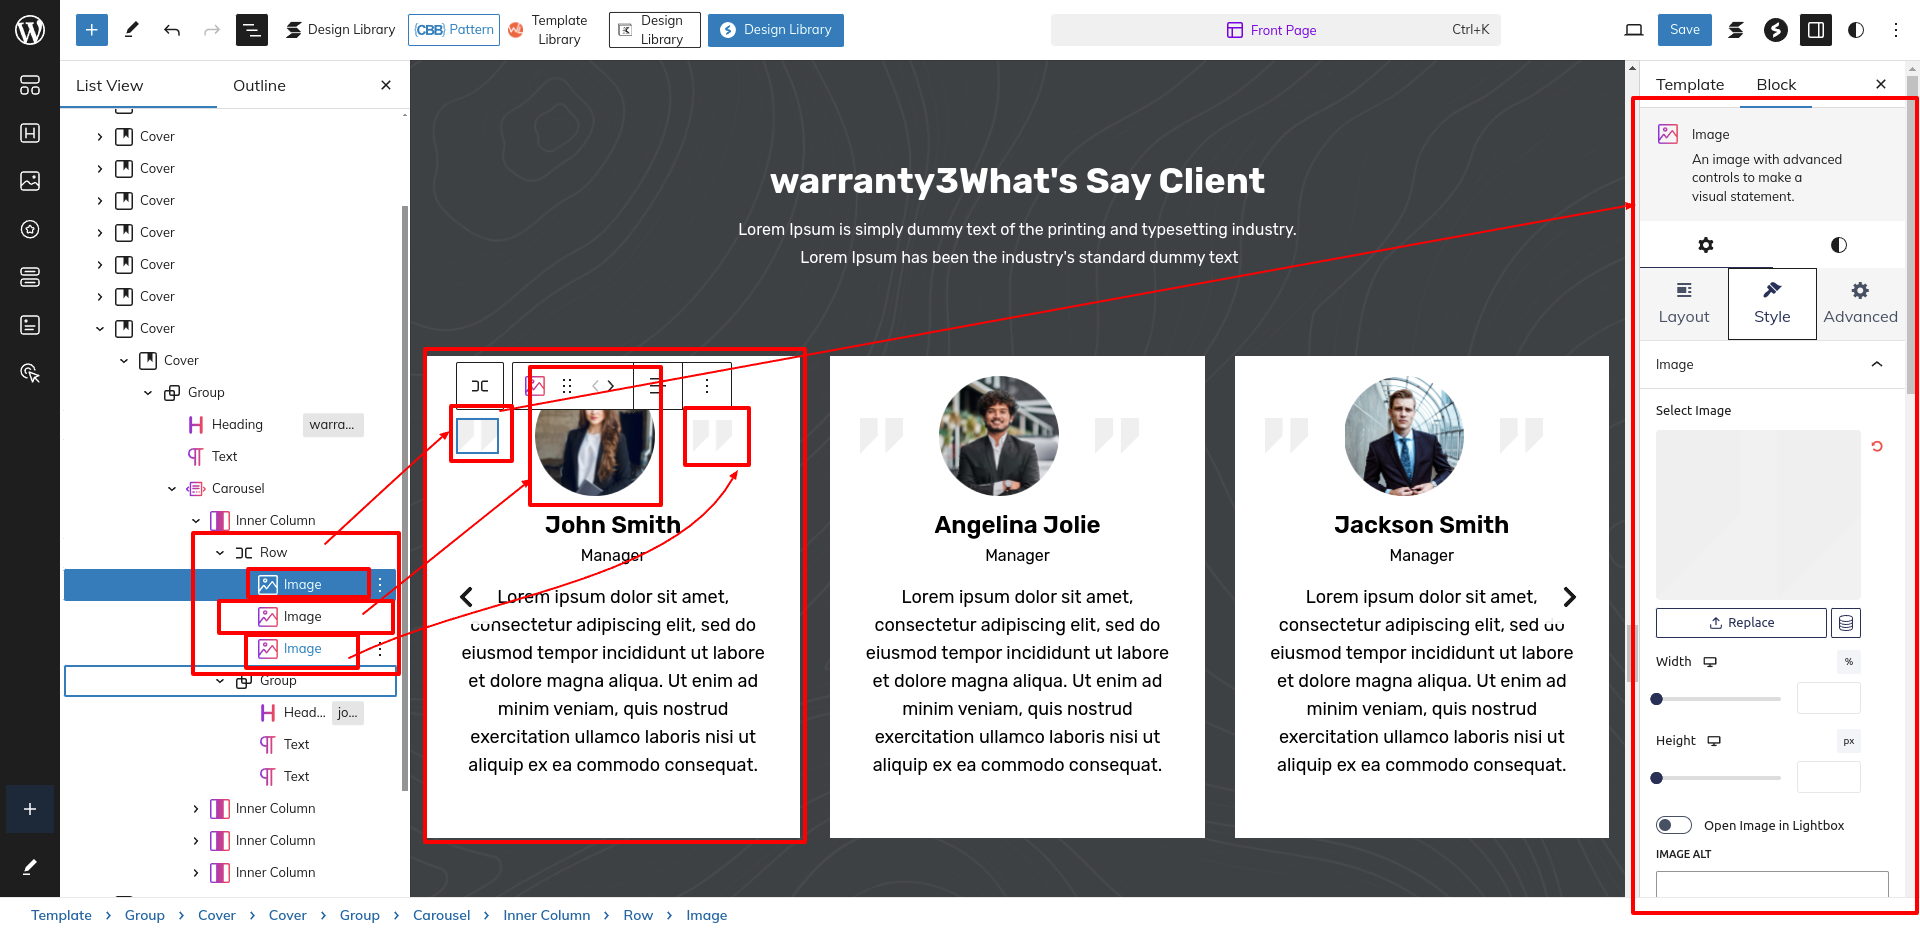
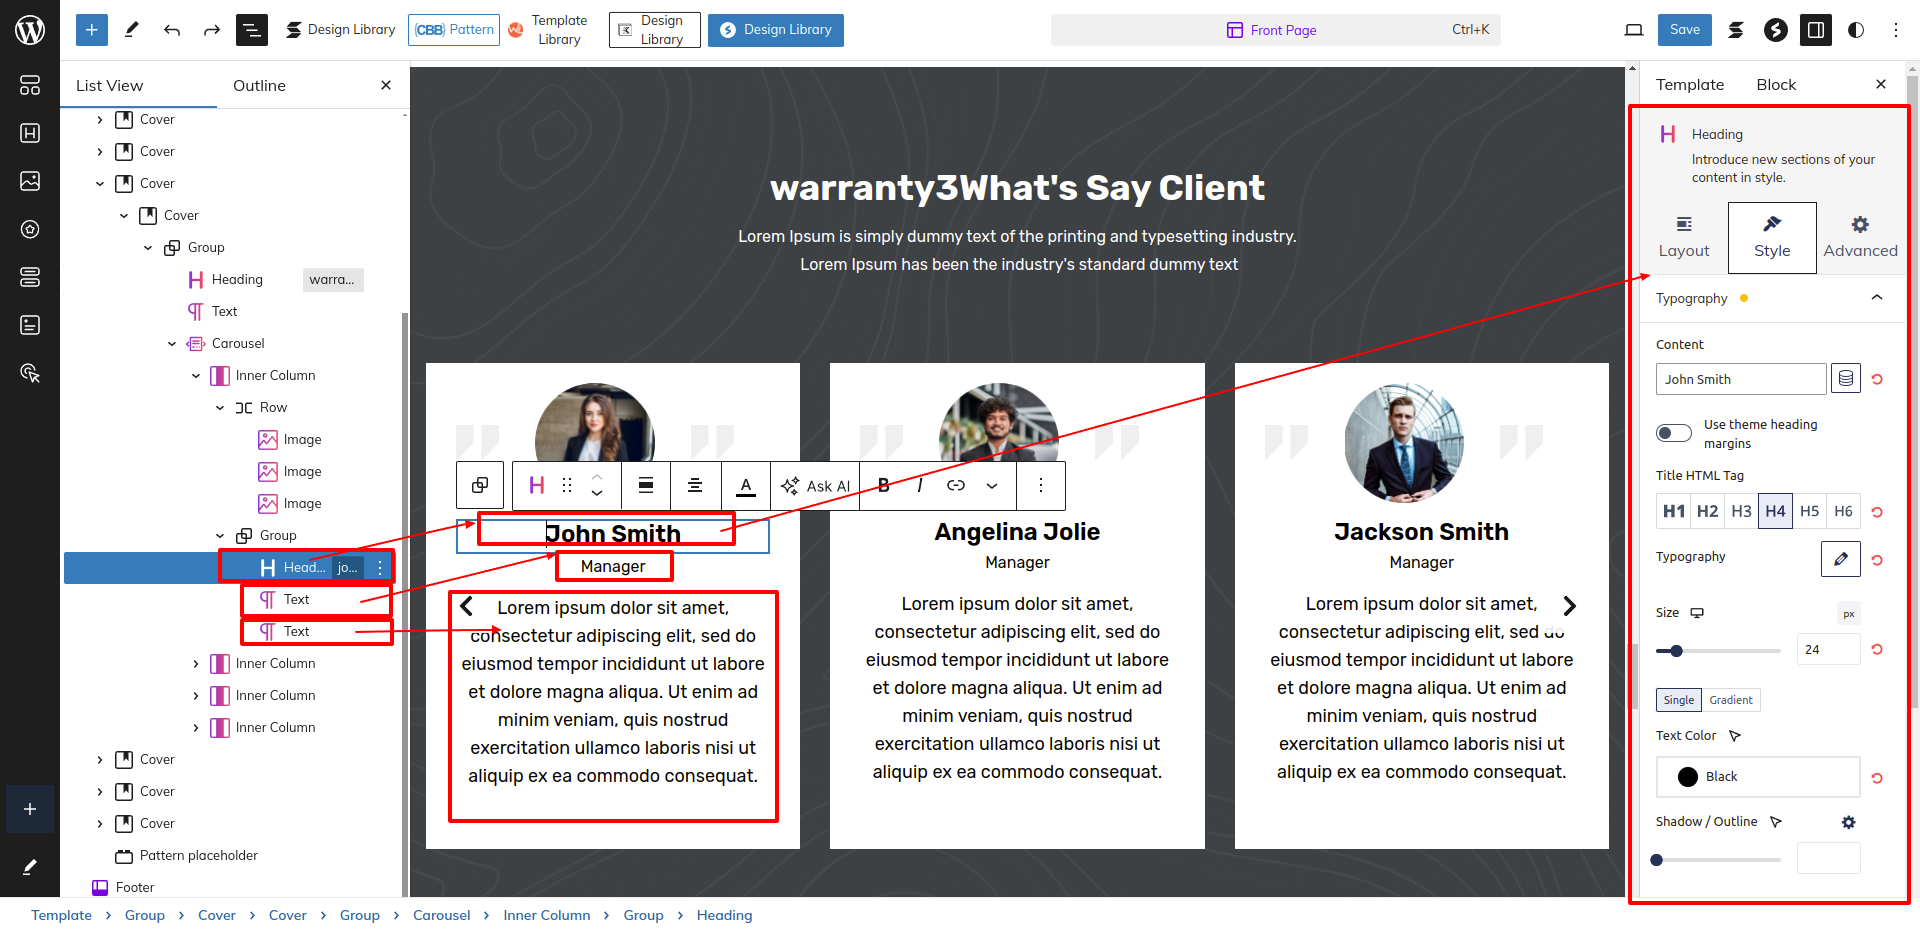
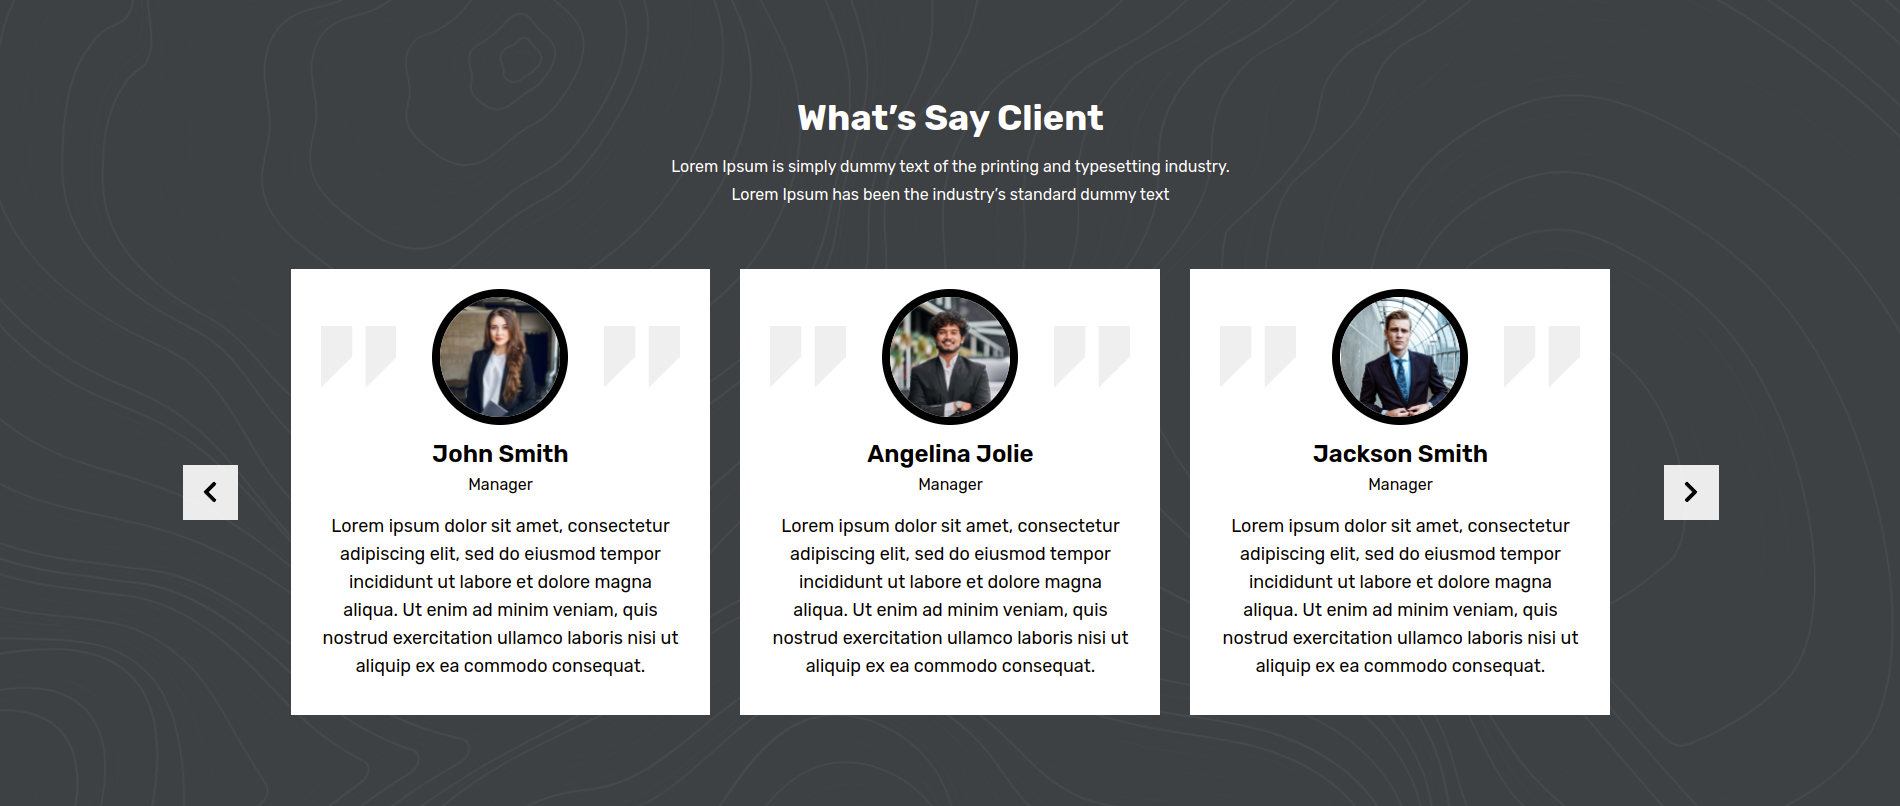
Setup Testimonials Section
Set up the Testimonials Section according to the instructions below.
As seen in the screenshot, enter the title, description and feature image.
This is how you may set up and add the Testimonials Section.
Setup Newsletter Section
Set up the Newsletter Section according to the instructions below.
As seen in the screenshot, enter the title, description and feature image.
This is how you may set up and add the Newsletter Section.
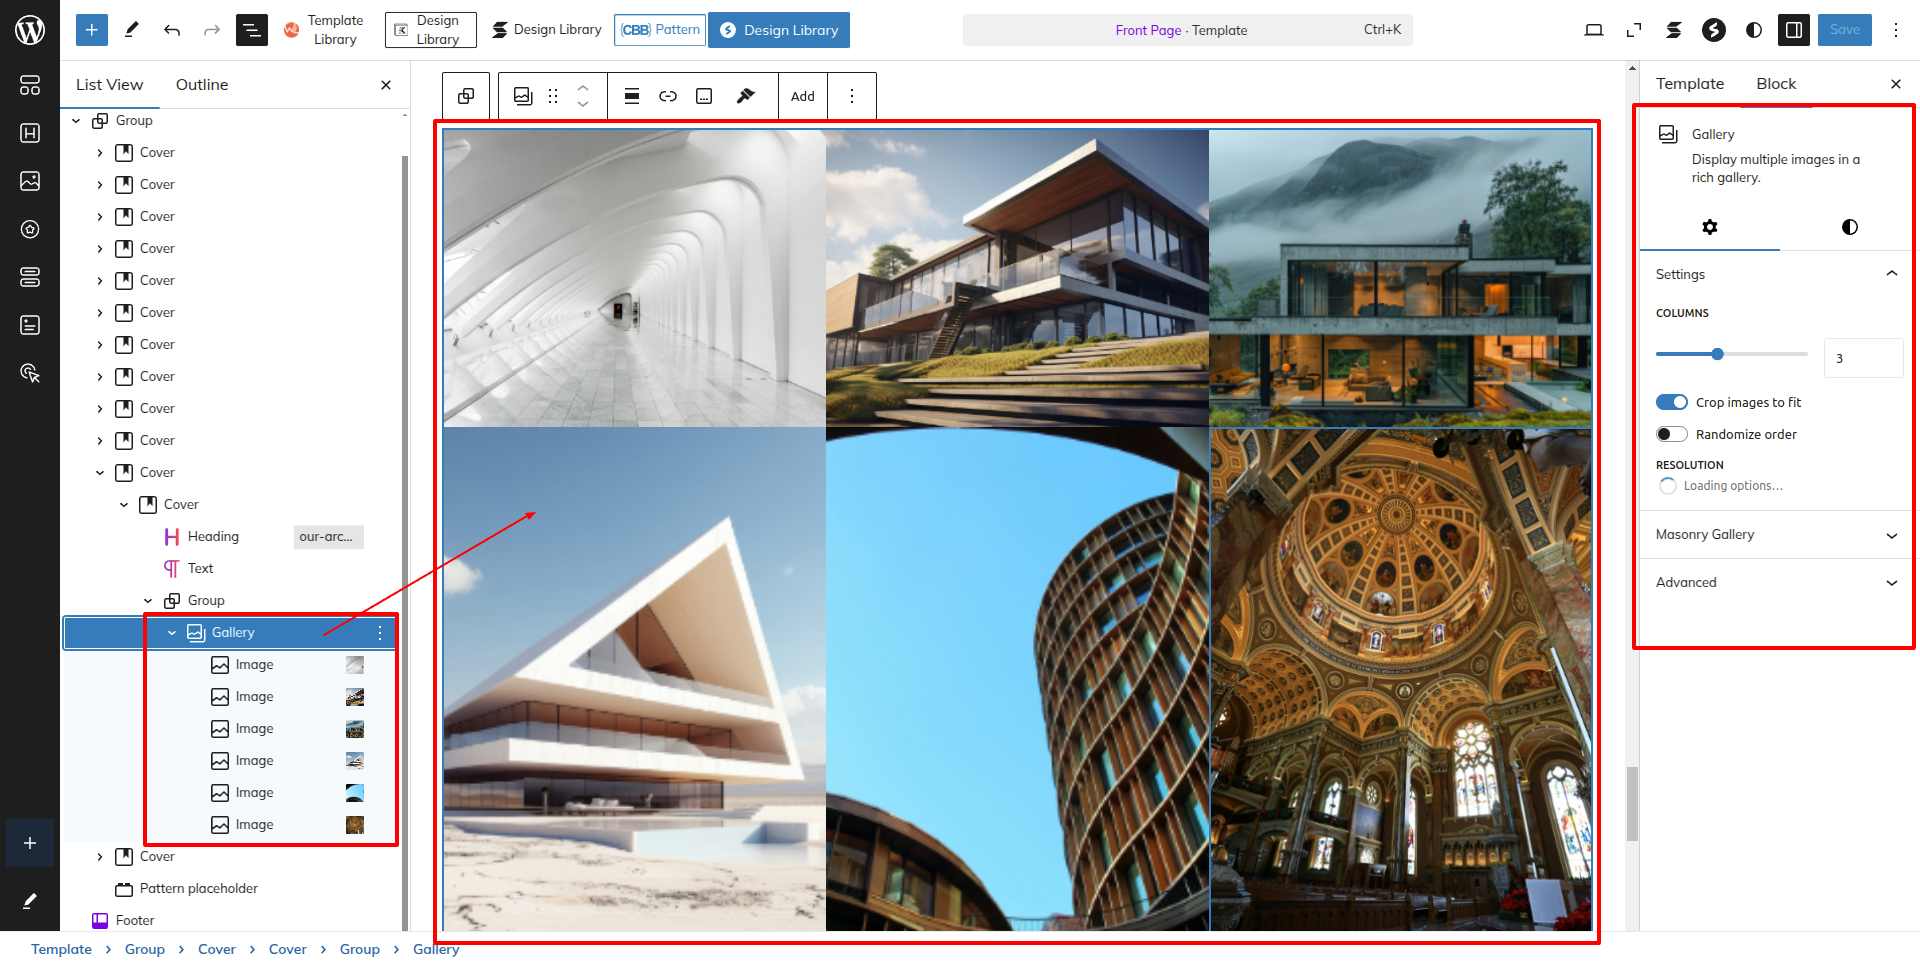
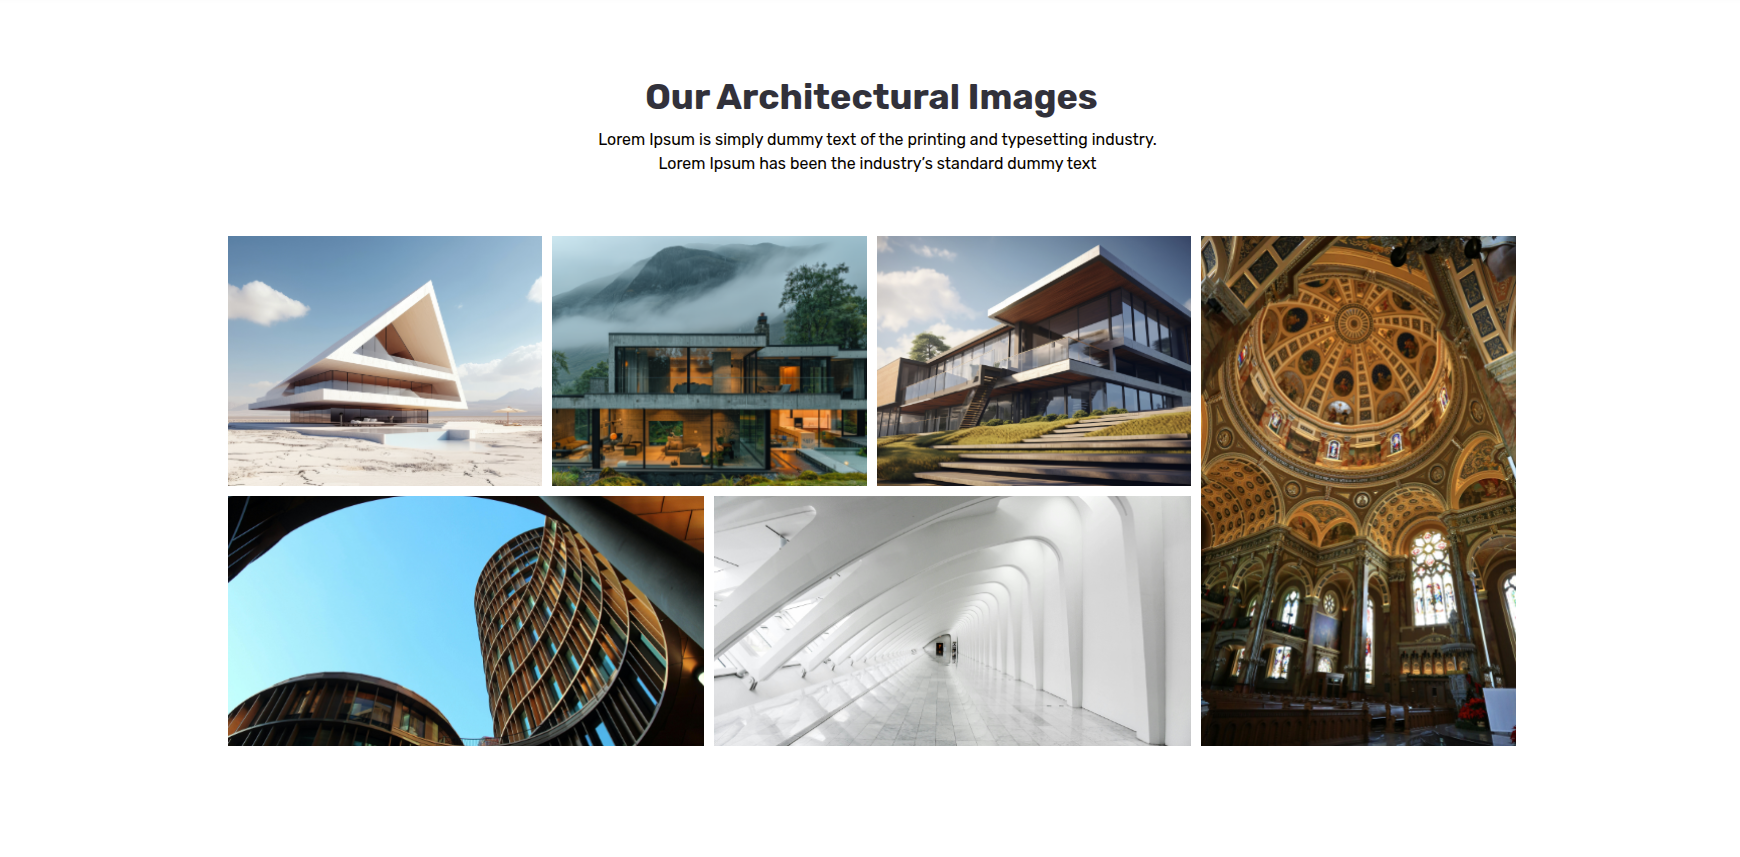
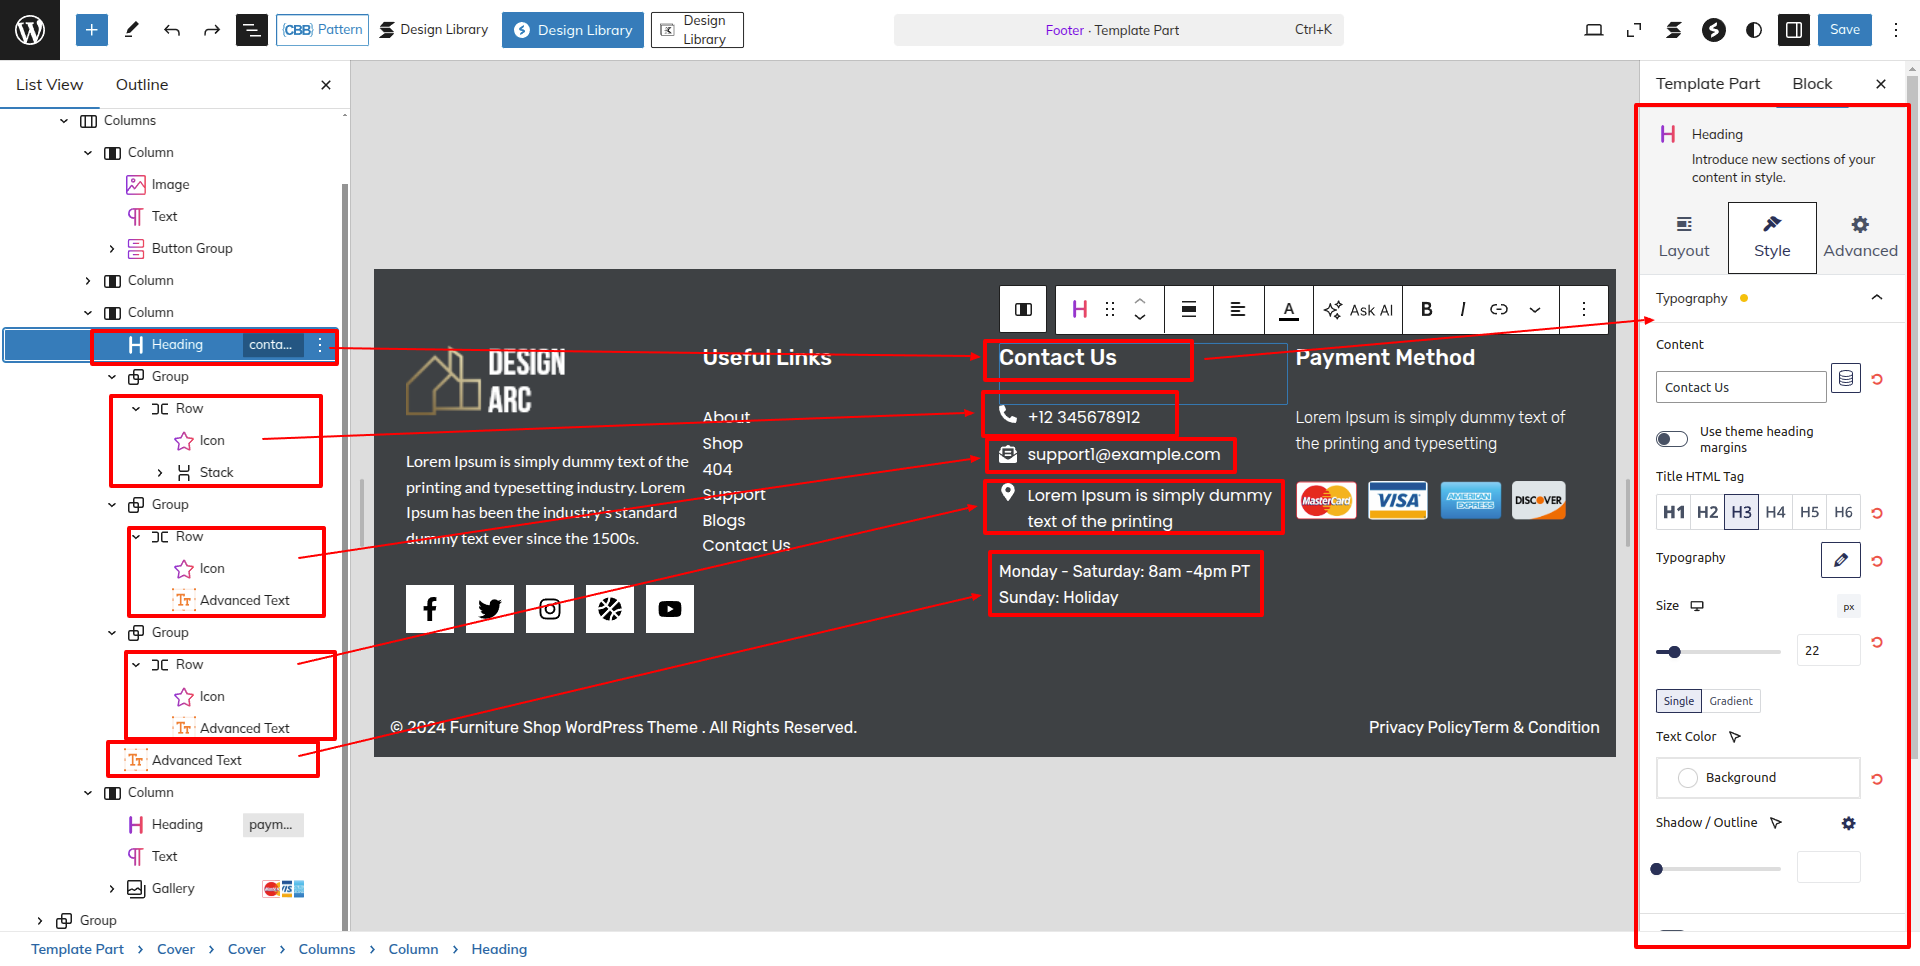
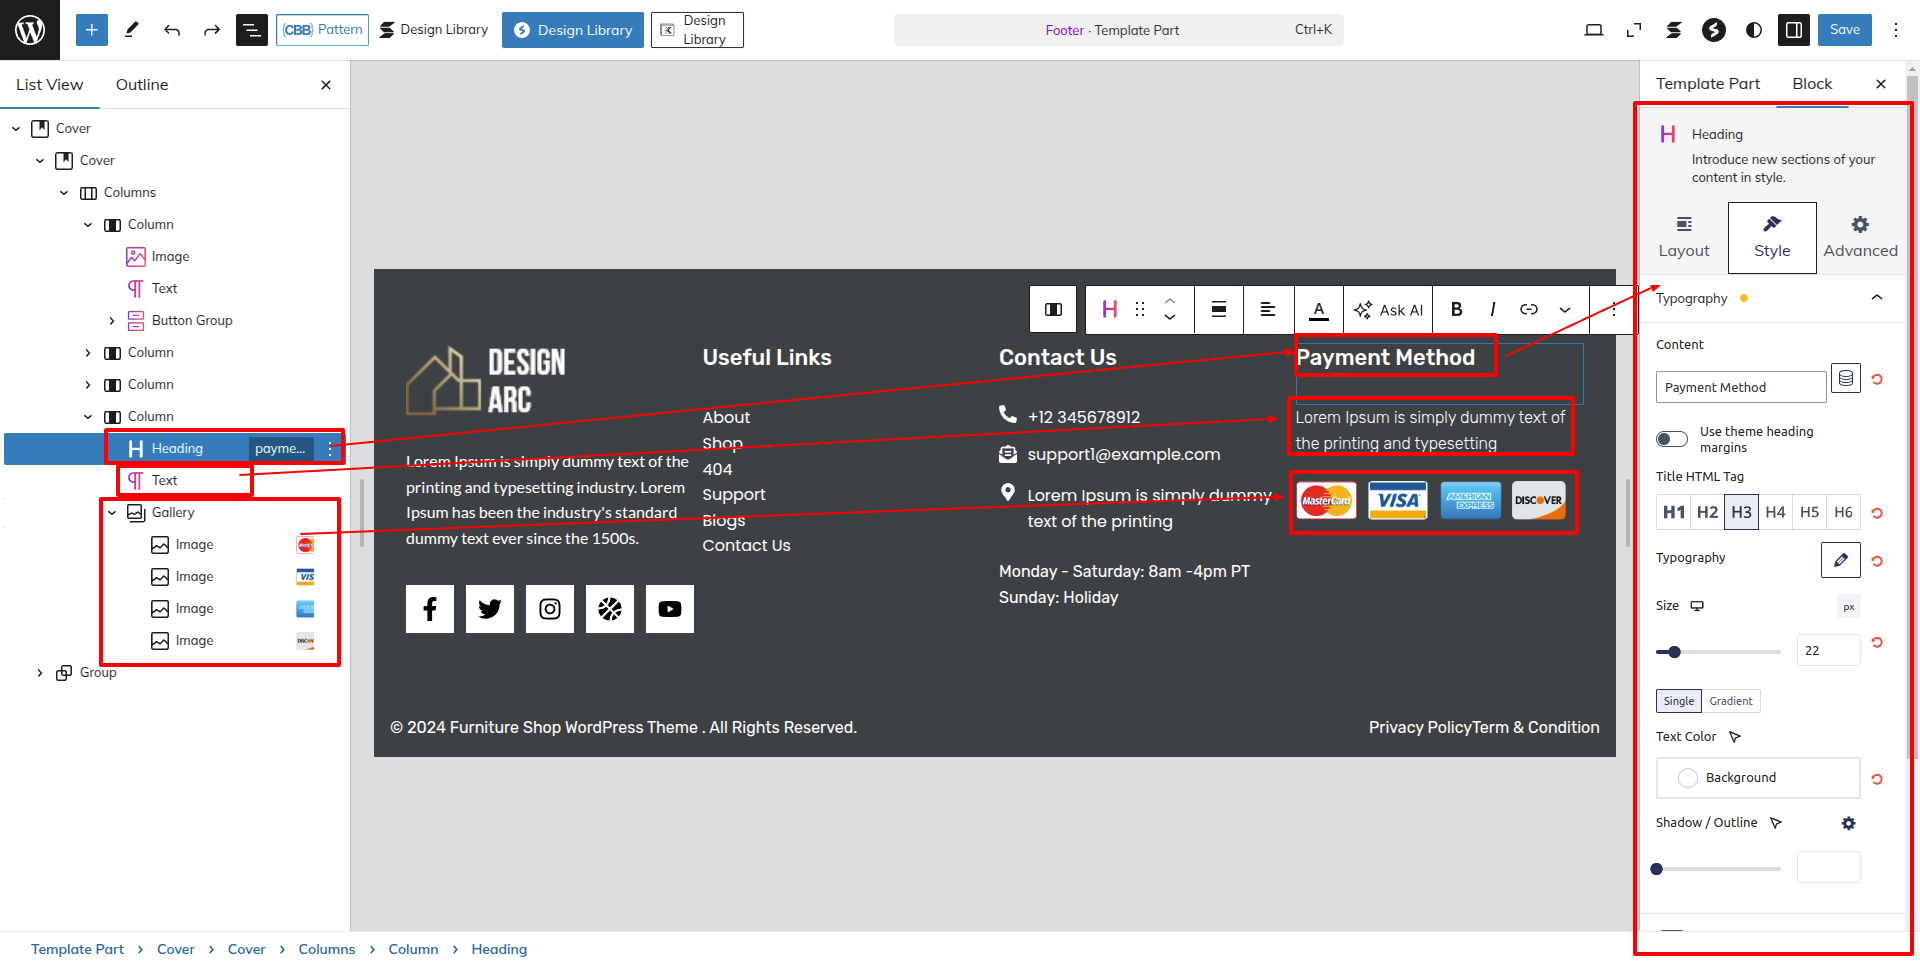
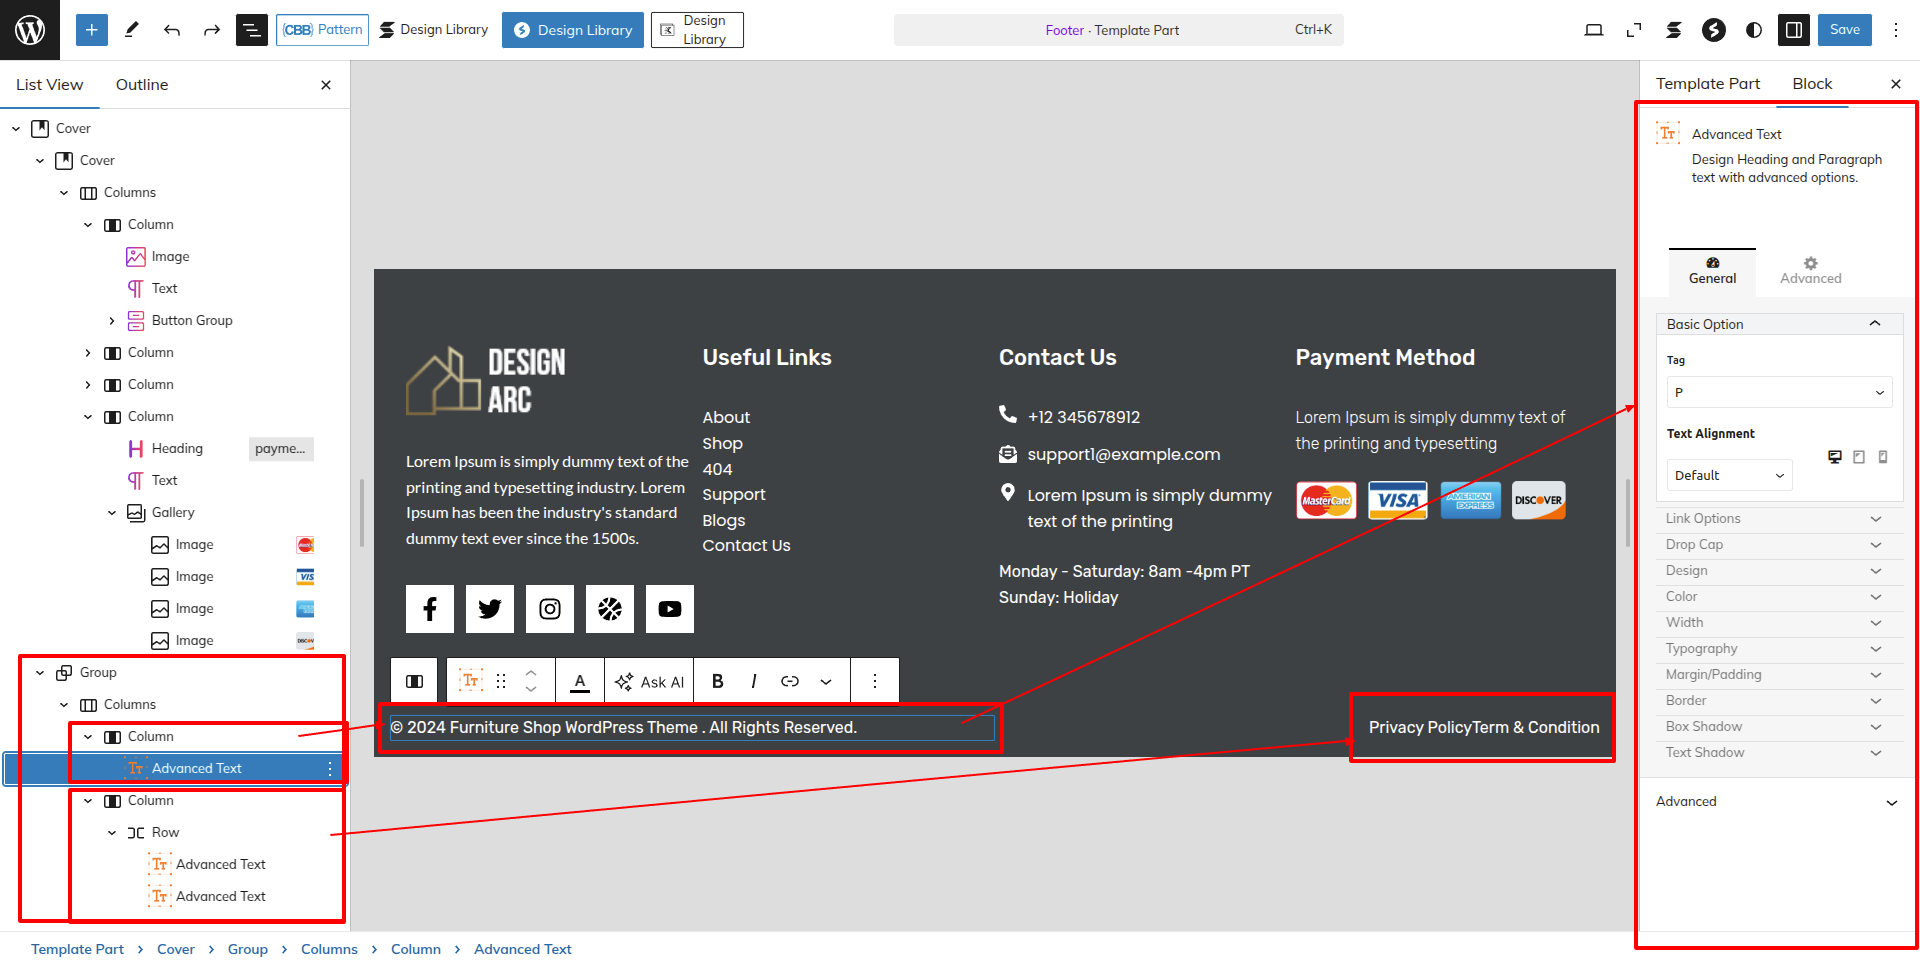
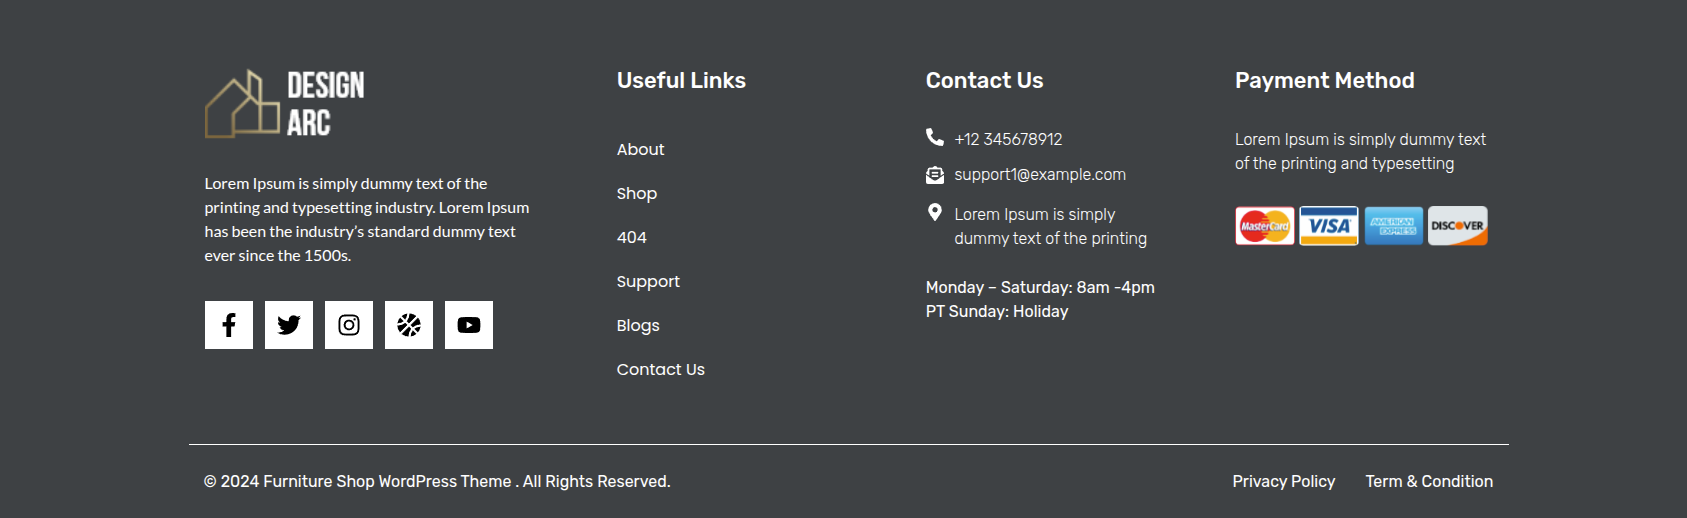
Setup Furniture Images Section
Go to Dashboard Appearance Editor.
As seen in the screenshot, enter the title and Description.
This is how you may set up and add the Furniture Images Section.
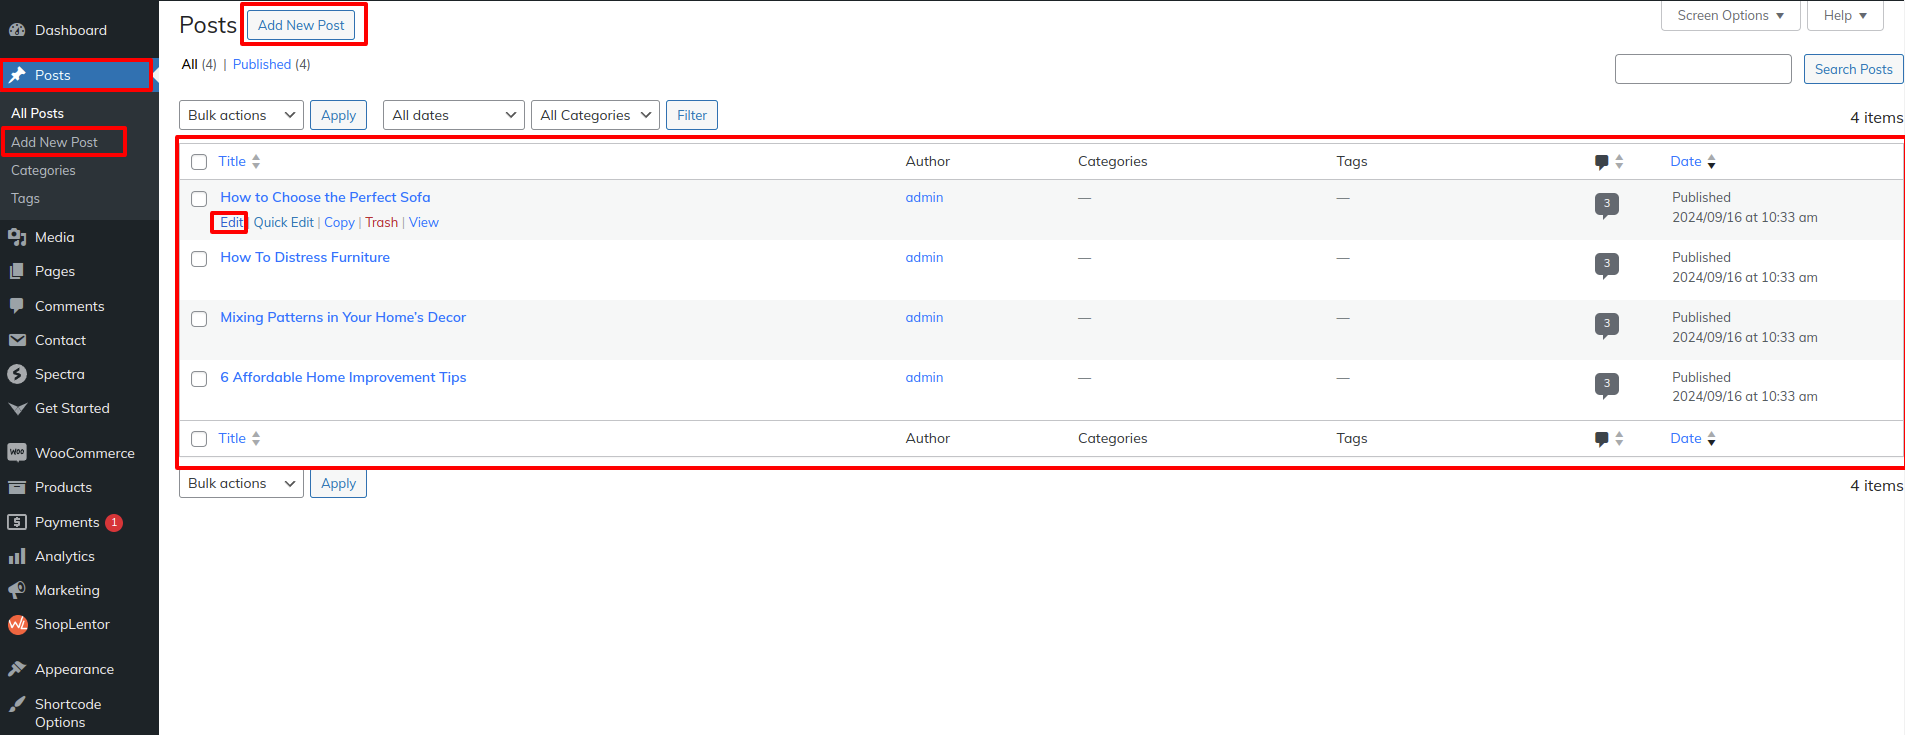
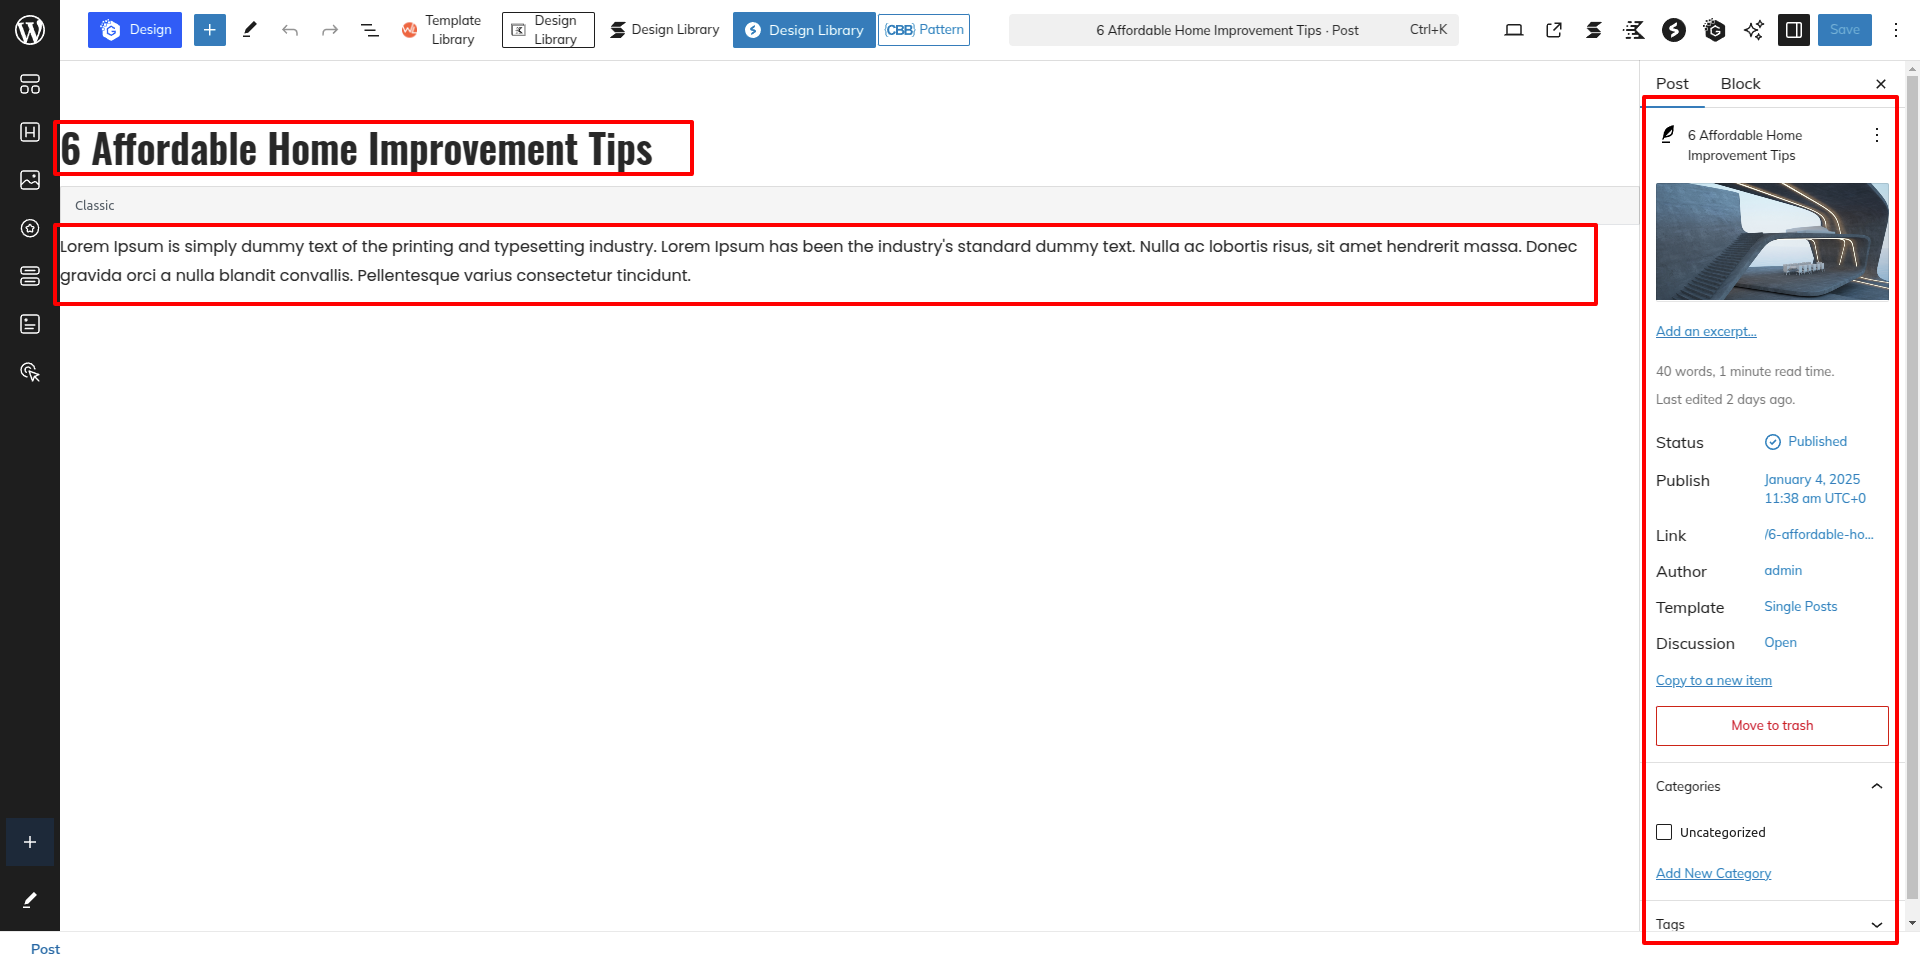
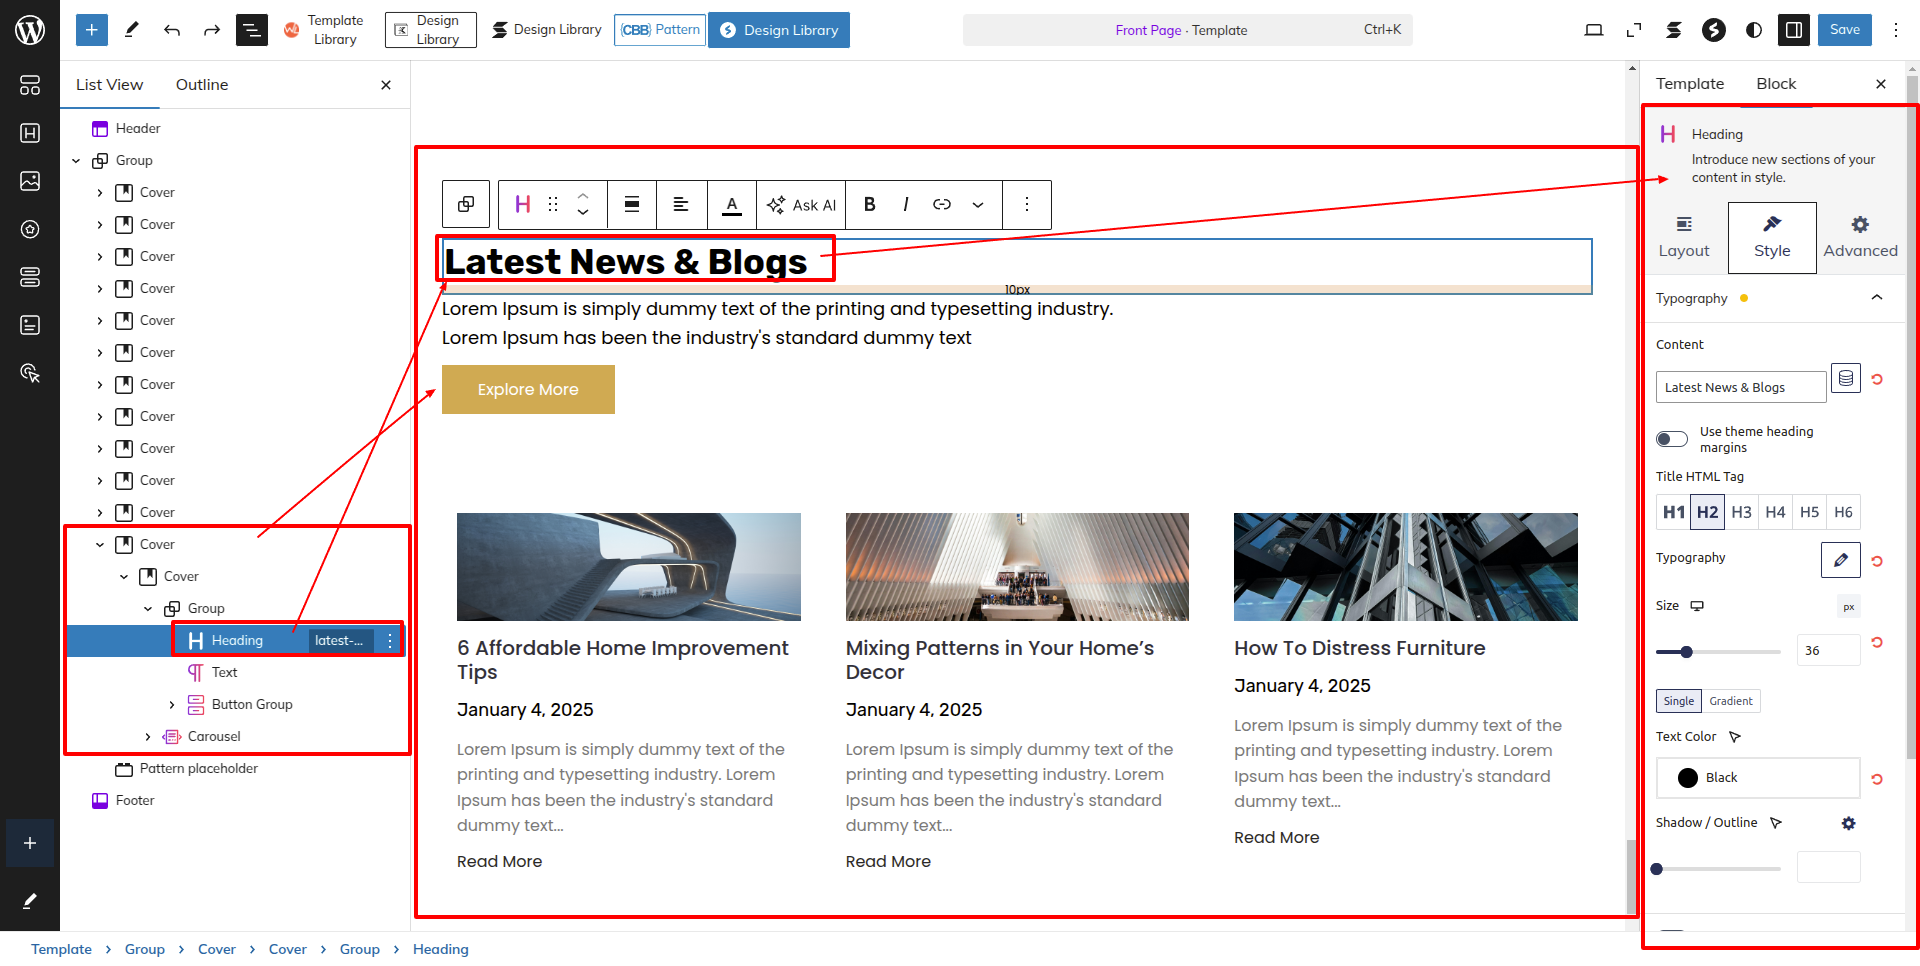
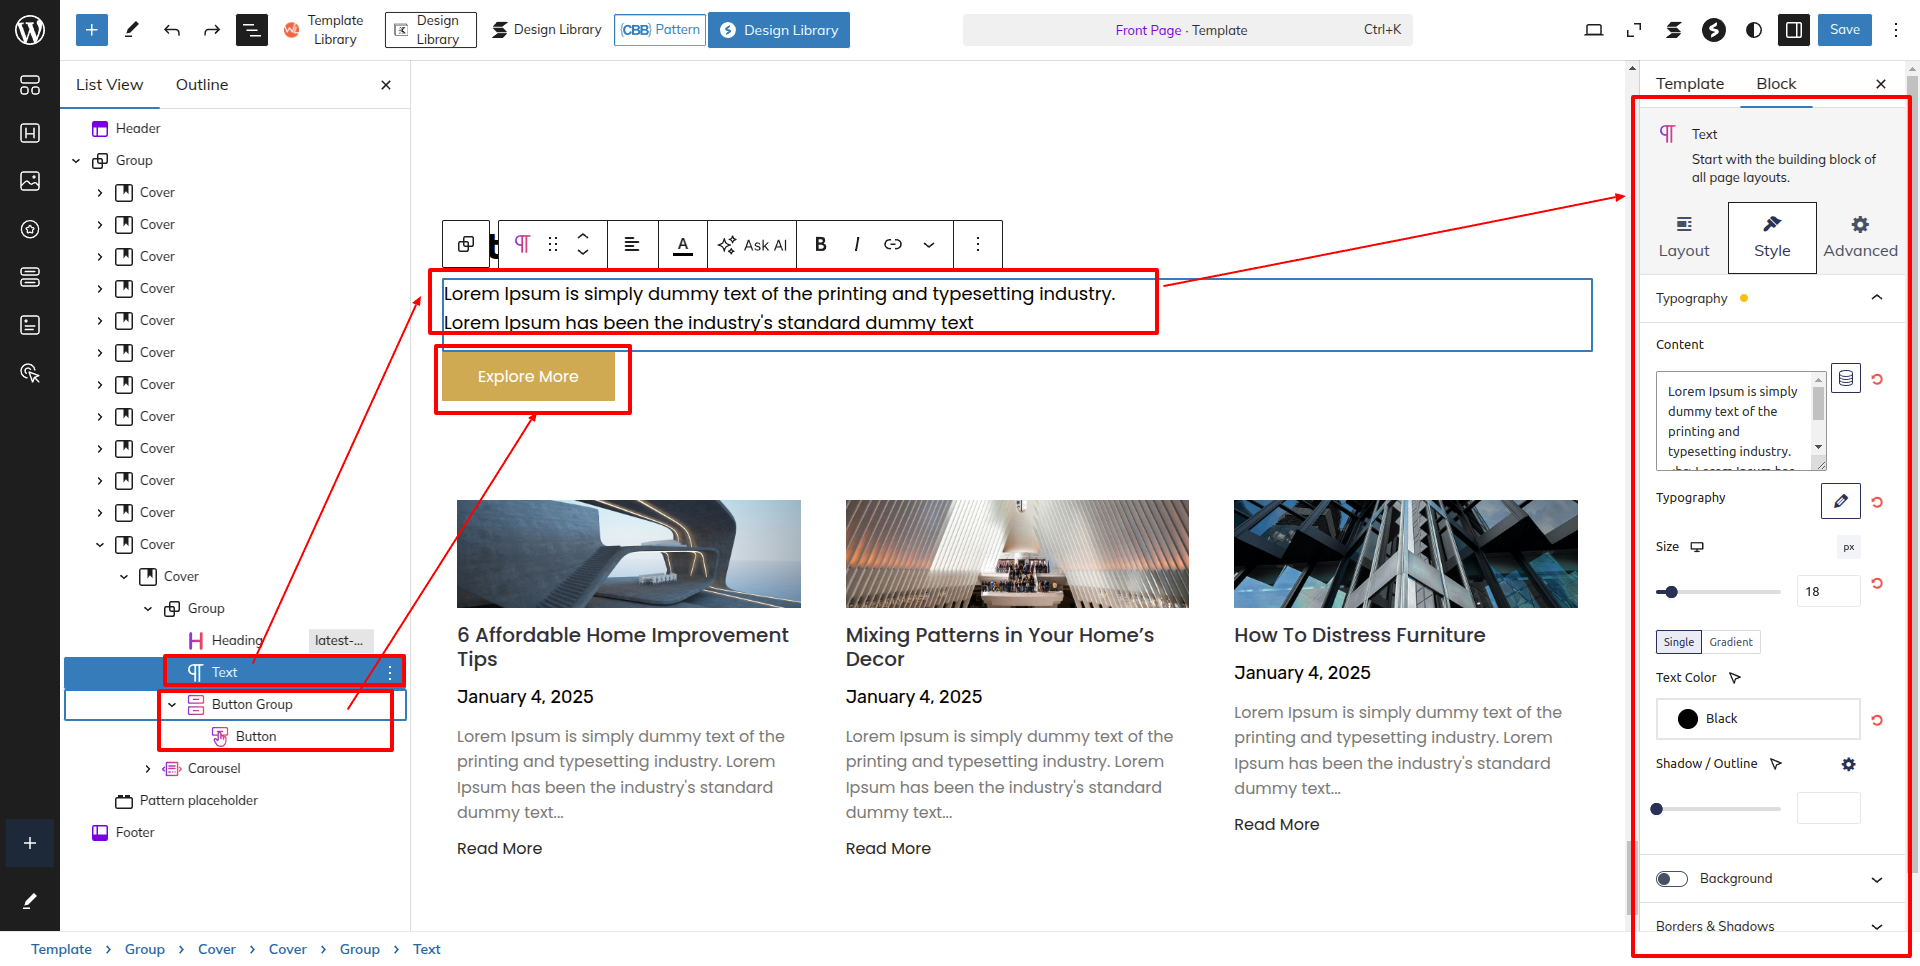
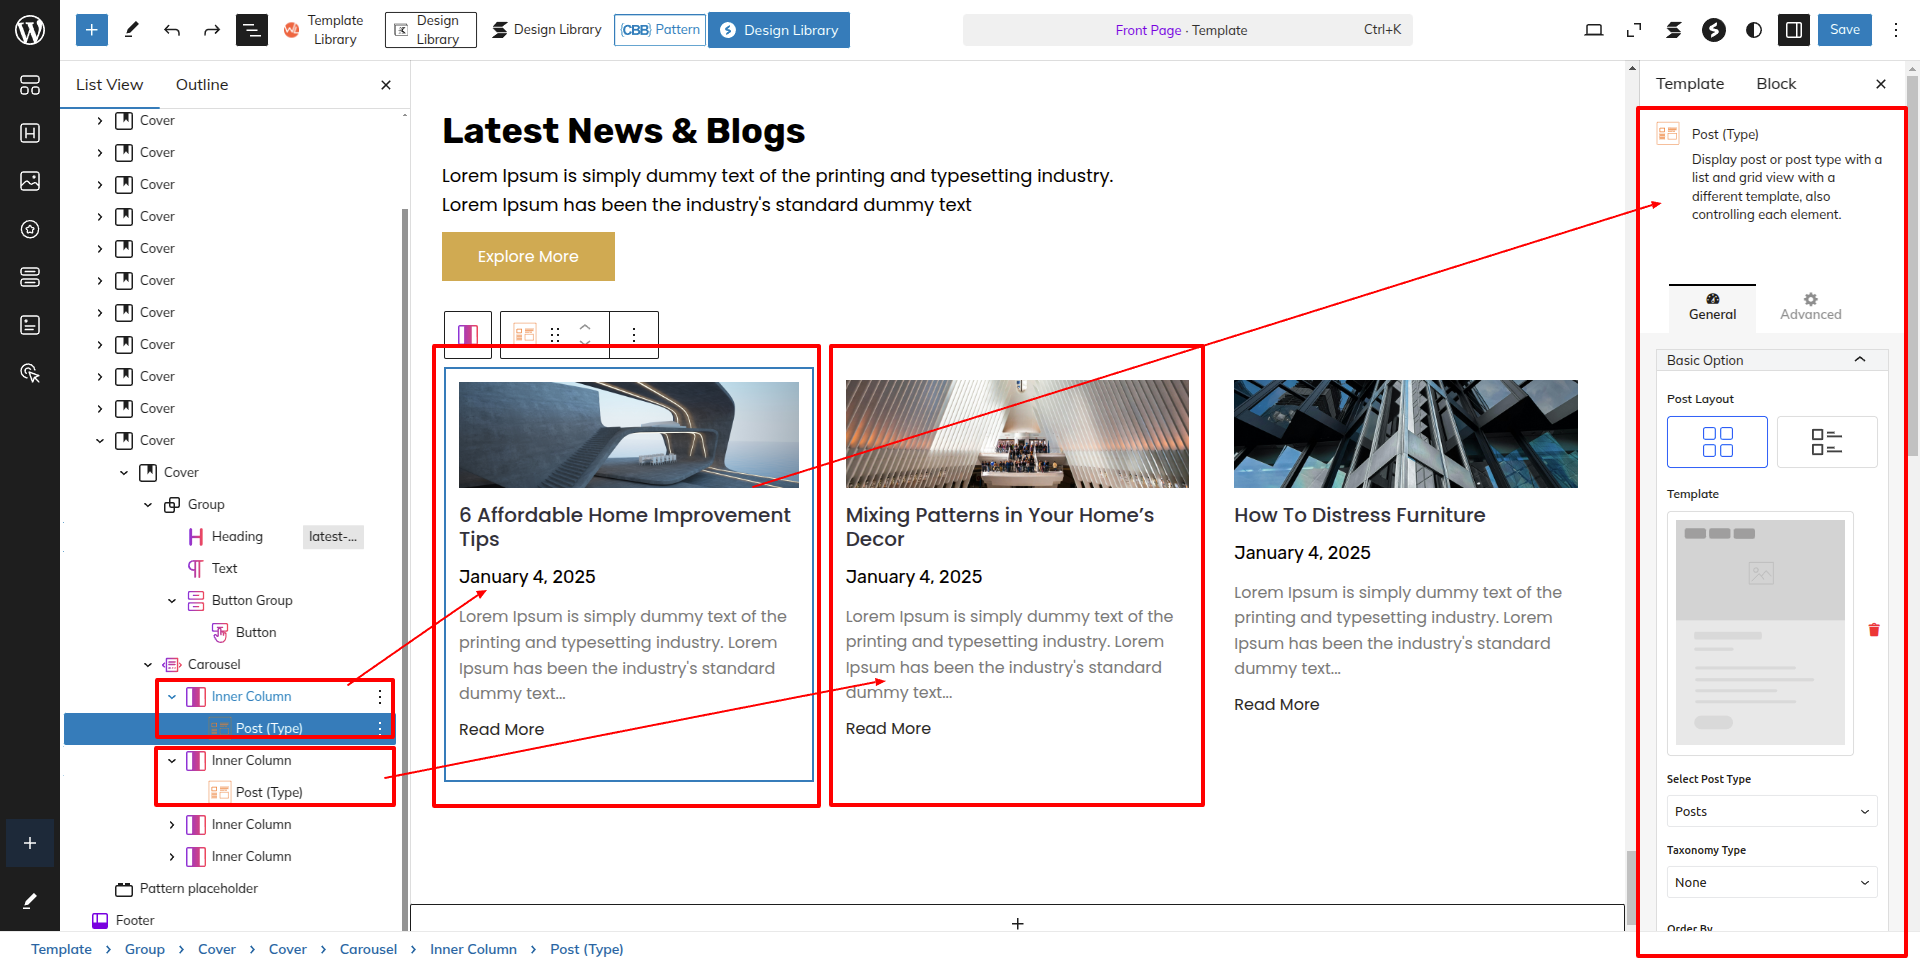
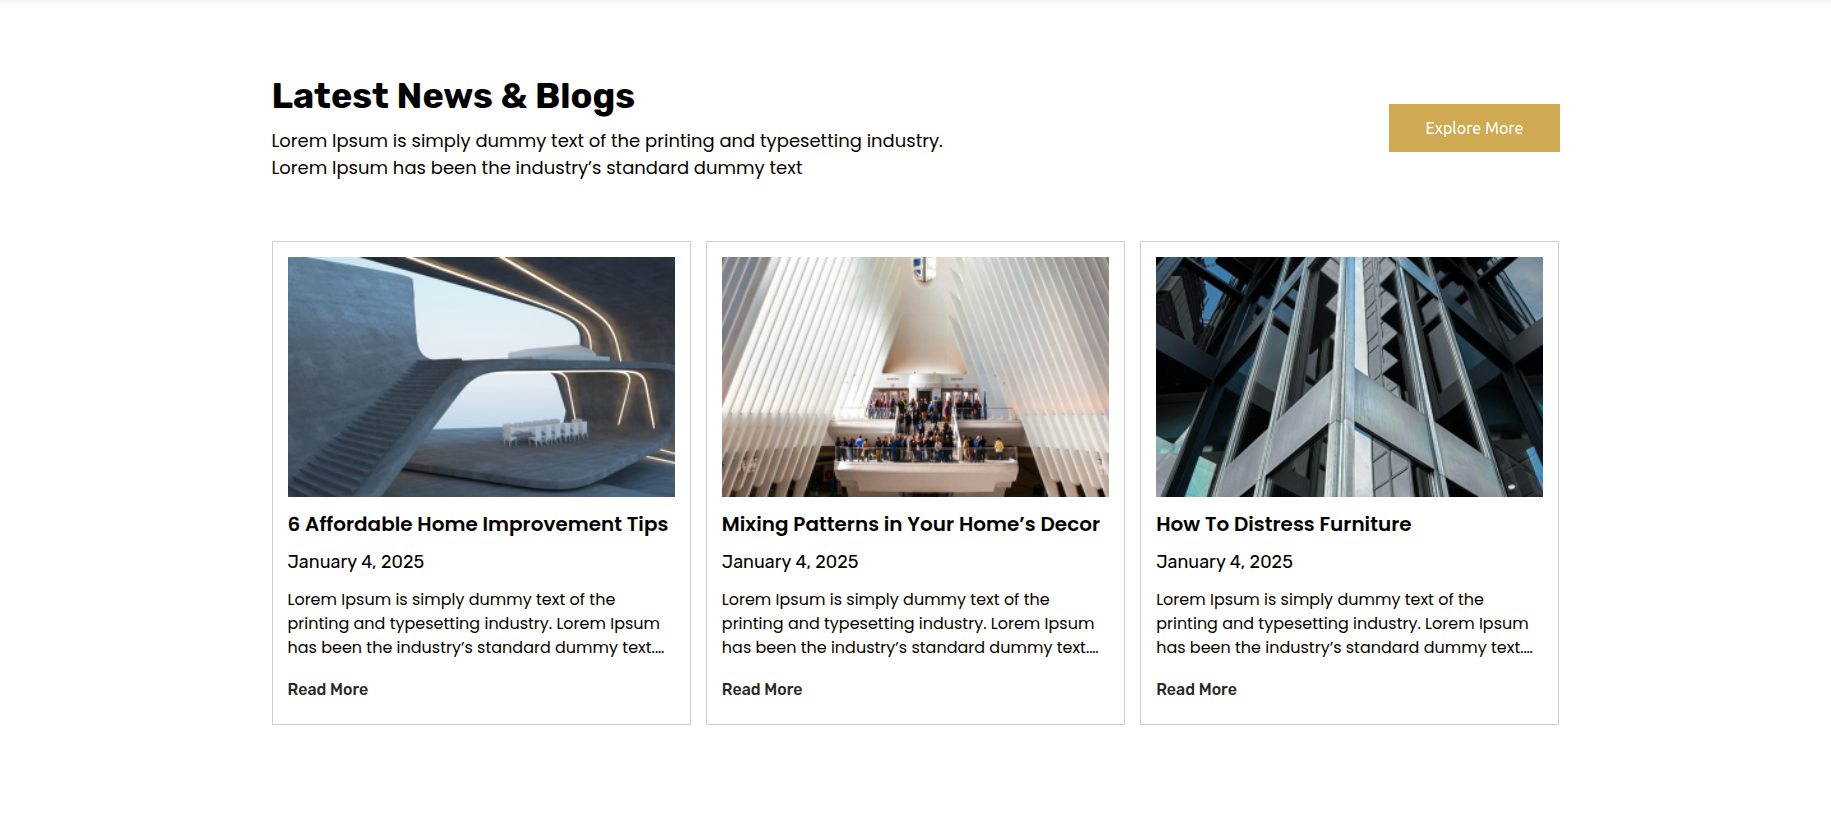
Setup Latest News & Articles Section
Set up the Latest News & Articles Section according to the instructions below.
As seen in the screenshot, enter the title, description, feature image, and post category for the post.
Go to the Dashboard Appearance Editor.
This is how you may set up and add the Latest News & Articles Section.
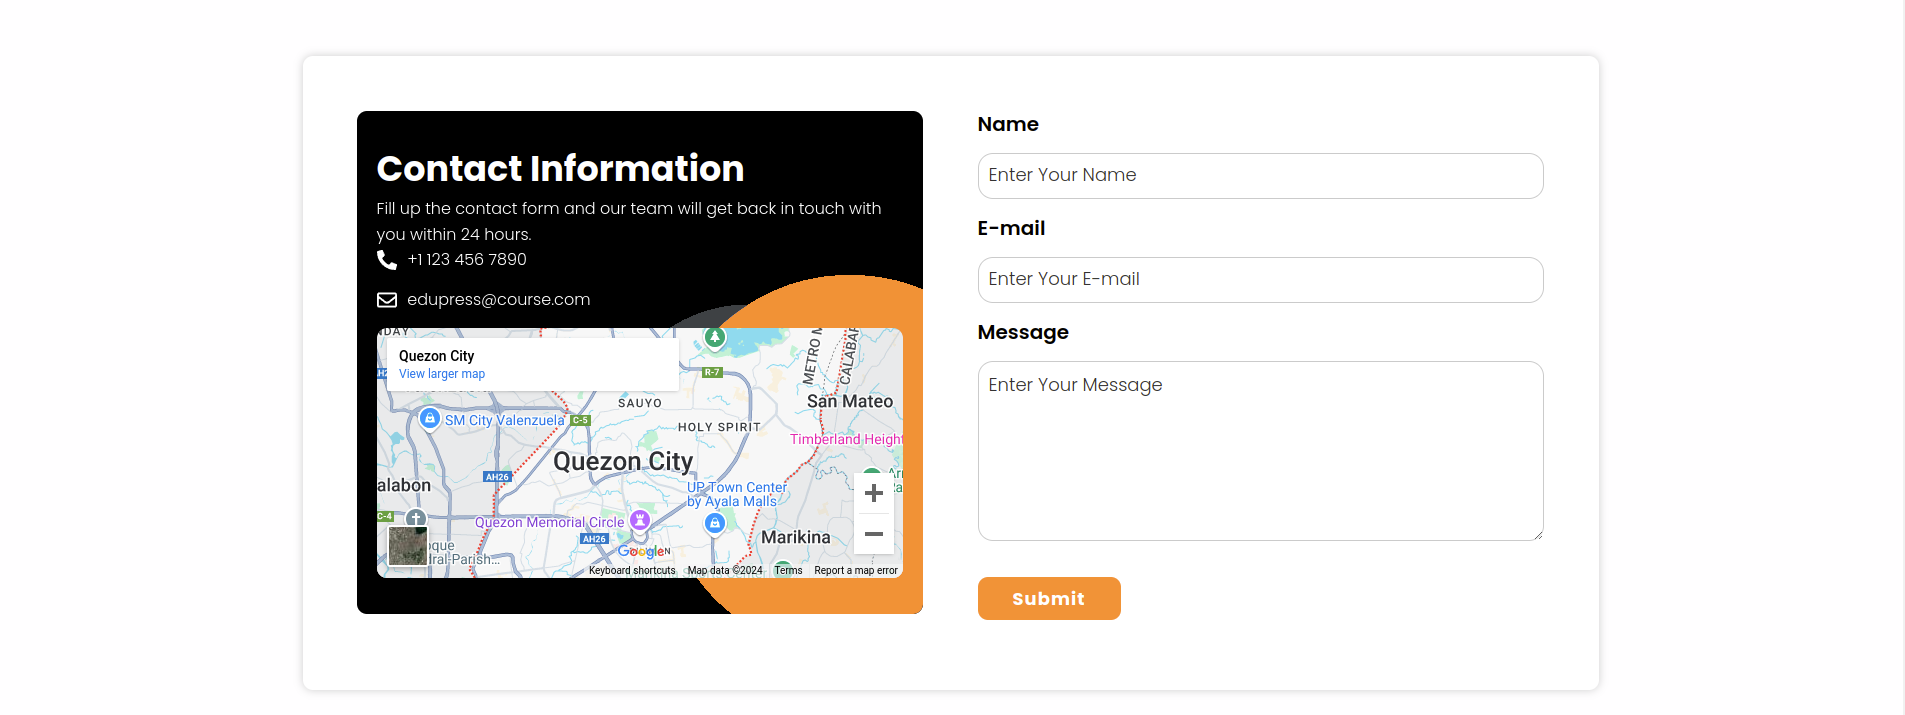
SETUP CONTACT US PAGE
Set up the Contact Us Page by following the steps mentioned below.
Step 1. Go to Dashboard Page Add New
Step 2. Add Page Name
Step 3. On the right side of the page, select contact-us template
Step 4. Click the Update button
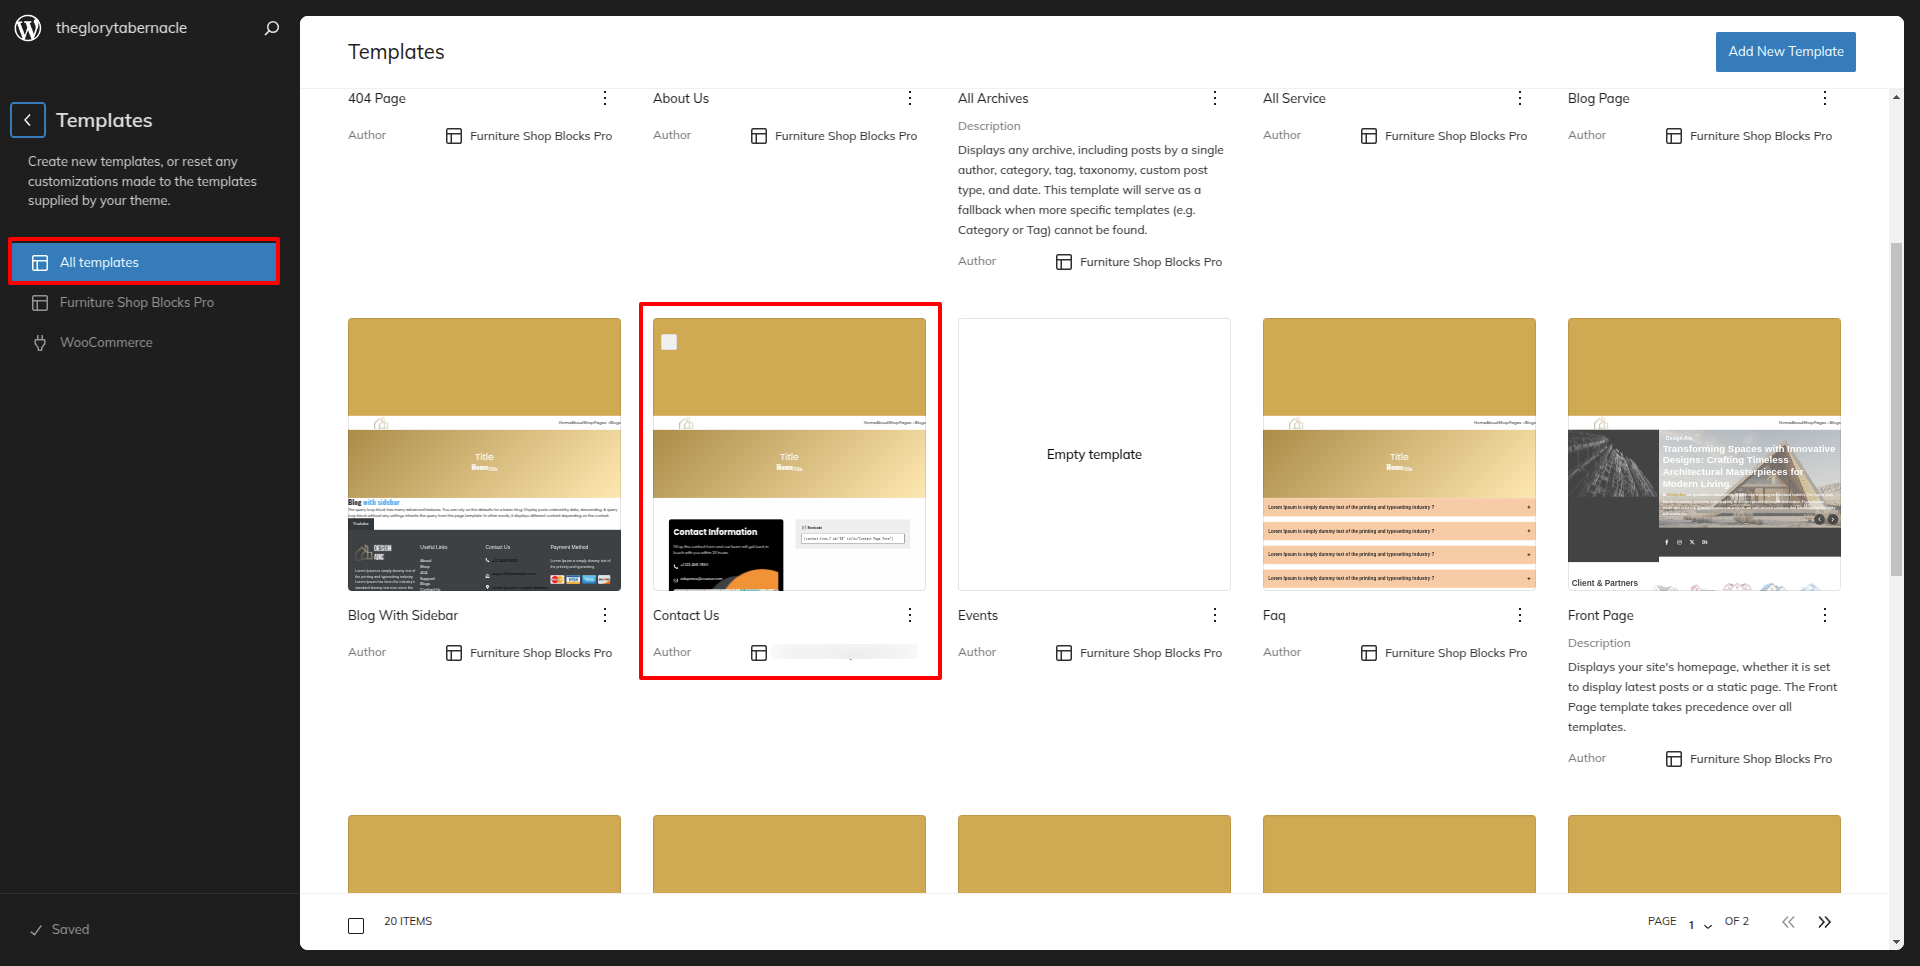
Go to the Dashboard Appearance Editor.
Click on "Template" as indicated in the screenshot below
After that, a sidebar will appear now, as seen in the screenshot below, pick "Contact Us" from the dropdown.
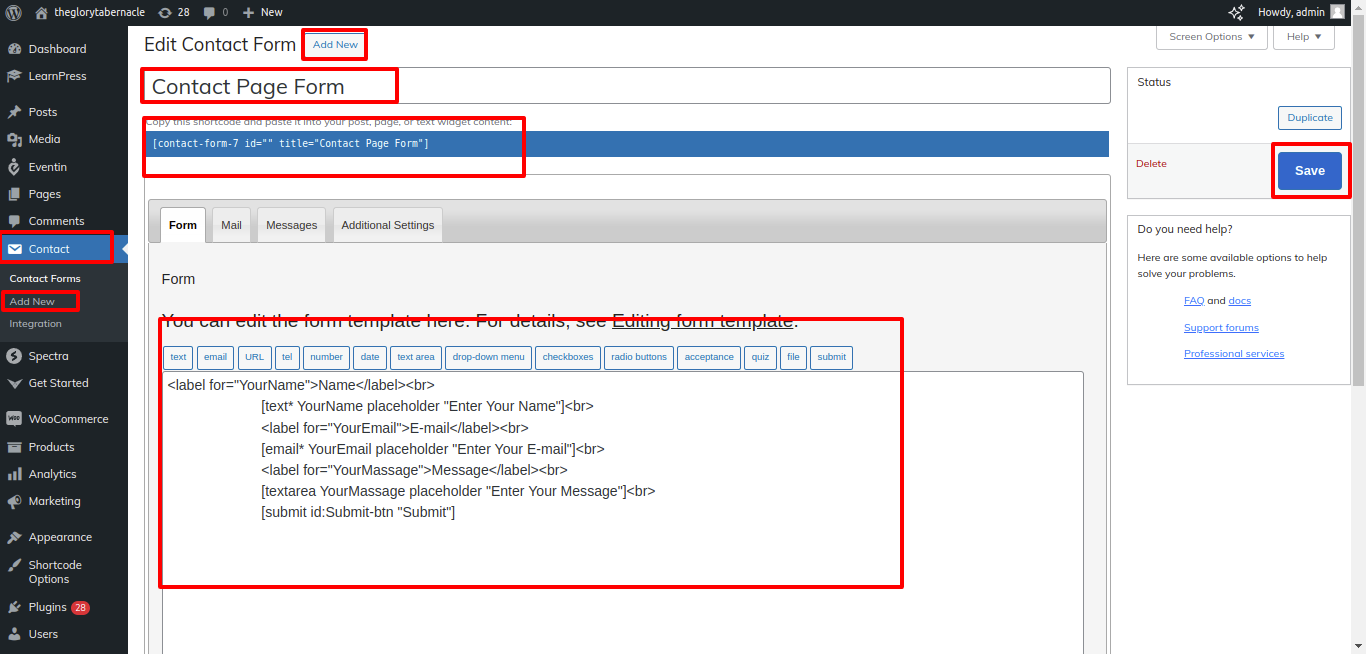
Created a Contact Form in accordance with the guidelines below.
Go to the Dashboard Contact Add New.
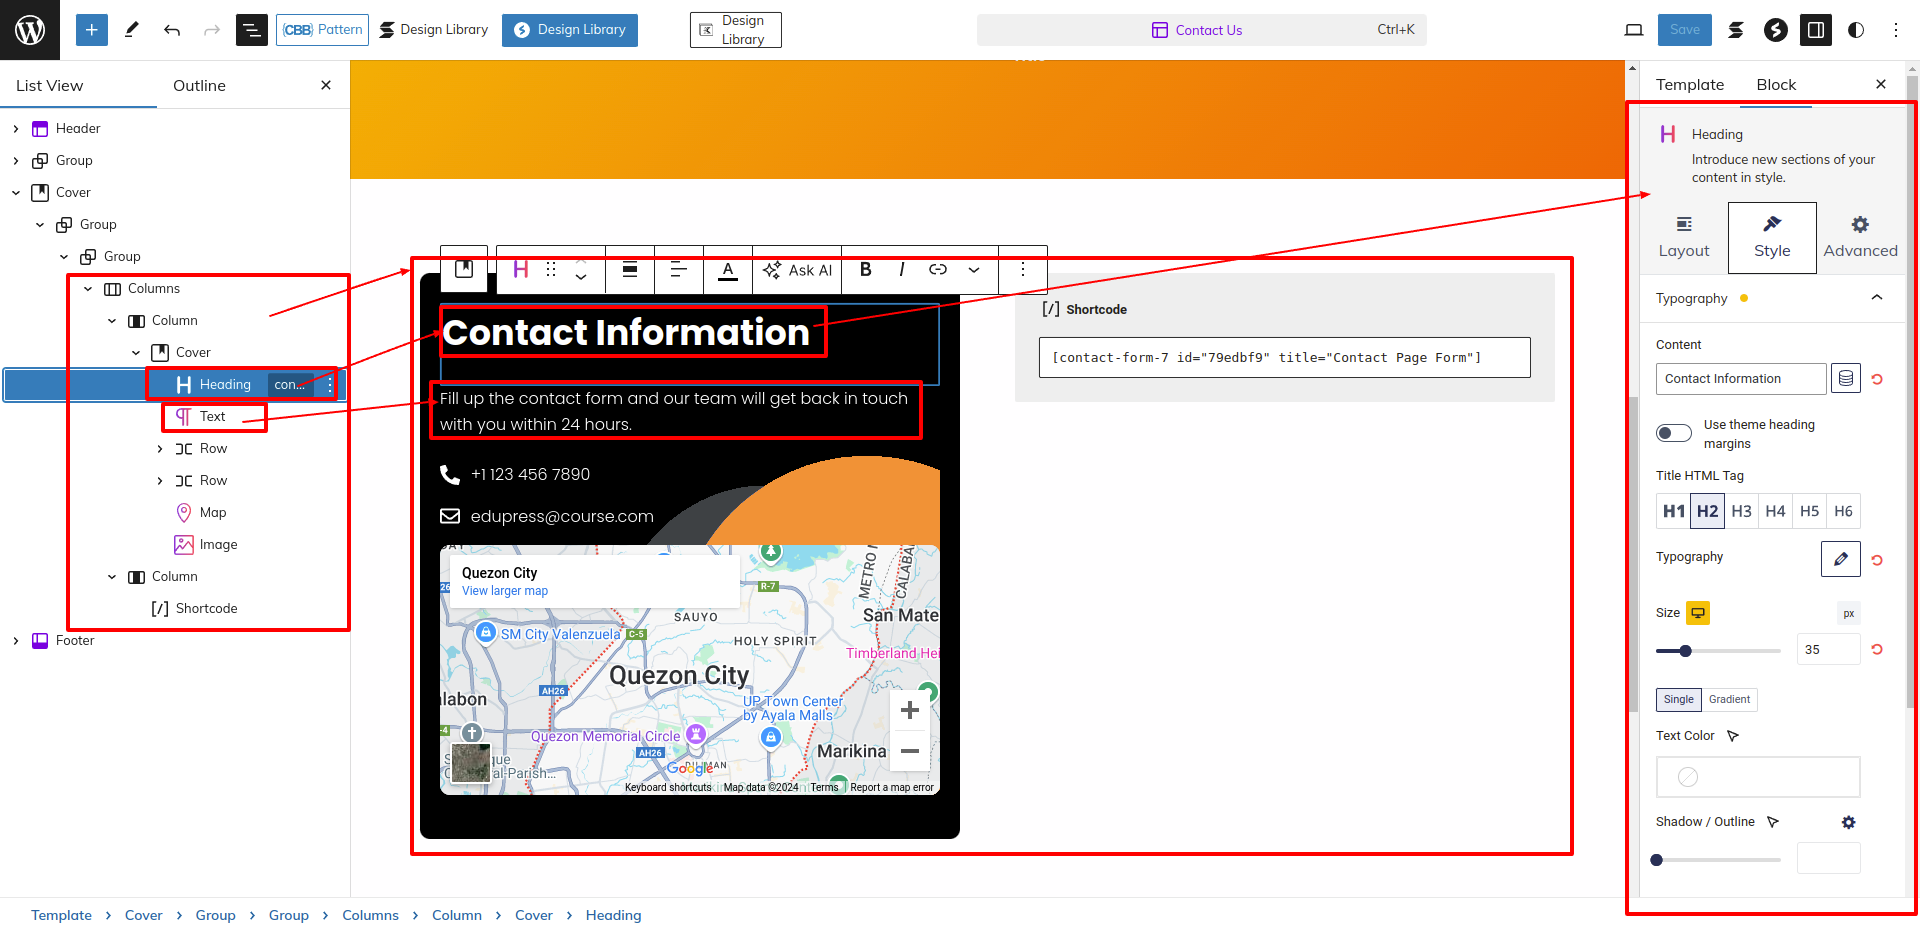
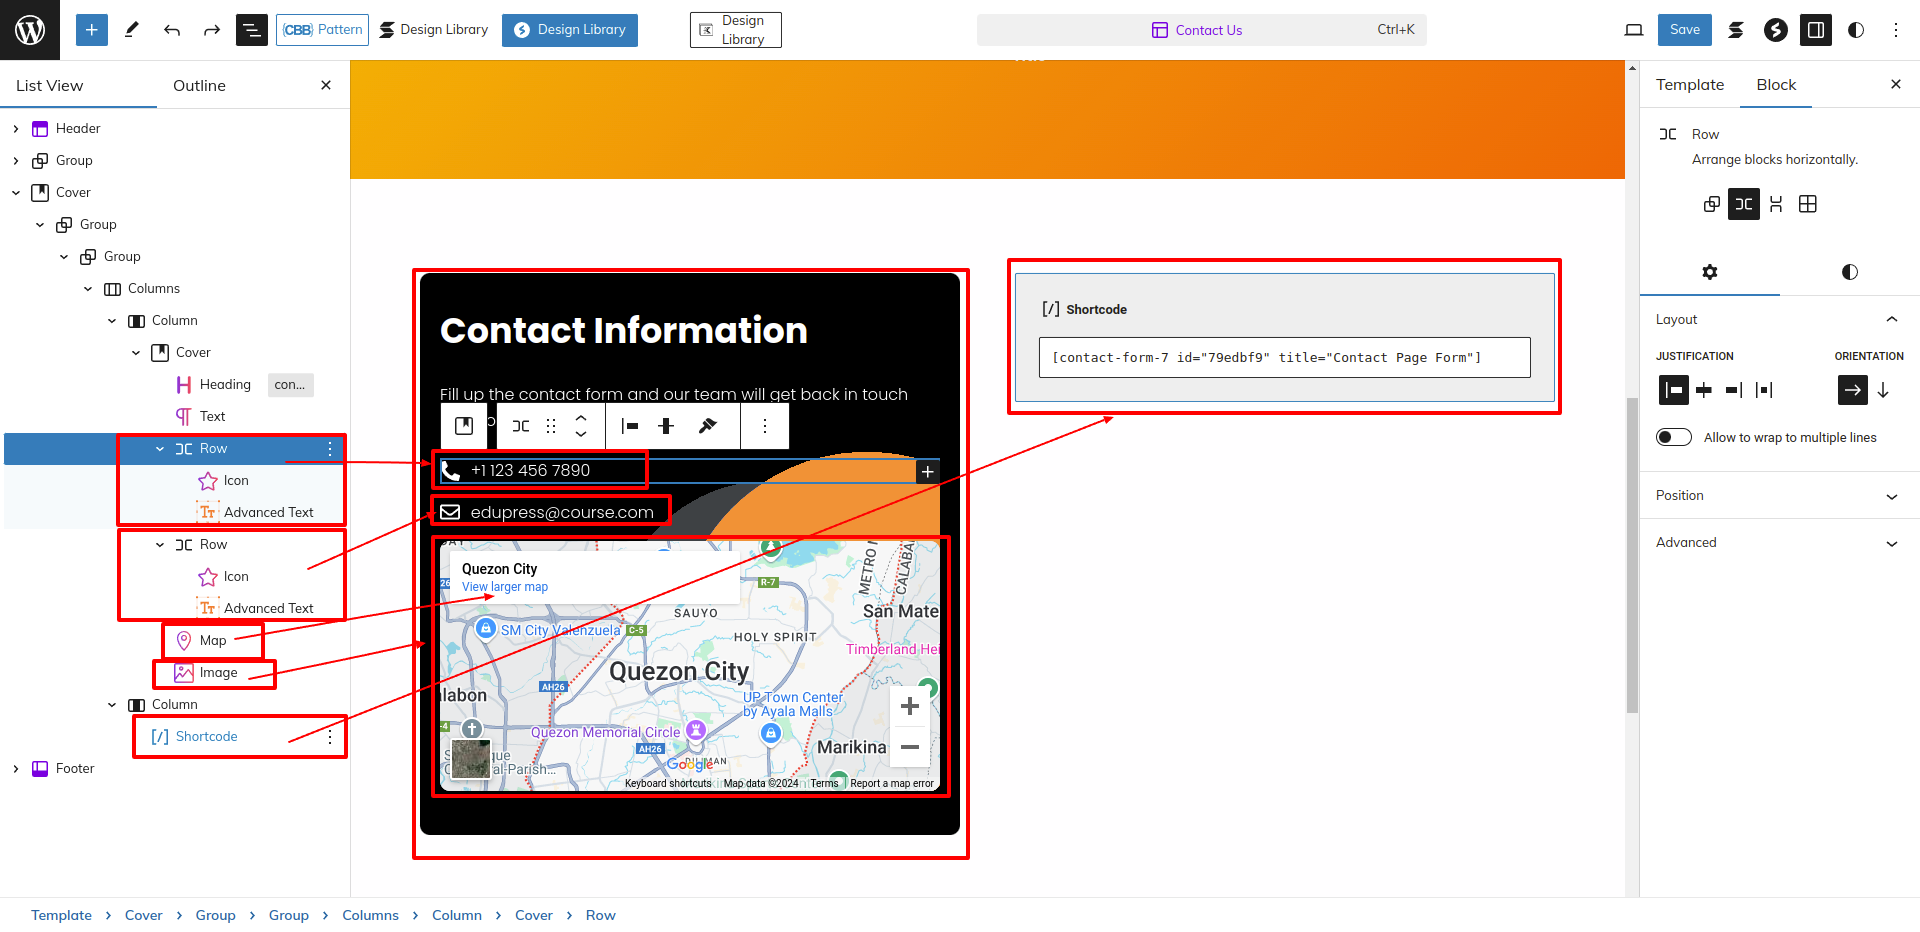
Using the contact form 7 plugin, I built a shortcode for the Contact Us Page Form and then used the shortcode block to enter the generated shortcode.
This is how you may set up and add the Contact Us Page.
Support
Once again, thank you so much for purchasing this theme. As I said at the beginning, I'd be glad to help you if you have any questions relating to this theme. If you have any queries, please feel free to contact us at Support Center.